AkulakhanBot (talk | contribs) m ({{Refs}} → ==References==\n{{Reflist}} for mobile display) |
|||
| (One intermediate revision by one other user not shown) | |||
| Line 15: | Line 15: | ||
==History== |
==History== |
||
| − | It was built by the ancient [[Dwemer]] civilization.<ref>Dialogue with [[Almalexia (Tribunal)|Almalexia]]</ref> In the deepest section, it contains a large mechanical weather machine, known as [[ |
+ | It was built by the ancient [[Dwemer]] civilization.<ref>Dialogue with [[Almalexia (Tribunal)|Almalexia]]</ref> In the deepest section, it contains a large mechanical weather machine, known as [[Karstangz-Bcharn]]. |
For a long time, the residents of [[Mournhold (Tribunal)|Mournhold]] did not know about the existence of Bamz-Amschend, and believed it to be nothing more than the ruins of [[Old Mournhold]], destroyed by [[Mehrunes Dagon]] at the end of the [[First Era]]. |
For a long time, the residents of [[Mournhold (Tribunal)|Mournhold]] did not know about the existence of Bamz-Amschend, and believed it to be nothing more than the ruins of [[Old Mournhold]], destroyed by [[Mehrunes Dagon]] at the end of the [[First Era]]. |
||
| Line 46: | Line 46: | ||
===Radac's Forge=== |
===Radac's Forge=== |
||
{{Main|Radac's Forge}} |
{{Main|Radac's Forge}} |
||
| − | The large area of the ruin where the Ghost of [[Radac Stungnthumz]] resides in his reborn form. His |
+ | The large area of the ruin where the Ghost of [[Radac Stungnthumz]] resides in his reborn form. His workshop area has a large mechanical inanimate construct, similar to centurions, however, it is triple the size of usual centurions. Further into the halls, there is a small room with valuable loot such as [[Diamond (Morrowind)|diamonds]] and [[Raw Ebony|raw ebony]]. There are also two more Dwemer Satchel Packs. |
===Passage of the Walker=== |
===Passage of the Walker=== |
||
| Line 54: | Line 54: | ||
===King's Walk=== |
===King's Walk=== |
||
{{Main|King's Walk}} |
{{Main|King's Walk}} |
||
| − | This area is essentially one long corridor leading to [[Skybreak Gallery]]. In the lower section there is a large water pipe |
+ | This area is essentially one long corridor leading to [[Skybreak Gallery]]. In the lower section, there is a large water pipe that has been damaged severely and is now the source of flooding. |
===Skybreak Gallery=== |
===Skybreak Gallery=== |
||
{{Main|Skybreak Gallery}} |
{{Main|Skybreak Gallery}} |
||
| − | This is where the weather control device [[ |
+ | This is where the weather control device [[Karstangz-Bcharn]] is located. However, it will need to be powered up before it can be used. |
==Quests== |
==Quests== |
||
===[[A Show of Power]]=== |
===[[A Show of Power]]=== |
||
| − | Deep inside Bamz-Amschend there is a miracle of Dwemer technology: Karstangz- |
+ | Deep inside Bamz-Amschend there is a miracle of Dwemer technology: Karstangz-Bcharn, a device said to be able to control the weather. [[Almalexia (Tribunal)|Almalexia]] wishes to demonstrate to her people that she is still mighty, and sends the Nerevarine to use this ancient machine to unleash an ashstorm on Mournhold. |
===[[The Blade of Nerevar]]=== |
===[[The Blade of Nerevar]]=== |
||
| Line 71: | Line 71: | ||
==Creatures== |
==Creatures== |
||
| − | There |
+ | There is a number of leveled Dwemer [[Animunculi]] throughout the whole ruins. |
==Gallery== |
==Gallery== |
||
| Line 107: | Line 107: | ||
*{{Clockwork City}} |
*{{Clockwork City}} |
||
| + | ==References== |
||
| − | {{Refs}} |
||
| + | {{Reflist}} |
||
<!--Interwiki links--> |
<!--Interwiki links--> |
||
Revision as of 17:03, 3 August 2020
- Main article: Mournhold (Tribunal)
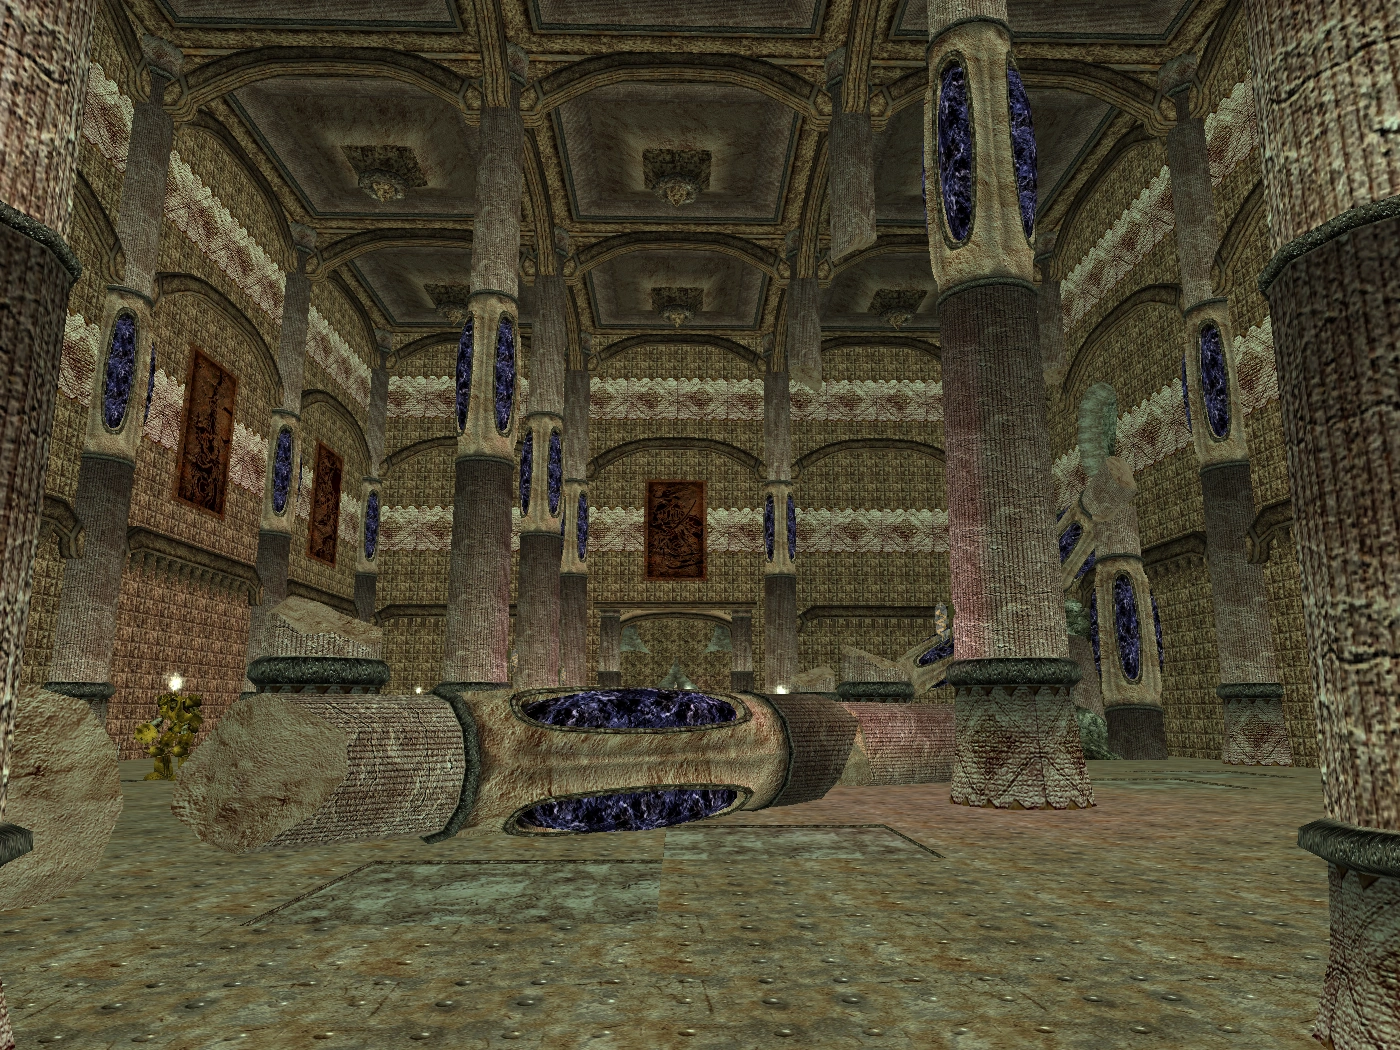
Bamz-Amschend is a large Dwemer Ruin found in The Elder Scrolls III: Tribunal.
History
It was built by the ancient Dwemer civilization.[1] In the deepest section, it contains a large mechanical weather machine, known as Karstangz-Bcharn.
For a long time, the residents of Mournhold did not know about the existence of Bamz-Amschend, and believed it to be nothing more than the ruins of Old Mournhold, destroyed by Mehrunes Dagon at the end of the First Era.
Near the end of the Third Era, the statue that depicts the battle between Almalexia and Dagon in the center of Plaza Brindisi Dorom is destroyed during the quest "An Attack on Mournhold" by an army of Fabricants that broke through, revealing the entrance to the ruins.
Description
It is located below Plaza Brindisi Dorom. The entrance to the ruin is under the statue of Almalexia and Mehrunes Dagon. There are many corridors and rooms blocked by rubble, however, the ruin is generally well-preserved for Dwemer ruin standards. The chambers are spacious, some have large fans on the ceiling. The designs on the walls and floors are different from those found in other Dwemer ruins found on Vvardenfell. Water pipes with glass windows, where the contents can be seen as it bubbles past. The ruins have an enormous architectural and historical value: No one was able to pillage it because it was inaccessible for centuries. Even the ashen remains of the Dwemer who once called this place home are still found undisturbed throughout the chambers and corridors. The whole ruin is guarded by many hostile dwemer Animunculi.
Norenen-dur
Under these ruins, an even older structure, the Daedric shrine of Norenen-dur, can be found. It is a large structure dedicated to the Daedric Princes.
Sublocations
Hearthfire Hall
Hearthfire Hall
The first area discovered, from Plaza Brindisi Dorom, within the ruin is Hearthfire Hall. There are numerous enemies amidst the ruined columns and piles of rubble in this massive chamber. The Nerevarine can easily be overwhelmed here. From here there are two doors, one, to Passage of Whispers, leading further into the ruins and the other leading to the Hall of Winds, which is a dead-end.
Hall of Winds
- Main article: Hall of Winds
A room with four smaller rooms on the sides, and an intersection of hallways between them. Aside from the regular loot this dead-end holds one of the Dwemer Satchel Packs.
Passage of Whispers
- Main article: Passage of Whispers
This area serves as a corridor between Hearthfire Hall, Hall of Wails, and Radac's Forge. Among the more notable loot here are two Dwarven halberds and two Dwemer cuirasses.
Hall of Wails
- Main article: Hall of Wails
Another dead-end set of rooms, similar to the Hall of Winds. There are beds, tables, and wardrobes. A set of Dwemer Airship Plans can be found on a table.
Radac's Forge
- Main article: Radac's Forge
The large area of the ruin where the Ghost of Radac Stungnthumz resides in his reborn form. His workshop area has a large mechanical inanimate construct, similar to centurions, however, it is triple the size of usual centurions. Further into the halls, there is a small room with valuable loot such as diamonds and raw ebony. There are also two more Dwemer Satchel Packs.
Passage of the Walker
- Main article: Passage of the Walker
This area can only be reached by using a Dwemer Satchel Pack to create a passage through the rubble in Radac's Forge. It leads to King's Walk and hides the entrance to the daedric shrine Norenen-dur behind another wall of rubbles.
King's Walk
- Main article: King's Walk
This area is essentially one long corridor leading to Skybreak Gallery. In the lower section, there is a large water pipe that has been damaged severely and is now the source of flooding.
Skybreak Gallery
- Main article: Skybreak Gallery
This is where the weather control device Karstangz-Bcharn is located. However, it will need to be powered up before it can be used.
Quests
A Show of Power
Deep inside Bamz-Amschend there is a miracle of Dwemer technology: Karstangz-Bcharn, a device said to be able to control the weather. Almalexia wishes to demonstrate to her people that she is still mighty, and sends the Nerevarine to use this ancient machine to unleash an ashstorm on Mournhold.
The Blade of Nerevar
Within the ruins currently resides the ghost of Radac Stungnthumz, a former Dwemer soldier who can help add fire to the reforged Trueflame.
Characters
- Radac Stungnthumz's specter — Located in Radac's Forge.
Creatures
There is a number of leveled Dwemer Animunculi throughout the whole ruins.
Gallery
")
")
")
Hearthfire Hall Constellation Plaques
Within Hearthfire Hall, the following engravings of constellations (Birthsigns) can be seen:
")
")
")
")
")
")
")
")
")
")
")
")
Trivia
- Although Levitation does not work anywhere in Mournhold, it is possible to use it inside Bamz-Amschend.
- A complete set of Dwarven Armor, shield included, can be found dispersed throughout the whole ruin.
- Bamz-Amschend was first mentioned in Pocket Guide to the Empire, First Edition: Morrowind in the excerpt regarding Mournhold: "It is reputed to be built over the ruins of a vast Dwarven city, although the current inhabitants vigorously deny this." It was also mentioned in the Chronicles of Nchuleft.
Appearances
- The Elder Scrolls Adventures: Redguard (mentioned only)
- The Elder Scrolls III: Tribunal
- The Elder Scrolls Online: Clockwork City