KittyPaine (talk | contribs) m (Revised) |
KittyPaine (talk | contribs) m (→Trivia) |
||
| Line 65: | Line 65: | ||
*Many [[Follower (Skyrim)|followers]] can be used as sacrifices, but [[Essential Characters (Skyrim)|essential NPCs]] won't be able to become sacrifices |
*Many [[Follower (Skyrim)|followers]] can be used as sacrifices, but [[Essential Characters (Skyrim)|essential NPCs]] won't be able to become sacrifices |
||
*The cultists are relatively difficult opponents. An easy way to kill all cultists at the shrine is to wait for a dragon attack, and then lure the dragon towards the shrine (e.g. [[Dragonrend]] shout). Hide (sneak, find cover nearby and don't attack) and the cultists will prioritise the dragon as a target. Remain hiding until most of the cultists are killed or severely weakened by the dragon, then pick off the survivors and defeat the dragon (if it hasn't flown away). Note that Boethiah will still try to recruit you when the last cultist is killed at the shrine - there appears to be no way to clear the shrine without Boethiah or a cultist attempting to recruit you, and that will always add the Boethiah's Calling quest to your journal. This method can also be used to start the quest if the cult leader dies early. |
*The cultists are relatively difficult opponents. An easy way to kill all cultists at the shrine is to wait for a dragon attack, and then lure the dragon towards the shrine (e.g. [[Dragonrend]] shout). Hide (sneak, find cover nearby and don't attack) and the cultists will prioritise the dragon as a target. Remain hiding until most of the cultists are killed or severely weakened by the dragon, then pick off the survivors and defeat the dragon (if it hasn't flown away). Note that Boethiah will still try to recruit you when the last cultist is killed at the shrine - there appears to be no way to clear the shrine without Boethiah or a cultist attempting to recruit you, and that will always add the Boethiah's Calling quest to your journal. This method can also be used to start the quest if the cult leader dies early. |
||
| − | *When sacrificing a follower their body can be looted twice. Once immediatly after you kill them on the [[Pillar of Sacrifice]] and again when [[Boethiah]] possesses their corpse all of their items (If their inventory is empty |
+ | *When sacrificing a follower their body can be looted twice. Once immediatly after you kill them on the [[Pillar of Sacrifice]] and again when [[Boethiah]] possesses their corpse all of their items (If their inventory is empty) respawn allowing them to looted again once Boethiah leaves their body. |
==Bugs== |
==Bugs== |
||
Revision as of 03:57, 6 March 2014
Objectives
Upon reaching level 30, Boethiah's Proving will begin spawning in various locations. Once read, Boethiah's Calling will start. Alternatively, if a Boethiah follower is killed, there will be a print of Boethiah's Proving on the corpse. Another way to start the quest is to go straight to the shrine, bypassing the first objective of finding the shrine.
- Find the Shrine of Boethiah.
- Find the cult of Boethiah.
- Lead someone to become trapped by the shrine and slay them, or kill all the cultists.
- Speak to Boethiah's Conduit.
- Slay the other cultists, or lead someone to become trapped by the shrine and slay them.
- Speak to Boethiah's Conduit.
- Slay everyone at Knifepoint Ridge stealthily.
- Retrieve and equip the Ebony Mail.
Detailed walkthrough
This quest can begin once the Dragonborn is at least level 30. Upon reaching level 30, the book Boethiah's Proving will spawn in various locations:
- Septimus Signus's Outpost on the bookshelf (the location of Discerning the Transmundane).
- Found on hostile Boethiah Cultists during random encounters.
- Abandoned House in Markarth, on the floor under the bookshelf in the second room next to the door leading down the stairs.
- Found in Hob's Fall Cave.
After finding the book, reading it will activate the quest, and the location will appear on the map. The Dragonborn will then need to travel to the Sacellum of Boethiah. (this step can be easily bypassed simply by approaching the shrine once you have reached level 30. After reaching level 30, you may need to let a couple days pass, to ensure all the proper npcs spawn.)
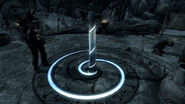
After finding the Sacellum, one of Boethiah's followers (usually the priestess) will speak to the Dragonborn, asking to lead someone to sacrifice. At this time, the Blade of Sacrifice will be given to the Dragonborn. Any follower can be taken to the Pillar of Sacrifice to be killed except for essential characters. Any of the initiates from any guilds, excluding the Dark Brotherhood, as their initiates are essential, will also work. Creature followers, like the dogs or the Armored Trolls, don't work as the sacrifice needs to be a humanoid follower. The Dragonborn should bring the chosen victim to the Pillar and tell him or her to use it. The victim will become stuck to the pillar, allowing the Dragonborn to perform a sacrifice. The Blade of Sacrifice can be used, but any other weapon or means of attack will suffice.
Alternatively, one may kill all of the cultists. This will also cause Boethiah to appear, though with slightly different dialogue. If this option is taken, she still tells you to bring a thrall to the altar for sacrifice. If you go to Knifepoint Ridge without making a sacrifice, the lower portion of the mine will still be caved in. (So either way, someone has to be sacrificed to complete the mission)
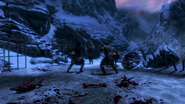
Boethiah will use the sacrificed body as a conduit. The body will stand up after death and speak in Boethiah's voice. After listening to and following him downstairs (along with the rest of the cultists), the Dragonborn will be forced to fight each and every one of Boethiah's followers. However, they will also fight amongst each other, so waiting for them to kill each other and finishing the rest can reduce the difficulty of the fight; Otherwise, Boethiah's cultists are fairly difficult. After defeating them, Boethiah will use the last killed person as a conduit, saying she is bored of her current champion, who now runs his own gang at Knifepoint Ridge. She orders the Dragonborn to kill them all silently, without giving the current champion time to defend himself (it does not matter whether the Dragonborn does this silently or not).
Tips for killing the gang silently:
- Use a bow to kill at long range.
- Jump off the walkways and land behind them for a fast kill (easiest with the Assassin's Blade perk).
- Invisibility and Muffle can be used to approach the gang members while being hidden. Note that enemies will be alarmed if Invisibility is cast near them without the Quiet Casting perk.
- To defeat Boethiah's champion without being noticed, the Dragonborn can climb the boxes behind his house and fall through the hole in the roof.
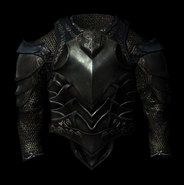
The Champion of Boethiah is wearing Ebony Mail, a unique cuirass that excretes poison. The poison effect does not begin until the champion notices the Dragonborn. Once he is defeated, the Ebony Mail can be looted from his body and equipped. Boethiah will speak to the Dragonborn (as an indirect objective voice; the Dragonborn will not need to return to her Shrine for this to occur) one final time, and the quest will end.
Alternative methods
There are some alternatives to being forced to sacrifice a companion:
- Typing
setstage da02 15in the console will advance the quest without requiring any follower's death.
AFTER:setstage da02 20
- If a sacrificed companion is resurrected via the console, Boethiah will take over the body briefly to talk to the Dragonborn. Once Boethiah has vacated the body, the companion can be resurrected successfully, but talking to them will simply restart the conversation with Boethiah. Once the quest has been completed, the companion should be alive, normal, and waiting at their home or recruitment point. This does not work with any Housecarls.
Broken Objective
Upon going deeper into the game's files, one may find a broken or deleted quest objective which involves killing Jarl Elisif. This is rare, speaking with Sybille Stentor after sacrificing a follower will have her explain to you about the Jarl feeling paranoid, the Dragonborn will offer to bodyguard Jarl Elisif in her room. After that, no more interaction is available.
There was going to be another quest the Dragonborn could do for Boethiah after becoming her champion, called Boethiah's Bidding. It involved killing Jarl Elisif for the Daedric Prince. After she was killed the new Jarl of Solitude would've been Erikur. Solitude guard's dialogue support this. The quest however was unfinished, likely due to the conflict it would have with the Civil War questline.
Gallery
Trivia
- The spiral of Daedric script around the Pillar of Sacrifice is mirrored, but reads from edge to center: "I am alive because that one is dead I exist because I have the will to do so," as quoted in the book Boethiah's Proving.
- An easy way to find Boethiah's cultists is to wander around far away from cities.
- Many followers can be used as sacrifices, but essential NPCs won't be able to become sacrifices
- The cultists are relatively difficult opponents. An easy way to kill all cultists at the shrine is to wait for a dragon attack, and then lure the dragon towards the shrine (e.g. Dragonrend shout). Hide (sneak, find cover nearby and don't attack) and the cultists will prioritise the dragon as a target. Remain hiding until most of the cultists are killed or severely weakened by the dragon, then pick off the survivors and defeat the dragon (if it hasn't flown away). Note that Boethiah will still try to recruit you when the last cultist is killed at the shrine - there appears to be no way to clear the shrine without Boethiah or a cultist attempting to recruit you, and that will always add the Boethiah's Calling quest to your journal. This method can also be used to start the quest if the cult leader dies early.
- When sacrificing a follower their body can be looted twice. Once immediatly after you kill them on the Pillar of Sacrifice and again when Boethiah possesses their corpse all of their items (If their inventory is empty) respawn allowing them to looted again once Boethiah leaves their body.
Bugs
|
This section contains bugs related to Boethiah's Calling. Before adding a bug to this list, consider the following:
|
| Click to show |
|---|
|


