Cerelia710 (talk | contribs) (Updated with new information) |
mNo edit summary |
||
| (79 intermediate revisions by 38 users not shown) | |||
| Line 1: | Line 1: | ||
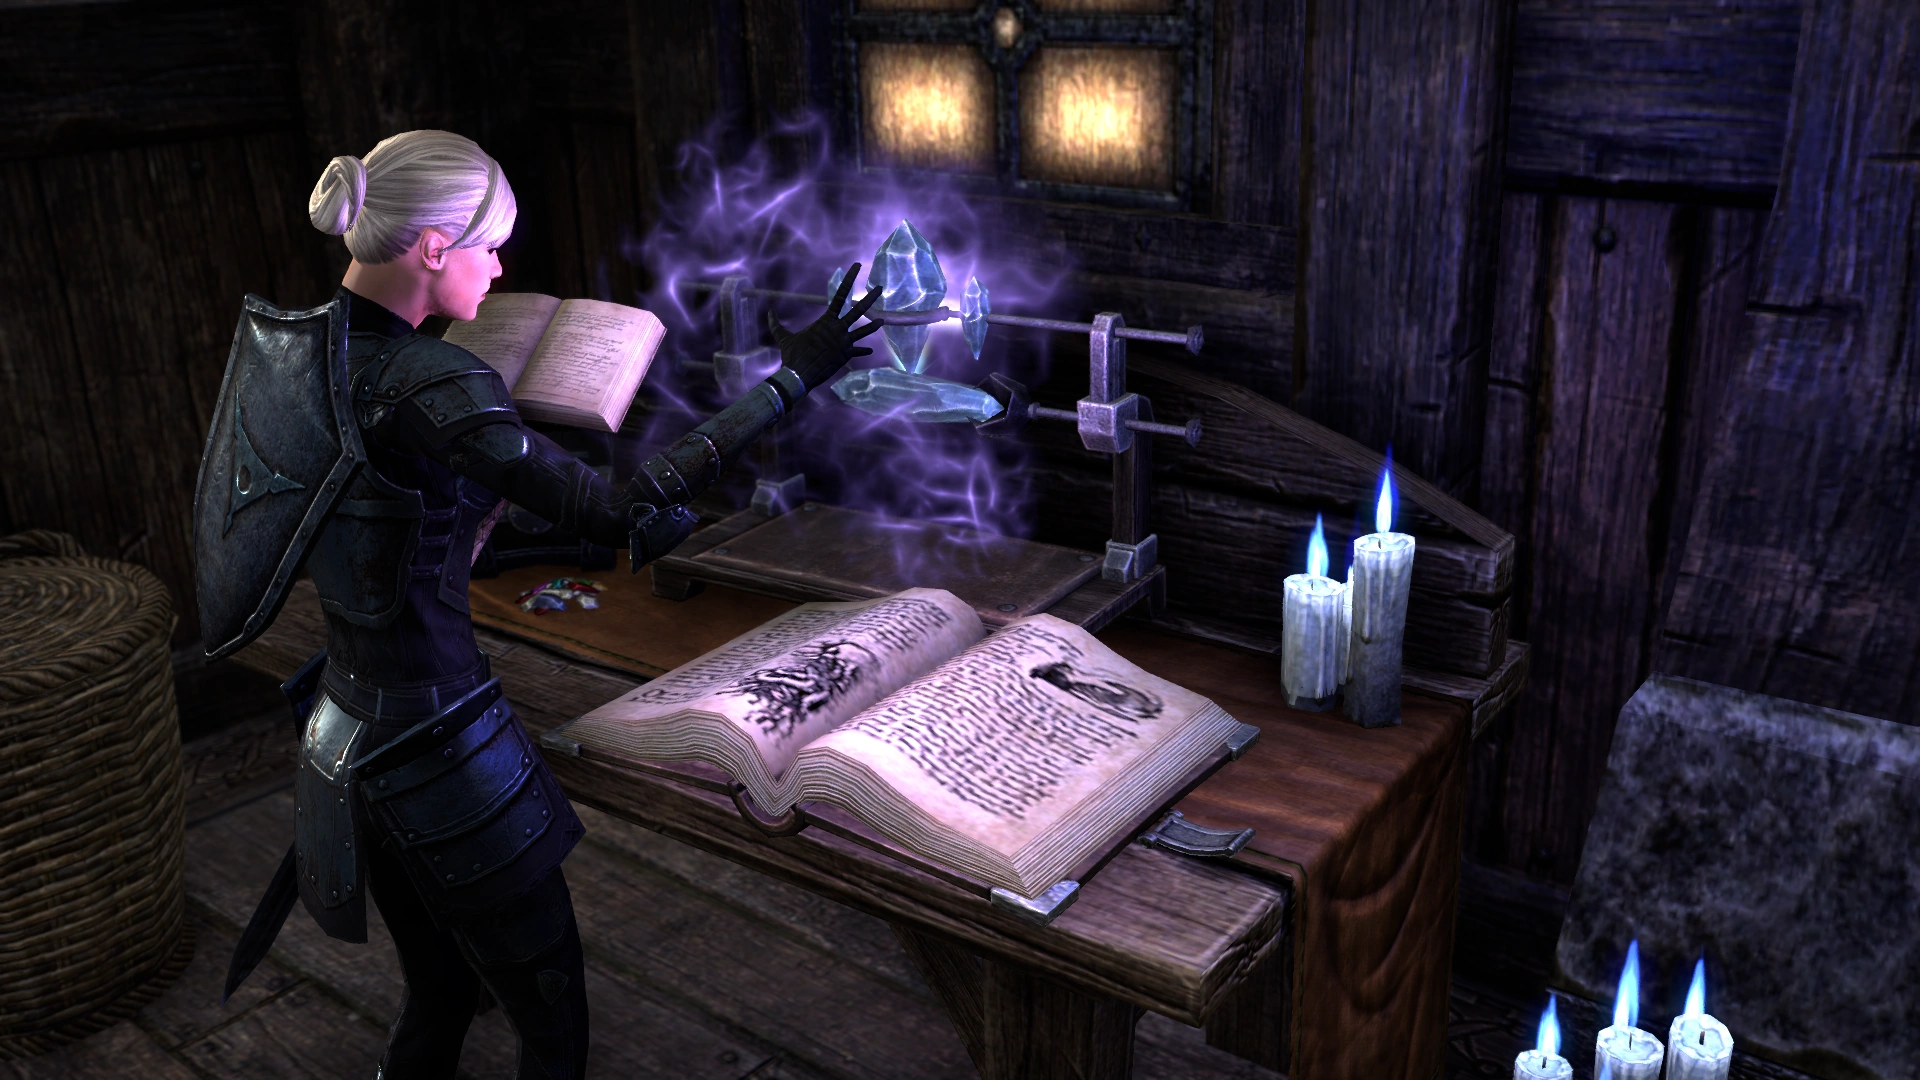
| + | [[File:Enchanting-0.png|thumb|220x220px|A player character using an enchanting station.]] |
||
| − | Enchanting is a [[Crafting (Online)|crafting]] profession in [[The Elder Scrolls Wiki/Portal/Online|Online]]. |
||
| + | {{For|2=Enchanting}} |
||
| − | |||
| + | '''Enchanting''' is a [[Crafting (Online)|crafting]] profession in {{Online}}. The [[Vestige]] must find runestones around Tamriel and examine them to get a rune. Then the Vestige must combine an aspect rune, an essence rune and a potency rune in order to create a glyph, that can be used later to enchant weapons, armor or jewelry. |
||
| − | ==Skill tree== |
||
| − | |||
| − | Passive abilities |
||
| − | *Aspect Improvement |
||
| − | **Allows the use of Common (white) and Standard (green) Aspect Runestones. |
||
| − | |||
| − | *Potency Improvement |
||
| − | **Allows the use of Jora, Porade, Jode and Notade Potency Runestones to make Glyphs of levels 1-15. |
||
| − | *Keen Eay: Rune Stone |
||
| − | **Runes in the world will be easier to see when you are 20 meters or closer. |
||
| − | *Hireling |
||
| − | **When you go offline a hireling will find Runestones for you. Your hireling refreshes every 24 hours. |
||
| − | *Aspect Extraction |
||
| − | **Increases the chance of extracting Aspect Runestones by 5%. |
||
| + | ==Skills== |
||
| + | ===Passive Abilities=== |
||
| + | *'''[[Aspect Improvement]]:''' Allows the use of Aspect Runestones. |
||
| + | **Rank 1: Common (white) and Standard (green) ''(Unlocked at Enchanting Level 1)'' |
||
| + | **Rank 2: Superior (blue) ''(Unlocked at Enchanting Level 6)'' |
||
| + | **Rank 3: Artifact (purple) ''(Unlocked at Enchanting Level 16)'' |
||
| + | **Rank 4: Legendary (gold) ''(Unlocked at Enchanting Level 31)'' |
||
| + | *'''[[Potency Improvement]]:''' Allows the use of Potency Runestones to make level __ Glyphs |
||
| + | **Rank 1: Allows use of Jora, Porade, Jode, and Notade to make level 1–15 Glyphs (''Unlocked at Enchanting Level 1'') |
||
| + | **Rank 2: Allows use of [[Jera]], [[Jejora]], [[Ode]], and [[Tade]] to make level 11–25 Glyphs (''Unlocked at Enchanting Level 5'') |
||
| + | **Rank 3: Allows use of [[Oda]], Pojora, [[Jayde]], and Edode to make level 21–35 Glyphs ''(Unlocked at Enchanting Level 10)'' |
||
| + | **Rank 4: Allows use of Edora, Jaera, Pojode, and Rekude to make level 30–45 Glyphs ''(Unlocked at Rank 3)'' |
||
| + | **Rank 5: Allows use of Pora, Denara, Hade, and Idode to make level 40–50 Glyphs ''(Unlocked at Rank 4)'' |
||
| + | **Rank 6: Allows use of Rera and Pode to make level Vetern Rank 1 Glyphs. ''(Unlocked at Enchanting Level 25)'' |
||
| + | **Rank 7: Allows use of Derado and Kedeko to make level Vetern Rank 3 Glyphs ''(Unlocked at Rank 6)'' |
||
| + | **Rank 8: Allows use of Recura and Rede to make level Vetern Rank 6 Glyphs ''(Unlocked at Rank 7)'' |
||
| + | **Rank 9: Allows use of Cura and Kude to make level Vetern Rank 8 Glyphs ''(Unlocked at Rank 8) '' |
||
| + | *'''[[Keen Eye: Rune Stones]]:''' Runes in the world will be easier to see when you are ___ meters or closer. |
||
| + | **Rank 1: 20 meters or closer (''Unlocked at Enchanting Level 2'') |
||
| + | **Rank 2: 30 meters or closer ''(Unlocked at Enchanting Level 7)'' |
||
| + | **Rank 3: 40 meters or closer ''(Unlocked at Rank 2)'' |
||
| + | *'''[[Hireling (Enchanting)|Hireling]]:''' When you go offline, a hireling will find runestones for you. Your hireling refreshes every 24 hours. |
||
| + | **Rank 1: Hireling will find Runestones and send them once a day (''Unlocked at Enchanting Level 3'') |
||
| + | **Rank 2: Hireling has a better chance of finding more rare Runestones to send you once a day. ''(Unlocked at Enchanting Level 12)'' |
||
| + | **Rank 3: Hireling has a good chance of finding rare Runestones to send you twice a day ''(Unlocked at Enchanting Level 32)'' |
||
| + | *'''[[Aspect Extraction]]:''' increases the chance of extracting Aspect Runestones by ___%. |
||
| + | **Rank 1: 5% (''Unlocked at Enchanting Level 4'') |
||
| + | **Rank 2: 10% ''(Unlocked at Rank 19)'' |
||
| + | **Rank 3: 15% ''(Unlocked at ''Enchanting Level 29'')'' |
||
==Runestones== |
==Runestones== |
||
| + | ===Potency Runestones=== |
||
| − | |||
| + | {| class="wikitable highlight" style="width: 100% text-align: center" |
||
| − | |||
| − | |||
| − | Potency Runestones |
||
| − | |||
| − | {| border="0" cellpadding="1" cellspacing="1" class="article-table" style="width: 500px;" |
||
|- |
|- |
||
| + | !style="text-align: center;" | |
||
| − | ! scope="col"|Name |
||
| + | !style="text-align: center;" |Additive Runes |
||
| − | |||
| − | ! |
+ | !style="text-align: center;" |Translation |
| + | !style="text-align: center;" | |
||
| − | |||
| + | !style="text-align: center;" |Subtractive Runes |
||
| − | ! scope="col"|Requires |
||
| + | !style="text-align: center;" |Translation |
||
| + | !style="text-align: center;" |Requires |
||
| + | !style="text-align: center;" |Glyph Prefix |
||
| + | !style="text-align: center; width: 11%" |Gear Level |
||
|- |
|- |
||
| + | |[[File:Jora p.png|30px]] |
||
| + | |Jora |
||
| + | |Develop |
||
| + | |[[File:Jode p.png|30px]] |
||
|Jode |
|Jode |
||
| − | |||
|Reduce |
|Reduce |
||
| − | |||
| − | |Potency Improvement 1 |
||
| − | |- |
||
| − | |Jora |
||
| − | |||
| − | |Develop |
||
| − | |||
|Potency Improvement 1 |
|Potency Improvement 1 |
||
| + | |Trifling |
||
| + | |Level 1–10 |
||
|- |
|- |
||
| + | |[[File:Porade p.png|30px]] |
||
| + | |Porade |
||
| + | |Add |
||
| + | |[[File:Notade p.png|30px]] |
||
|Notade |
|Notade |
||
| − | |||
|Subtract |
|Subtract |
||
| − | |||
| − | |Potency Improvement 1 |
||
| − | |- |
||
| − | |Porade |
||
| − | |||
| − | |? |
||
| − | |||
|Potency Improvement 1 |
|Potency Improvement 1 |
||
| + | |Inferior |
||
| + | |Level 5–15 |
||
|- |
|- |
||
| + | |[[File:Jera p.png|30px]] |
||
|Jera |
|Jera |
||
| + | |Increase |
||
| − | |||
| + | |[[File:Ode p.png|30px]] |
||
| − | |? |
||
| + | |Ode |
||
| − | |||
| + | |Shrink |
||
|Potency Improvement 2 |
|Potency Improvement 2 |
||
| + | |Petty |
||
| + | |Level 10–20 |
||
| + | |- |
||
| + | |[[File:Jejora p.png|30px]] |
||
| + | |Jejora |
||
| + | |Raise |
||
| + | |[[File:Tade p.png|30px]] |
||
| + | |Tade |
||
| + | |Decrease |
||
| + | |Potency Improvement 2 |
||
| + | |Slight |
||
| + | |Level 15–25 |
||
| + | |- |
||
| + | |[[File:Odra p.png|30px]] |
||
| + | |Odra |
||
| + | |Gain |
||
| + | |[[File:Jayde p.png|30px]] |
||
| + | |Jayde |
||
| + | |Deduct |
||
| + | |Potency Improvement 3 |
||
| + | |Minor |
||
| + | |Level 20–30 |
||
| + | |- |
||
| + | |[[File:Pojora p.png|30px]] |
||
| + | |Pojora |
||
| + | |Supplement |
||
| + | |[[File:Edode p.png|30px]] |
||
| + | |Edode |
||
| + | |Lower |
||
| + | |Potency Improvement 3 |
||
| + | |Lesser |
||
| + | |Level 25–35 |
||
| + | |- |
||
| + | |[[File:Edora p.png|30px]] |
||
| + | |Edora |
||
| + | |Boost |
||
| + | |[[File:Pojode p.png|30px]] |
||
| + | |Pojode |
||
| + | |Diminish |
||
| + | |Potency Improvement 4 |
||
| + | |Moderate |
||
| + | |Level 30–40 |
||
| + | |- |
||
| + | |[[File:Jaera p.png|30px]] |
||
| + | |Jaera |
||
| + | |Advance |
||
| + | |[[File:Rekude p.png|30px]] |
||
| + | |Rekude |
||
| + | |Weaken |
||
| + | |Potency Improvement 4 |
||
| + | |Average |
||
| + | |Level 35–45 |
||
| + | |- |
||
| + | | |
||
| + | |Pora |
||
| + | |Augment |
||
| + | | |
||
| + | |Hade |
||
| + | |Lessen |
||
| + | |Potency Improvement 5 |
||
| + | |Strong |
||
| + | |Level 40–50 |
||
| + | |- |
||
| + | |[[File:Denara p.png|30px]] |
||
| + | |Denara |
||
| + | |Strengthen |
||
| + | | |
||
| + | |Idode |
||
| + | |Impair |
||
| + | |Potency Improvement 5 |
||
| + | |Major |
||
| + | |{{CP}}10–30 |
||
| + | |- |
||
| + | | |
||
| + | |Rera |
||
| + | |Exaggerate |
||
| + | | |
||
| + | |Pode |
||
| + | |Remove |
||
| + | |Potency Improvement 6 |
||
| + | |Greater |
||
| + | |{{CP}}30–50 |
||
| + | |- |
||
| + | | |
||
| + | |Derado |
||
| + | |Empower |
||
| + | | |
||
| + | |Kedeko |
||
| + | |Drain |
||
| + | |Potency Improvement 7 |
||
| + | |Grand |
||
| + | |{{CP}}50–70 |
||
| + | |- |
||
| + | | |
||
| + | |Recura |
||
| + | |Magnify |
||
| + | | |
||
| + | |Rede |
||
| + | |Deprive |
||
| + | |Potency Improvement 8 |
||
| + | |Splended |
||
| + | |{{CP}}70–100 |
||
| + | |- |
||
| + | | |
||
| + | |Kura |
||
| + | |Intensify |
||
| + | | |
||
| + | |Kude |
||
| + | |Negate |
||
| + | |Potency Improvement 9 |
||
| + | |Monumental |
||
| + | |{{CP}}100–150 |
||
| + | |- |
||
| + | | |
||
| + | |Rejera |
||
| + | |Amplify |
||
| + | | |
||
| + | |Jihade |
||
| + | |Divest |
||
| + | |Potency Improvement 10 |
||
| + | |Superb |
||
| + | |{{CP}}150–159 |
||
| + | |- |
||
| + | | |
||
| + | |Repora |
||
| + | |Reinforce |
||
| + | | |
||
| + | |Itade |
||
| + | |Plunder |
||
| + | |Potency Improvement 10 |
||
| + | |Truly Superb |
||
| + | |{{CP}}160 |
||
|} |
|} |
||
| + | ===Essence Runestones=== |
||
| − | |||
| + | {| class="wikitable highlight" style="width: 100% text-align: center" |
||
| − | |||
| − | Essence Runestones |
||
| − | |||
| − | {| border="0" cellpadding="1" cellspacing="1" class="article-table" style="width: 500px;" |
||
|- |
|- |
||
| + | !style="text-align: center;" | |
||
| − | ! scope="col"|Name |
||
| + | !style="text-align: center;" |Name |
||
| − | |||
| − | ! |
+ | !style="text-align: center;" |Translation |
| + | !style="text-align: center;" |Requires |
||
| − | |||
| + | !style="text-align: center;" |Additive (-ra) Effect |
||
| − | ! scope="col"|Requires |
||
| + | !style="text-align: center;" |Subtractive (-de) Effect |
||
| + | |- |
||
| + | |[[File:Dekeipa e.png|30px]] |
||
| + | |Dekeipa |
||
| + | |Frost |
||
| + | |Essence Improvement 1 |
||
| + | |Weapon: Deals Frost Damage. |
||
| + | |Jewelry: Adds Cold Resistance. |
||
| + | |- |
||
| + | |[[File:Deni e.png|30px]] |
||
| + | |Deni |
||
| + | |Stamina |
||
| + | |Essence Improvement 1 |
||
| + | |Armor: Adds Maximum Stamina. |
||
| + | |Weapon: Deals Magic Damage and Restores Stamina. |
||
| + | |- |
||
| + | |[[File:Denima e.png|30px]] |
||
| + | |Denima |
||
| + | |Stamina Regen |
||
| + | |Essence Improvement 1 |
||
| + | |Jewelry: Adds Stamina Recovery. |
||
| + | |Jewelry: Reduces Stamina ability cost. |
||
|- |
|- |
||
| + | |[[File:Deteri e.png|30px]] |
||
|Deteri |
|Deteri |
||
| − | |||
|Armor |
|Armor |
||
| − | |||
|Essence Improvement 1 |
|Essence Improvement 1 |
||
| + | |Weapon: Grants Temporary Damage Shield. |
||
| + | |Weapon: Temporarily reduces target's Spell and Physical Resistance. |
||
|- |
|- |
||
| + | |[[File:Haoko e.png|30px]] |
||
|Haoko |
|Haoko |
||
| − | |||
|Disease |
|Disease |
||
| − | |||
|Essence Improvement 1 |
|Essence Improvement 1 |
||
| + | |Weapon: Deals Disease Damage. |
||
| + | |Jewelry: Adds Disease Resistance. |
||
|- |
|- |
||
| + | |[[File:Kaderi e.png|30px]] |
||
| + | |Kaderi |
||
| + | |Shield |
||
| + | |Essence Improvement 1 |
||
| + | |Jewelry: Increase Bash Damage. |
||
| + | |<span style="font-weight:normal;">Jewelry: Reduces Stamina Cost of Bashing and Blocking</span> |
||
| + | |- |
||
| + | |[[File:Kuoko e.png|30px]] |
||
| + | |Kuoko |
||
| + | |Poison |
||
| + | |Essence Improvement 1 |
||
| + | |Weapon: Deals Poison Damage. |
||
| + | |Jewelry: Adds Poison Resistance. |
||
| + | |- |
||
| + | |[[File:Makderi e.png|30px]] |
||
|Makderi |
|Makderi |
||
| − | |||
|Spell Harm |
|Spell Harm |
||
| + | |Essence Improvement 1 |
||
| − | |||
| + | |Jewelry: Adds Spell Damage. |
||
| − | |Essence Improvement ? |
||
| + | |Jewelry: Adds Spell Resistance. |
||
|- |
|- |
||
| + | |[[File:Makko e.png|30px]] |
||
|Makko |
|Makko |
||
| − | |||
|Magicka |
|Magicka |
||
| − | |||
|Essence Improvement 1 |
|Essence Improvement 1 |
||
| + | |Armor: Adds Maximum Magicka. |
||
| + | |Weapon: Deals Magic Damage and Restores Magicka. |
||
|- |
|- |
||
| + | |[[File:Makkoma e.png|30px]] |
||
|Makkoma |
|Makkoma |
||
| − | |||
|Magicka Regen |
|Magicka Regen |
||
| − | |||
|Essence Improvement 1 |
|Essence Improvement 1 |
||
| + | |Jewelry: Adds Magicka Recovery. |
||
| + | |Jewelry: Reduces Magicka spell cost. |
||
|- |
|- |
||
| + | |[[File:Meip e.png|30px]] |
||
|Meip |
|Meip |
||
| − | |||
|Shock |
|Shock |
||
| − | |||
|Essence Improvement 1 |
|Essence Improvement 1 |
||
| + | |Weapon: Deals Shock Damage. |
||
| + | |Jewelry: Adds Shock Resistance. |
||
|- |
|- |
||
| + | |[[File:Oko e.png|30px]] |
||
| − | |Rakeipa |
||
| + | |Oko |
||
| − | |||
| + | |Health |
||
| − | |Fire |
||
| − | |||
|Essence Improvement 1 |
|Essence Improvement 1 |
||
| + | |Armor: Adds Maximum Health. |
||
| + | |Weapon: Deals Magic Damage and Restores Health |
||
|- |
|- |
||
| + | |[[File:Okoma e.png|30px]] |
||
| − | |Taderi |
||
| + | |Okoma |
||
| − | |||
| + | |Health Regen |
||
| − | |Physical Harm |
||
| − | |||
|Essence Improvement 1 |
|Essence Improvement 1 |
||
| + | |Jewelry: Adds Health Recovery. |
||
| + | |Weapon: Deals Unresistible Damage. |
||
|- |
|- |
||
| + | |[[File:Okori e.png|30px]] |
||
| − | |Denima |
||
| + | |Okori |
||
| − | |||
| + | |Power |
||
| − | |Stamina Regen |
||
| − | |||
|Essence Improvement 1 |
|Essence Improvement 1 |
||
| + | | |
||
| + | | |
||
|- |
|- |
||
| + | |[[File:Oru e.png|30px]] |
||
| − | |Okoma |
||
| + | |Oru |
||
| − | |||
| + | |Alchemist |
||
| − | |Health Regen |
||
| − | |||
|Essence Improvement 1 |
|Essence Improvement 1 |
||
| + | |Jewelry: Increases potion duration. |
||
| + | |Jewelry: Reduces potion cooldown. |
||
|- |
|- |
||
| + | |[[File:Rakeipa e.png|30px]] |
||
| − | |Oru |
||
| + | |[[Rakeipa]] |
||
| − | |||
| + | |Fire |
||
| − | |Alchemist |
||
| − | |||
|Essence Improvement 1 |
|Essence Improvement 1 |
||
| + | |Weapon: Deals Flame Damage. |
||
| + | |Jewelry: Adds Flame Resistance. |
||
| + | |- |
||
| + | |[[File:Taderi e.png|30px]] |
||
| + | |Taderi |
||
| + | |Physical Harm |
||
| + | |Essence Improvement 1 |
||
| + | |Jewelry: Adds Weapon Damage. |
||
| + | |Jewelry: Adds Physical Resistance. |
||
|} |
|} |
||
| + | ===Aspect Runestones=== |
||
| − | |||
| + | {| class="wikitable highlight" style="width: 100% text-align: center" |
||
| − | |||
| − | Aspect Runestones |
||
| − | |||
| − | {| border="0" cellpadding="1" cellspacing="1" class="article-table article-table-selected" style="width: 500px;" |
||
|- |
|- |
||
| + | !style="text-align: center;" | |
||
| − | ! scope="col"|Name |
||
| + | !style="text-align: center;" |Name |
||
| − | |||
| − | ! |
+ | !style="text-align: center;" |<span style="font-weight:bold;">Translation</span> |
| + | !style="text-align: center;" |<span style="font-weight:bold;">Requires</span> |
||
| − | |||
| − | ! scope="col"|<span style="font-weight:bold;">Requires</span> |
||
|- |
|- |
||
| + | |[[File:Ta a.png|30px]] |
||
|Ta |
|Ta |
||
| − | |||
|Base |
|Base |
||
| − | |||
|Aspect Improvement 1 |
|Aspect Improvement 1 |
||
|- |
|- |
||
| − | |Jejota |
+ | |[[File:Jejota a.png|30px]] |
| + | |{{Green|Jejota}} |
||
| − | |||
|Fine |
|Fine |
||
| − | |||
|Aspect Improvement 1 |
|Aspect Improvement 1 |
||
|- |
|- |
||
| − | |Denata |
+ | |[[File:Denata a.png|30px]] |
| + | |{{Blue|Denata}} |
||
| − | |||
| + | |Superior |
||
| − | |? |
||
| − | |||
|Aspect Improvement 2 |
|Aspect Improvement 2 |
||
|- |
|- |
||
| − | |Rekuta |
+ | |[[File:Rekuta a.png|30px]] |
| + | |{{Purple|Rekuta}} |
||
| − | |||
| + | |Epic |
||
| − | |? |
||
| − | |||
|Aspect Improvement 3 |
|Aspect Improvement 3 |
||
| + | |- |
||
| + | | |
||
| + | |{{Gold|Kuta}} |
||
| + | |Legendary |
||
| + | |Aspect Improvement 4 |
||
|} |
|} |
||
| + | |||
| + | ==Skill books== |
||
| + | *''[[A Request for Relief]]'' |
||
| + | *''[[Ahzidal's Descent]]'' |
||
| + | *''[[Enigma of the Runestones]]'' |
||
| + | *''[[Glyphs and Enchantment]]'' |
||
| + | *''[[Harvest's End (Online Book)|Harvest's End]]'' |
||
| + | |||
| + | ==Leveling tips== |
||
| + | *Investing 30 [[Champion System|Champion Points]] into [[Champion System#The Tower|The Tower]] constellation will increase the crafting inspiration by 20%. Therefore, leveling crafting skills will require less materials and time. |
||
| + | *An active [[ESO Plus]] membership also grants additional inspiration. |
||
| + | *Deconstructing looted [[Glyphs]] is cheap way to level up Enchanting. They are a common drop, and they can be acquired while questing or doing other activities. In addition, deconstructing items will grant the player crafting materials which can be used to further increase the skill. |
||
| + | *Keen Eye: Rune Stones, Hireling and Runestone Extraction pasive skills are useful to obtain crafting materials. |
||
| + | *A [[Skill Point]] should be spent on Potency Improvement and Aspect Improvement whenever possible. Potency Improvement will allow crafting higher level Potency Runestones, while Aspect Improvement skill allows using better quality Aspect Runestones. Using higher crafting materials grants notably higher experience. |
||
| + | *Legendary (gold) Aspect Runestones are extremely rare and expensive, only Artifact (purple) Aspect Runestones should be used to level beyond rank 16. |
||
| + | *Players receive less experience from deconstructing Glyphs crafted by themselves. Finding another player who is also leveling up Enchanting and trading the Glyphs crafted in order to deconstruct the other player's Glyphs is an efficient way of recovering materials. |
||
| + | |||
| + | ==Gallery== |
||
| + | <gallery widths="175" spacing="small"> |
||
| + | Runestone concept art.jpg|Runestone Concept art |
||
| + | Aspect RuneInGame.png|Aspect Rune |
||
| + | </gallery> |
||
==Appearances== |
==Appearances== |
||
| + | *{{Daggerfall}} |
||
| + | *{{Morrowind}} |
||
| + | *{{Stormhold}} |
||
| + | *{{Oblivion}} |
||
| + | *{{Skyrim}} |
||
*{{Online}} |
*{{Online}} |
||
| + | *{{Blades}} |
||
| − | [[Category:The Elder Scrolls Online]] |
||
| + | __FORCETOC__ |
||
| + | |||
| + | <!--Interwiki links--> |
||
| + | [[de:Verzauberung (Online)]] |
||
| + | [[ru:Зачарование (Online)]] |
||
| + | [[Category:Online: Skills]] |
||
| + | [[Category:Online: Crafting]] |
||
[[Category:Online: Gameplay]] |
[[Category:Online: Gameplay]] |
||
| + | [[Category:Online: Skill Image Needed]] |
||
Revision as of 00:05, 8 April 2020
A player character using an enchanting station.
- For other uses, see Enchanting.
Enchanting is a crafting profession in The Elder Scrolls Online. The Vestige must find runestones around Tamriel and examine them to get a rune. Then the Vestige must combine an aspect rune, an essence rune and a potency rune in order to create a glyph, that can be used later to enchant weapons, armor or jewelry.
Skills
Passive Abilities
- Aspect Improvement: Allows the use of Aspect Runestones.
- Rank 1: Common (white) and Standard (green) (Unlocked at Enchanting Level 1)
- Rank 2: Superior (blue) (Unlocked at Enchanting Level 6)
- Rank 3: Artifact (purple) (Unlocked at Enchanting Level 16)
- Rank 4: Legendary (gold) (Unlocked at Enchanting Level 31)
- Potency Improvement: Allows the use of Potency Runestones to make level __ Glyphs
- Rank 1: Allows use of Jora, Porade, Jode, and Notade to make level 1–15 Glyphs (Unlocked at Enchanting Level 1)
- Rank 2: Allows use of Jera, Jejora, Ode, and Tade to make level 11–25 Glyphs (Unlocked at Enchanting Level 5)
- Rank 3: Allows use of Oda, Pojora, Jayde, and Edode to make level 21–35 Glyphs (Unlocked at Enchanting Level 10)
- Rank 4: Allows use of Edora, Jaera, Pojode, and Rekude to make level 30–45 Glyphs (Unlocked at Rank 3)
- Rank 5: Allows use of Pora, Denara, Hade, and Idode to make level 40–50 Glyphs (Unlocked at Rank 4)
- Rank 6: Allows use of Rera and Pode to make level Vetern Rank 1 Glyphs. (Unlocked at Enchanting Level 25)
- Rank 7: Allows use of Derado and Kedeko to make level Vetern Rank 3 Glyphs (Unlocked at Rank 6)
- Rank 8: Allows use of Recura and Rede to make level Vetern Rank 6 Glyphs (Unlocked at Rank 7)
- Rank 9: Allows use of Cura and Kude to make level Vetern Rank 8 Glyphs (Unlocked at Rank 8)
- Keen Eye: Rune Stones: Runes in the world will be easier to see when you are ___ meters or closer.
- Rank 1: 20 meters or closer (Unlocked at Enchanting Level 2)
- Rank 2: 30 meters or closer (Unlocked at Enchanting Level 7)
- Rank 3: 40 meters or closer (Unlocked at Rank 2)
- Hireling: When you go offline, a hireling will find runestones for you. Your hireling refreshes every 24 hours.
- Rank 1: Hireling will find Runestones and send them once a day (Unlocked at Enchanting Level 3)
- Rank 2: Hireling has a better chance of finding more rare Runestones to send you once a day. (Unlocked at Enchanting Level 12)
- Rank 3: Hireling has a good chance of finding rare Runestones to send you twice a day (Unlocked at Enchanting Level 32)
- Aspect Extraction: increases the chance of extracting Aspect Runestones by ___%.
- Rank 1: 5% (Unlocked at Enchanting Level 4)
- Rank 2: 10% (Unlocked at Rank 19)
- Rank 3: 15% (Unlocked at Enchanting Level 29)
Runestones
Potency Runestones
| Additive Runes | Translation | Subtractive Runes | Translation | Requires | Glyph Prefix | Gear Level | ||
|---|---|---|---|---|---|---|---|---|
| Jora | Develop | Jode | Reduce | Potency Improvement 1 | Trifling | Level 1–10 | ||
| Porade | Add | Notade | Subtract | Potency Improvement 1 | Inferior | Level 5–15 | ||
| Jera | Increase | Ode | Shrink | Potency Improvement 2 | Petty | Level 10–20 | ||
| Jejora | Raise | Tade | Decrease | Potency Improvement 2 | Slight | Level 15–25 | ||
| Odra | Gain | Jayde | Deduct | Potency Improvement 3 | Minor | Level 20–30 | ||
| Pojora | Supplement | Edode | Lower | Potency Improvement 3 | Lesser | Level 25–35 | ||
| Edora | Boost | Pojode | Diminish | Potency Improvement 4 | Moderate | Level 30–40 | ||
| Jaera | Advance | Rekude | Weaken | Potency Improvement 4 | Average | Level 35–45 | ||
| Pora | Augment | Hade | Lessen | Potency Improvement 5 | Strong | Level 40–50 | ||
| Denara | Strengthen | Idode | Impair | Potency Improvement 5 | Major | |||
| Rera | Exaggerate | Pode | Remove | Potency Improvement 6 | Greater | |||
| Derado | Empower | Kedeko | Drain | Potency Improvement 7 | Grand | |||
| Recura | Magnify | Rede | Deprive | Potency Improvement 8 | Splended | |||
| Kura | Intensify | Kude | Negate | Potency Improvement 9 | Monumental | |||
| Rejera | Amplify | Jihade | Divest | Potency Improvement 10 | Superb | |||
| Repora | Reinforce | Itade | Plunder | Potency Improvement 10 | Truly Superb |
Essence Runestones
| Name | Translation | Requires | Additive (-ra) Effect | Subtractive (-de) Effect | |
|---|---|---|---|---|---|
| Dekeipa | Frost | Essence Improvement 1 | Weapon: Deals Frost Damage. | Jewelry: Adds Cold Resistance. | |
| Deni | Stamina | Essence Improvement 1 | Armor: Adds Maximum Stamina. | Weapon: Deals Magic Damage and Restores Stamina. | |
| Denima | Stamina Regen | Essence Improvement 1 | Jewelry: Adds Stamina Recovery. | Jewelry: Reduces Stamina ability cost. | |
| Deteri | Armor | Essence Improvement 1 | Weapon: Grants Temporary Damage Shield. | Weapon: Temporarily reduces target's Spell and Physical Resistance. | |
| Haoko | Disease | Essence Improvement 1 | Weapon: Deals Disease Damage. | Jewelry: Adds Disease Resistance. | |
| Kaderi | Shield | Essence Improvement 1 | Jewelry: Increase Bash Damage. | Jewelry: Reduces Stamina Cost of Bashing and Blocking | |
| Kuoko | Poison | Essence Improvement 1 | Weapon: Deals Poison Damage. | Jewelry: Adds Poison Resistance. | |
| Makderi | Spell Harm | Essence Improvement 1 | Jewelry: Adds Spell Damage. | Jewelry: Adds Spell Resistance. | |
| Makko | Magicka | Essence Improvement 1 | Armor: Adds Maximum Magicka. | Weapon: Deals Magic Damage and Restores Magicka. | |
| Makkoma | Magicka Regen | Essence Improvement 1 | Jewelry: Adds Magicka Recovery. | Jewelry: Reduces Magicka spell cost. | |
| Meip | Shock | Essence Improvement 1 | Weapon: Deals Shock Damage. | Jewelry: Adds Shock Resistance. | |
| Oko | Health | Essence Improvement 1 | Armor: Adds Maximum Health. | Weapon: Deals Magic Damage and Restores Health | |
| Okoma | Health Regen | Essence Improvement 1 | Jewelry: Adds Health Recovery. | Weapon: Deals Unresistible Damage. | |
| Okori | Power | Essence Improvement 1 | |||
| Oru | Alchemist | Essence Improvement 1 | Jewelry: Increases potion duration. | Jewelry: Reduces potion cooldown. | |
| Rakeipa | Fire | Essence Improvement 1 | Weapon: Deals Flame Damage. | Jewelry: Adds Flame Resistance. | |
| Taderi | Physical Harm | Essence Improvement 1 | Jewelry: Adds Weapon Damage. | Jewelry: Adds Physical Resistance. |
Aspect Runestones
| Name | Translation | Requires | |
|---|---|---|---|
| Ta | Base | Aspect Improvement 1 | |
| Jejota | Fine | Aspect Improvement 1 | |
| Denata | Superior | Aspect Improvement 2 | |
| Rekuta | Epic | Aspect Improvement 3 | |
| Kuta | Legendary | Aspect Improvement 4 |
Skill books
- A Request for Relief
- Ahzidal's Descent
- Enigma of the Runestones
- Glyphs and Enchantment
- Harvest's End
Leveling tips
- Investing 30 Champion Points into The Tower constellation will increase the crafting inspiration by 20%. Therefore, leveling crafting skills will require less materials and time.
- An active ESO Plus membership also grants additional inspiration.
- Deconstructing looted Glyphs is cheap way to level up Enchanting. They are a common drop, and they can be acquired while questing or doing other activities. In addition, deconstructing items will grant the player crafting materials which can be used to further increase the skill.
- Keen Eye: Rune Stones, Hireling and Runestone Extraction pasive skills are useful to obtain crafting materials.
- A Skill Point should be spent on Potency Improvement and Aspect Improvement whenever possible. Potency Improvement will allow crafting higher level Potency Runestones, while Aspect Improvement skill allows using better quality Aspect Runestones. Using higher crafting materials grants notably higher experience.
- Legendary (gold) Aspect Runestones are extremely rare and expensive, only Artifact (purple) Aspect Runestones should be used to level beyond rank 16.
- Players receive less experience from deconstructing Glyphs crafted by themselves. Finding another player who is also leveling up Enchanting and trading the Glyphs crafted in order to deconstruct the other player's Glyphs is an efficient way of recovering materials.
Gallery
")
Runestone Concept art
")
Aspect Rune