m (Not really sure if this is needed, but I guess I shouldnt remove it) |
AkulakhanBot (talk | contribs) m (Link fixes) |
||
| (42 intermediate revisions by 23 users not shown) | |||
| Line 1: | Line 1: | ||
| + | {{WikiaVideos}} |
||
{{SkyrimQuests |
{{SkyrimQuests |
||
|image = Forbidden Legend - Gauldurson Brothers.png |
|image = Forbidden Legend - Gauldurson Brothers.png |
||
| + | |caption = The three Gauldurson brothers in spectral form. |
||
| − | |questgiver = |
+ | |questgiver = [[Gauldur Amulet Fragment]]<br />''[[Lost Legends]]''<br />''[[Writ of Sealing]]'' |
|location = [[Folgunthur]]<br />[[Saarthal]]<br />[[Geirmund's Hall (Skyrim)|Geirmund's Hall]]<br />[[Reachwater Rock]] |
|location = [[Folgunthur]]<br />[[Saarthal]]<br />[[Geirmund's Hall (Skyrim)|Geirmund's Hall]]<br />[[Reachwater Rock]] |
||
| + | |prereq = |
||
| − | |prereq = Read [[Lost Legends]]<br />[[Under Saarthal]]<br />Explore [[Geirmund's Hall (Skyrim)|Geirmund's Hall]] or [[Folgunthur]] |
||
|reward = [[The Gauldur Amulet]]<br />[[Staff of Jyrik Gauldurson]]<br />[[Gauldur Blackblade]]<br />[[Gauldur Blackbow]] |
|reward = [[The Gauldur Amulet]]<br />[[Staff of Jyrik Gauldurson]]<br />[[Gauldur Blackblade]]<br />[[Gauldur Blackbow]] |
||
| + | |type = [[Side Quests (Skyrim)|Side quest]] |
||
|QuestID = dunGauldursonQST |
|QuestID = dunGauldursonQST |
||
| − | }} |
+ | }} |
| + | {{Quote|Condemned by your crimes against realm and lord.<br />May your name and your deeds be forever forgotten.<br />And the charm which your bear be sealed by our ward.|''[[Writ of Sealing]]''|The Elder Scrolls V: Skyrim}} |
||
| − | '''Forbidden Legend''' is a [[Quests (Skyrim)|quest]] available in {{Skyrim}}. The quest details the investigation of the [[Gauldur]] legend, and the finding and forging of the long lost, ancient [[Gauldur Amulet]]. |
||
| + | '''Forbidden Legend''' is a [[Quests (Skyrim)|quest]] available in {{Skyrim}} in which the [[Last Dragonborn|Dragonborn]] must recover the separated [[Gauldur Amulet Fragment|fragments]] of [[The Gauldur Amulet]] from various Ancient [[Nord]] [[ruins]] to be reforged and defeat the bound spirits of the sons of [[Arch-Mage]] [[Gauldur]]. The quest has the [[Last Dragonborn|Dragonborn]] adventuring across [[Skyrim]], exploring the [[Nordic Tombs]] of [[Folgunthur]], [[Geirmund's Hall (Skyrim)|Geirmund's Hall]], [[Saarthal]], and [[Reachwater Rock]]. |
||
| − | |||
| − | The quest has the [[Last Dragonborn|Dragonborn]] adventuring across [[Skyrim]], exploring the [[Nordic Tombs]] of [[Folgunthur]], [[Geirmund's Hall (Skyrim)|Geirmund's Hall]], [[Saarthal]], and [[Reachwater Rock]]. |
||
==Background== |
==Background== |
||
| − | <div class="blockquote">'' |
+ | <div class="blockquote-half">''Long ago, the Archmage Gauldur was murdered, and his three sons were hunted down by King Herald's personal battlemage. The entire incident was covered up, their names struck from every record. But the legend survived. Perhaps someone still knows the truth of this ancient tale.''</div> |
| − | |||
| ⚫ | |||
| − | |||
| − | A great chase ensued, from the wilds of the Reach to the glacial north. One brother is said to have perished in the ruins of [[Folgunthur]], at the Foot of [[Solitude (Skyrim)|Solitude]]. The others were run to ground soon thereafter. And once it was done, King Harald ordered every record of their murders destroyed, and Gauldur's name and deeds were struck from the rolls of history. |
||
==Objectives== |
==Objectives== |
||
| − | + | #Investigate the cryptic message |
|
| − | + | #Investigate the Gauldur legend |
|
| − | + | #Learn the truth from Daynas Valen |
|
| − | + | #Read Daynas Valen's notes |
|
| − | + | #Find the Gauldur Amulet fragment in Saarthal |
|
| − | + | #Find the Gauldur Amulet fragment in Folgunthur |
|
| − | + | #Find the Gauldur Amulet fragment in Geirmund's Hall |
|
| − | + | #Reforge the Gauldur Amulet |
|
| − | + | #Take the Gauldur Amulet |
|
==Walkthrough== |
==Walkthrough== |
||
| − | This quest can be started by reading the book "[[Lost Legends]]" found throughout Skyrim. The article [[Lost Legends locations]] has more information on their locations. A copy can be found on a dead adventurer's body in Reachwater Rock where part of this quest takes place. The quest can also be activated by reading a [[Writ of Sealing]] in any of the burial locations. |
+ | This quest can be started by reading the book "''[[Lost Legends]]''" found throughout Skyrim. The article [[Lost Legends locations]] has more information on their locations. A copy can be found on a dead adventurer's body in Reachwater Rock where part of this quest takes place. The quest can also be activated by reading a [[Writ of Sealing]] in any of the burial locations. |
| + | |||
| ⚫ | The quest details the investigation of the Gauldur legend, and the finding and forging of the long lost, ancient [[Gauldur Amulet]]. When the three sons of Gauldur divided the amulet amongst themselves, they immediately began sacking various settlements around Skyrim. This attracted the attention of the High King Harald of Skyrim, which caused him to send his best warriors and his personal battlemage [[Lord Geirmund]]. After the defeat of the three sons, Harald ordered every record of their murders destroyed and Gauldur's name and deeds were struck from history, with only fragmented stories left behind. |
||
===Investigate the Gauldur Legend=== |
===Investigate the Gauldur Legend=== |
||
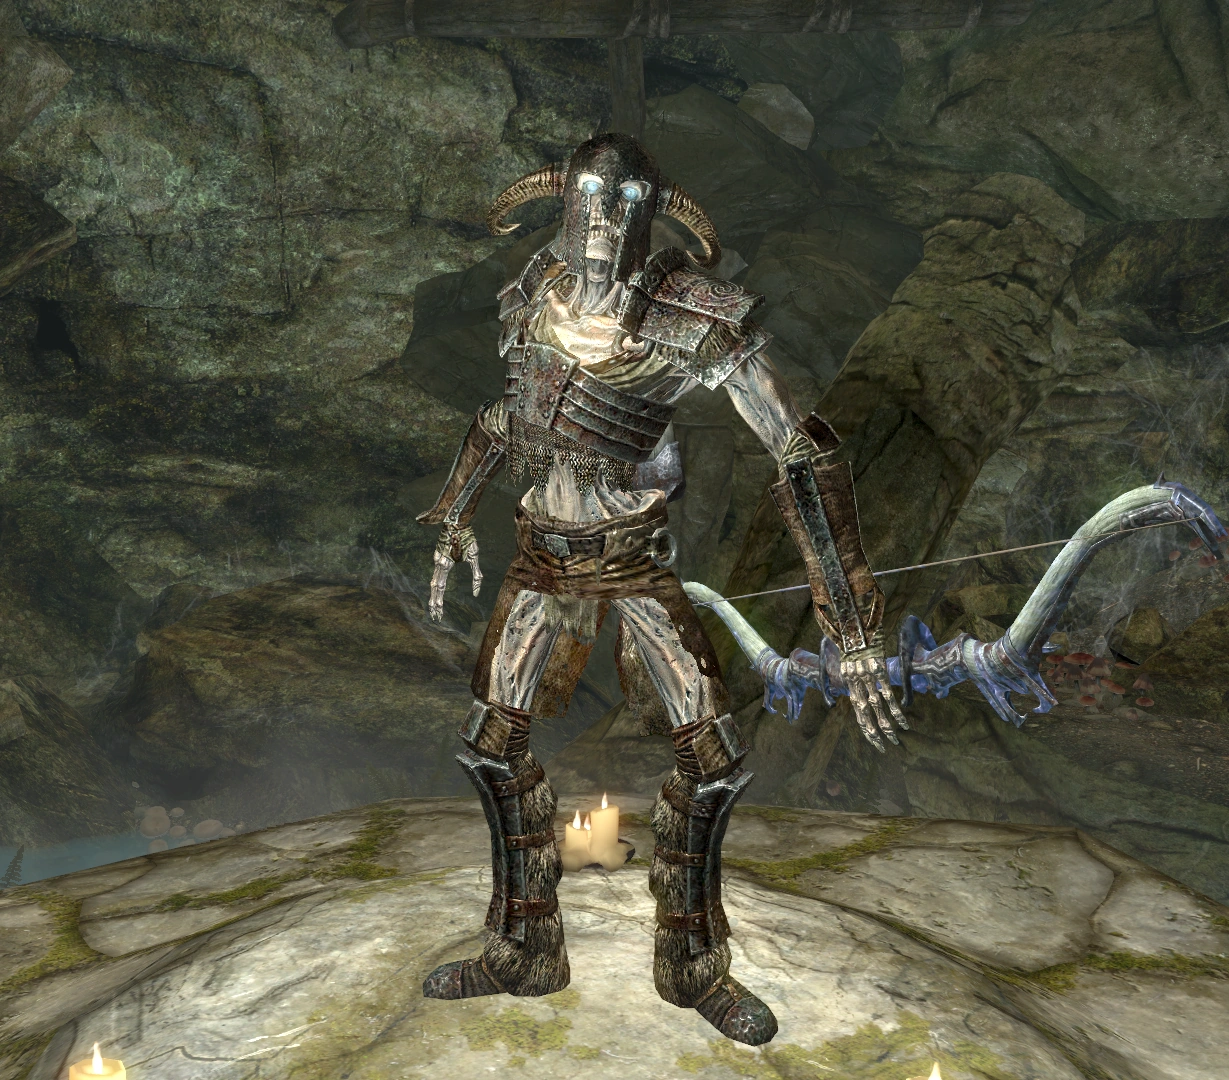
| − | [[File:Folgunthur Mikrul.png|Mikrul Gauldurson|thumb]] |
+ | [[File:Folgunthur Mikrul.png|Mikrul Gauldurson.|thumb]] |
The quest begins in [[Folgunthur]] by reading the [[Daynas Valen's Journal|journal]] of [[Daynas Valen]], which is located under a tent in the camp outside of the tomb. The journal tells of his travels with the [[Ivory Dragon Claw]], and his time on a passenger ship from the city of [[Anvil]] in [[Cyrodiil]] to [[Skyrim]]. He traveled to Folgunthur with two adventurers that he met on the boat, looking for the fragments of the amulet. |
The quest begins in [[Folgunthur]] by reading the [[Daynas Valen's Journal|journal]] of [[Daynas Valen]], which is located under a tent in the camp outside of the tomb. The journal tells of his travels with the [[Ivory Dragon Claw]], and his time on a passenger ship from the city of [[Anvil]] in [[Cyrodiil]] to [[Skyrim]]. He traveled to Folgunthur with two adventurers that he met on the boat, looking for the fragments of the amulet. |
||
| Line 42: | Line 42: | ||
The bridge can be crossed by activating the keyhole. Once across and having avoided the traps and draugr, the Dragonborn will come to a gate with four levers. The path can be opened by activating the two on the right starting with the one nearest the gate, then the lever on the left furthest from the gate, the left lever closest to the gate, then finally the one on the right closest to the gate again. Past the gates, the path goes down stairs, then northeast across a set of stairs where there is a falling boulder trap. |
The bridge can be crossed by activating the keyhole. Once across and having avoided the traps and draugr, the Dragonborn will come to a gate with four levers. The path can be opened by activating the two on the right starting with the one nearest the gate, then the lever on the left furthest from the gate, the left lever closest to the gate, then finally the one on the right closest to the gate again. Past the gates, the path goes down stairs, then northeast across a set of stairs where there is a falling boulder trap. |
||
| − | The path continues to a room with two thrones. The lever to the left of the leftmost throne opens the door to the room with pillars to unlock the grille covering a staircase (from the left, Hawk-Whale-Snake) plus a soul gem trap. The chain pull in the previous room finishes the job. Down the stairs are two [[Frostbite Spider (Skyrim)| |
+ | The path continues to a room with two thrones. The lever to the left of the leftmost throne opens the door to the room with pillars to unlock the grille covering a staircase (from the left, Hawk-Whale-Snake) plus a soul gem trap. The chain pull in the previous room finishes the job. Down the stairs are two [[Frostbite Spider (Skyrim)|frostbite spiders]]. Ahead will be a dragon claw puzzle door, but there will be several draugr in crypts on either side. The combination to the puzzle, top to bottom, is Hawk-Hawk-Dragon. Inside is a door to Folgunthur Crypt. |
| − | Beyond that door is [[Mikrul Gauldurson]], one of the easier Gauldur brothers as he has no special skills that separate him from a regular leveled draugr. However, he does have a small contingent of leveled draugr thralls who will attack the Dragonborn upon Mikrul's awakening. They all die, though, as soon as he is killed. A [[Gauldur Amulet Fragment]] and enchanted sword, [[Gauldur Blackblade]], are on his corpse. Afterwards, the claw can be used to gain access to the two rooms on the back wall. The one to the right has a chest with leveled loot and a [[Word Wall]] for [[Frost Breath]]. A door to the right of the word wall provides an exit back to Folgunthur. |
+ | Beyond that door is [[Mikrul Gauldurson]], one of the easier Gauldur brothers as he has no special skills that separate him from a regular leveled draugr. However, he does have a small contingent of leveled draugr thralls who will attack the Dragonborn upon Mikrul's awakening. They all die, though, as soon as he is killed. A [[Gauldur Amulet Fragment]] and enchanted sword, [[Gauldur Blackblade]], are on his corpse. Afterwards, the claw can be used to gain access to the two rooms on the back wall. The one to the right has a chest with leveled loot and a [[Word Wall (Skyrim)|Word Wall]] for [[Frost Breath]]. A door to the right of the word wall provides an exit back to Folgunthur. |
===Find the Gauldur Amulet Fragment in Saarthal=== |
===Find the Gauldur Amulet Fragment in Saarthal=== |
||
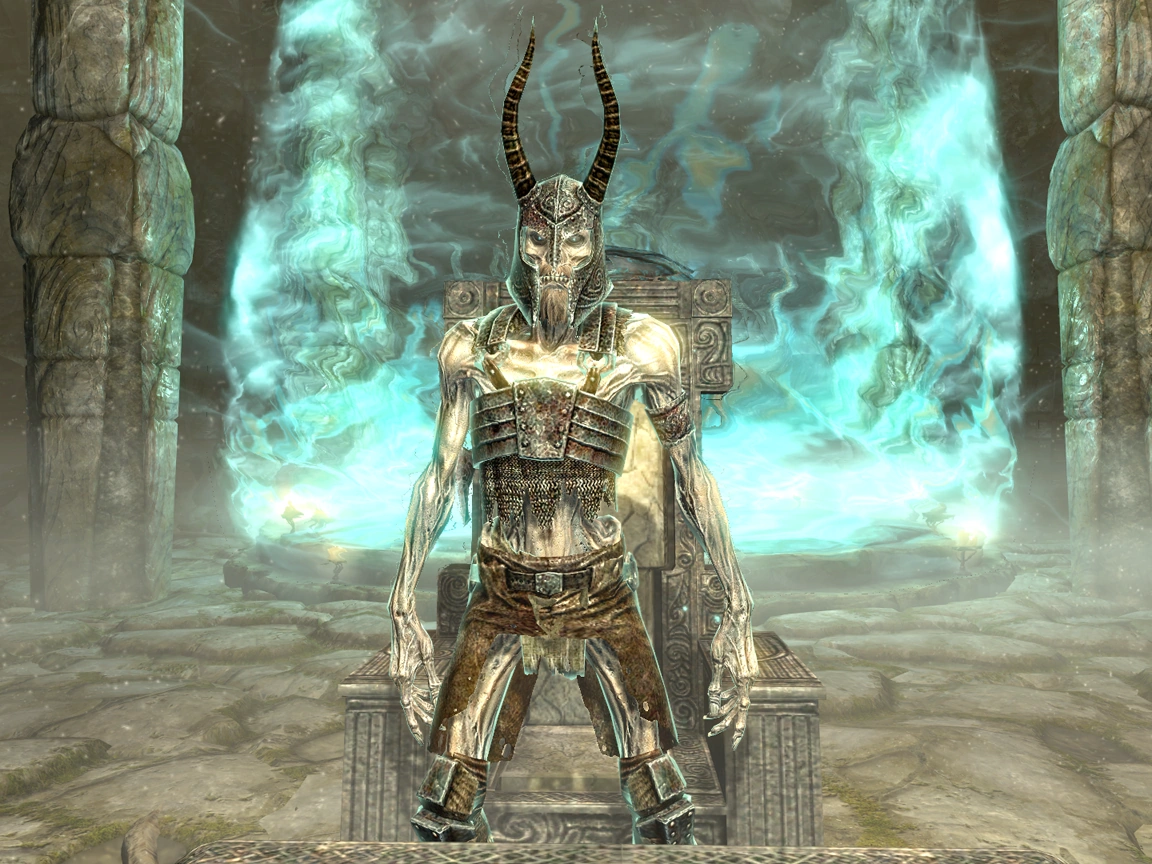
| − | [[File:Saarthal Jyrik 2.png|Jyrik Gauldurson|thumb]] |
+ | [[File:Saarthal Jyrik 2.png|Jyrik Gauldurson.|thumb]] |
| − | In order to gain access to the excavation site, the Dragonborn must first begin the quest [[Under Saarthal]]. This quest is attained by joining the [[College of Winterhold (Skyrim)|College of Winterhold]]. If the Dragonborn is not skilled with magic it may be best to not join until prompted by the quest [[Elder Knowledge]] as this will only require a demonstration of the [[Voice]] to join the college (after asking her if an exception may be made for being |
+ | In order to gain access to the excavation site, the Dragonborn must first begin the quest "[[Under Saarthal]]." This quest is attained by joining the [[College of Winterhold (Skyrim)|College of Winterhold]]. If the Dragonborn is not skilled with magic it may be best to not join until prompted by the quest "[[Elder Knowledge]]" as this will only require a demonstration of the [[Voice]] to join the college (after asking her if an exception may be made for being the Dragonborn). After completing the very short quest "[[First Lessons]]," [[Tolfdir (Skyrim)|Tolfdir]] will give the quest Under Saarthal. |
| − | At this point, the Under Saarthal quest should be followed. Tolfdir should be followed into the excavation site. He will be available for most of the dungeon. He will be missing for a short stretch where he leaves after defeating a room full of draugr, but will return right before Dragonborn discovers the antechamber with Jyrik and The Eye of Magnus inside. [[Jyrik Gauldurson|Jyrik]], who is in Saarthal by the orb, should be defeated and his [[Writ of Sealing]] and [[Gauldur Amulet Fragment]] taken. |
+ | At this point, the Under Saarthal quest should be followed. Tolfdir should be followed into the excavation site. He will be available for most of the dungeon. He will be missing for a short stretch where he leaves after defeating a room full of draugr, but will return right before the Dragonborn discovers the antechamber with Jyrik and The Eye of Magnus inside. [[Jyrik Gauldurson|Jyrik]], who is in Saarthal by the orb, should be defeated and his [[Writ of Sealing]] and [[Gauldur Amulet Fragment]] taken. Do not forget to claim the [[Staff of Jyrik Gauldurson]] on the table in front of Jyrik's throne before it can be sent bouncing around the room by Tolfdir when he first tries to attack Jyrik. |
| − | A mage can defeat him by watching the elemental cloud around him as it changes randomly between storm, frost, and fire, and not using the element that is cloaking him as he will resist the attack. Warriors may treat him like a draugr scourge lord, or another draugr mage. Reading the writ will start the next quest point. The next clue about the origin of the Gauldur Amulet Fragment (if needed) can be found in |
+ | A mage can defeat him by watching the elemental cloud around him as it changes randomly between storm, frost, and fire, and not using the element that is cloaking him as he will resist the attack. Warriors may treat him like a draugr scourge lord, or another draugr mage. Reading the writ will start the next quest point. The next clue about the origin of the Gauldur Amulet Fragment (if needed) can be found in [[The Arcanaeum]] by reading the book [[Lost Legends]] (on a small table on the right hand side of the room, behind the pillars not in the middle, as the room is entered). |
===Find the Gauldur Amulet Fragment in Geirmund's Hall=== |
===Find the Gauldur Amulet Fragment in Geirmund's Hall=== |
||
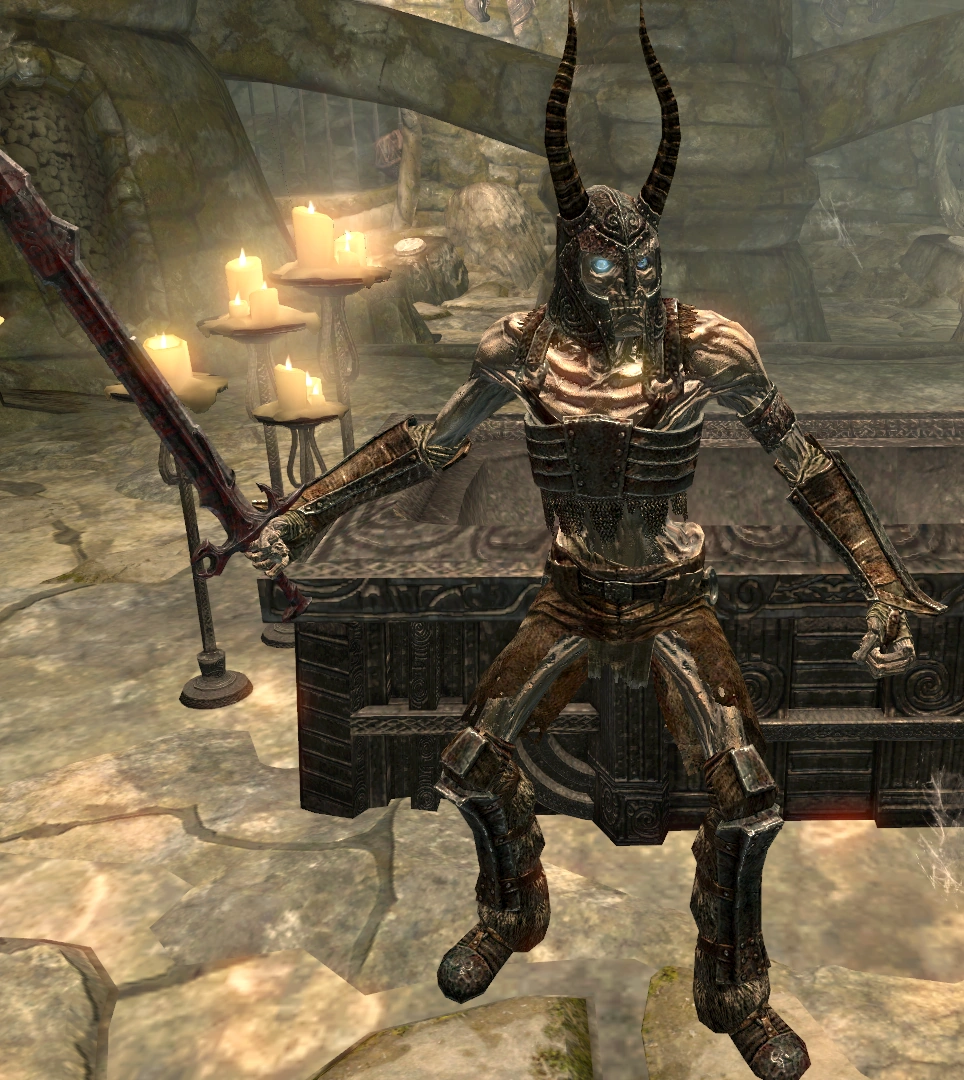
| − | [[File:Geirmund's Hall Sigdis.png|Sigdis Gauldurson|thumb]] |
+ | [[File:Geirmund's Hall Sigdis.png|Sigdis Gauldurson.|thumb]] |
| − | [[Geirmund's Hall (Skyrim)|Geirmund's Hall]] is a dungeon close to [[Ivarstead (Skyrim)|Ivarstead]], grave of the hero [[Geirmund]]. There is a large hole in the ground against the eastern wall. At the bottom is an underwater alcove, with a chest and a Potion of Waterbreathing at the southern end. Up the wooden ramp is an iron door. Behind it are two frostbite spiders and an adept-locked door with leveled loot behind it. To south and then west, check behind you for a chest. Before opening, disarm the trap or stand to the side of the chest to avoid the fire. Continuing, you will find a set of steps that lead down to a water-filled room with a pillar puzzle and some draugr |
+ | [[Geirmund's Hall (Skyrim)|Geirmund's Hall]] is a dungeon close to [[Ivarstead (Skyrim)|Ivarstead]], grave of the hero [[Geirmund]]. There is a large hole in the ground against the eastern wall. At the bottom is an underwater alcove, with a chest and a Potion of Waterbreathing at the southern end. Up the wooden ramp is an iron door. Behind it are two frostbite spiders and an adept-locked door with leveled loot behind it. To the south and then west, check behind you for a chest. Before opening, disarm the trap or stand to the side of the chest to avoid the fire. Beware of the plate triggering a dart trap. Continuing, you will find a set of steps that lead down to a water-filled room with a pillar puzzle and some draugr. Halfway down the water room is a table with a soul gem – taking it releases a swinging mammoth skull trap. To unlock the puzzle, the order of the pillars starting from the first is hawk, whale, snake, whale. Once the pillars are in place, the lever by the gate opens the door. |
| − | The next room contains several more draugr. After climbing the wooden ramp, immediately to the right is an altar with the body of Geirmund holding a key. The door opposite Geirmund's resting place leads to an [[Arcane Enchanter (Skyrim)|Arcane Enchanter]] plus a draugr and a frostbite spider. There are stairs up to the right, but they lead to a blocked path. The path to the left leads to a strong leveled draugr. After that is a dead end and a lever on the ground which will trigger a trap if activated. However, behind that lever on the |
+ | The next room contains several more draugr. After climbing the wooden ramp, immediately to the right is an altar with the body of Geirmund holding a key. The door opposite Geirmund's resting place leads to an [[Arcane Enchanter (Skyrim)|Arcane Enchanter]] plus a draugr and a frostbite spider. There are stairs up to the right, but they lead to a blocked path. The path to the left leads to a strong leveled draugr. After that is a dead end and a lever on the ground which will trigger a trap if activated. However, behind that lever on the right-hand side is another lever on the wall. Activating that one will cause the drawbridge to drop. |
| − | Across it is another lever that will drop another drawbridge with draugr on the other side. |
+ | Across it is another lever that will drop another drawbridge with draugr on the other side. Next is a swinging pendulum trap with a draugr on the other side, who can be dispatched by shooting him with an arrow through the pendulums – he will attempt to come through the pendulums, and will be killed. |
| − | [[File:Geirmund's Hall Sigdis Clones.png|Sigdis and his clones|thumb]] |
+ | [[File:Geirmund's Hall Sigdis Clones.png|Sigdis and his clones.|thumb]] |
The final room is water-filed, with wooden ramps leading to the crypt for [[Sigdis Gauldurson]], arguably the hardest of the three sons to kill. There are four sigils on the ground in the cave. He will frequently teleport to whichever one is farthest from the Dragonborn and make two copies of himself. All three will attack the Dragonborn, including using Shouts like [[Unrelenting Force (Skyrim)|Unrelenting Force]] (which will knock the Dragonborn over whether or not any bonuses for the Unrelenting Force shout are active) and, at higher levels, Disarm. The easiest way to attack him is with stealth and ranged attacks. |
The final room is water-filed, with wooden ramps leading to the crypt for [[Sigdis Gauldurson]], arguably the hardest of the three sons to kill. There are four sigils on the ground in the cave. He will frequently teleport to whichever one is farthest from the Dragonborn and make two copies of himself. All three will attack the Dragonborn, including using Shouts like [[Unrelenting Force (Skyrim)|Unrelenting Force]] (which will knock the Dragonborn over whether or not any bonuses for the Unrelenting Force shout are active) and, at higher levels, Disarm. The easiest way to attack him is with stealth and ranged attacks. |
||
| Line 68: | Line 68: | ||
===Reforge the Gauldur Amulet=== |
===Reforge the Gauldur Amulet=== |
||
| − | After all of the fragments have been collected, the quest continues in [[Reachwater Rock]], near [[Karthspire]]. Inside, there is a dead Adventurer near the [[Emerald Dragon Claw]], on a pedestal along with a note warning would-be explorers away from the site. Further up the path is a claw door, which can be unlocked |
+ | After all of the fragments have been collected, the quest continues in [[Reachwater Rock]], near [[Karthspire]]. Inside, there is a dead Adventurer near the [[Emerald Dragon Claw]], on a pedestal along with a [[Ancient Edict|note]] warning would-be explorers to stay away from the site. Further up the path is a claw door, which can be unlocked by rotating the rings to match the combination inscribed on the palm of the Emerald Claw: '''Bear, Whale, Snake''' (from the top down). Insert the claw in the keyhole and the door will open, along with three similar doors further ahead. Inside is yet another claw door, this time using the combination of the [[Ivory Dragon Claw]]: '''Hawk, Hawk, Dragon''' (again, from the top down). |
Further inside will be a large room with a table with three amulet pedestals. Placing the three amulet fragments on each of the pedestals will make the ghosts of each son appear, each of whom the Dragonborn will have to fight in turn. |
Further inside will be a large room with a table with three amulet pedestals. Placing the three amulet fragments on each of the pedestals will make the ghosts of each son appear, each of whom the Dragonborn will have to fight in turn. |
||
| − | First will be Mikrul, who again can be faced as a leveled draugr with a small horde. The draugr he commands will not stop attacking until Mikrul is defeated |
+ | First will be Mikrul, who again can be faced as a leveled draugr with a small horde of draugr thralls. The draugr he commands will not stop attacking until Mikrul is defeated. |
| − | Sigdis will use the same tactics as before, disappearing and reappearing to shoot arrows at the Dragonborn, using four out of the six possible locations, and using shouts occasionally. Every time he teleports, the battle temporarily stops, which allows restoration of health and saving the game. The real Sigdis has a slightly different helmet model ( |
+ | Sigdis will use the same tactics as before, disappearing and reappearing to shoot arrows at the Dragonborn, using four out of the six possible locations, and using shouts occasionally. Every time he teleports, the battle temporarily stops, which allows restoration of health and saving the game. The real Sigdis has a slightly different helmet model (Ancient Nord Helmet) than his clones (Helm of Yngol), and his clones will always have full health, and be surrounded by a slightly bluish glow. |
| − | After Sigdis, Jyrik will appear, occasionally teleporting around the room. |
+ | After Sigdis, Jyrik will appear, occasionally teleporting around the room and using the same elemental cloaking tactic he used back in Saarthal while Tolfdir dealt with the Eye of Magnus. Defeat him using physical attacks or Destruction magic that does not match his elemental cloak. |
| − | Once all three sons have been defeated, they will reappear as ghosts above the pedestal. As they look to take the Dragonborn on three against one, their father appears and banishes them. Archmage Gauldur will then reforge the [[Gauldur Amulet Fragment]]s into [[The Gauldur Amulet]], a necklace that grants +30 to health, magicka, and stamina. |
+ | Once all three sons have been defeated, they will reappear as ghosts above the pedestal. As they look to take the Dragonborn on three against one, their father appears and banishes them, with Sigdis commenting on realizing their father has awoken before Gauldur's sarcophagus bursts open and unleashes the spell to send them to Oblivion. Archmage Gauldur will then reforge the [[Gauldur Amulet Fragment]]s into [[The Gauldur Amulet]], a necklace that grants +30 to health, magicka, and stamina. |
| − | Gauldur's skeleton, in the crypt behind the table with the pedestals, holds a decent amount of money. Additionally, the Ghosts' use of Unrelenting Force may cause one to get stuck on the platform that the Ghosts who |
+ | Gauldur's skeleton, in the crypt behind the table with the pedestals, holds a decent amount of money. Additionally, the Ghosts' use of Unrelenting Force may cause one to get stuck on the platform that the Ghosts who have not yet fought are on – this may cause them to not be able to get back down. |
After the three sons have been banished, there is an area that opens behind the pathway that you last entered. This area contains a chest and some items surrounding the chest. |
After the three sons have been banished, there is an area that opens behind the pathway that you last entered. This area contains a chest and some items surrounding the chest. |
||
| − | == |
+ | ===Rewards=== |
*[[The Gauldur Amulet]] |
*[[The Gauldur Amulet]] |
||
*[[Staff of Jyrik Gauldurson]] |
*[[Staff of Jyrik Gauldurson]] |
||
*[[Gauldur Blackblade]] |
*[[Gauldur Blackblade]] |
||
*[[Gauldur Blackbow]] |
*[[Gauldur Blackbow]] |
||
| − | * |
+ | *A treasure chest at the bottom of the pool when you first enter the cavern located just below the dead Adventurer. |
| + | *Various chests and loot: |
||
| − | *There are some good chests/loot to be found when exiting the cave. The locations are: |
||
| − | * |
+ | **At the entrance to Gauldur's grave, there is a false wall which leads to some leveled loot with the wall automatically unveiling itself upon clearing the dungeon |
| − | * |
+ | **An adept-locked chest containing leveled loot and potions in the chamber where the Emerald Dragon Claw was found with the chest atop a pillar (using [[Whirlwind Sprint]] may be necessary in order to reach the platform) |
| − | * |
+ | **A [[Giant (Skyrim)|giant]] floating in Arriva's bog and an [[Iron Shield (Skyrim)|iron shield]] in the water, just under a floating skeleton |
| − | * |
+ | **An adept-locked chest in the water below the pillar in Reachwater Rock |
| − | * |
+ | **An [[Orichalcum Ore (Skyrim)|orichalcum ore]] vein east of the dead adventurer, next to a torch by some mushrooms |
| − | * |
+ | **A chest in the water in Reachwater Rock |
==Journal== |
==Journal== |
||
{|class="skqtable" |
{|class="skqtable" |
||
| + | !colspan="2"|Forbidden Legend – dunGauldursonQST |
||
| ⚫ | |||
| + | |- |
||
| ⚫ | |||
| + | |- |
||
| ⚫ | |||
| ⚫ | |||
| + | |- |
||
| ⚫ | |||
| ⚫ | |||
| + | |- |
||
| + | |align="center"|8||''In Geirmund's Hall, I found a cryptic message on the body of a powerful Draugr, condemning him for his ancient crimes. What was his story? Why was he entombed with a broken amulet?'' |
||
| + | *'''Objective 6:''' Investigate the cryptic message |
||
| + | |- |
||
| + | |align="center"|9||''In Saarthal, I found a cryptic message on the body of a powerful Draugr, condemning him for his ancient crimes. What was his story? Why was he entombed with a broken amulet?'' |
||
| + | *'''Objective 6:''' Investigate the cryptic message |
||
|- |
|- |
||
| ⚫ | |align="center"|10||''Long ago, the Archmage Gauldur was murdered, and his three sons were hunted down by King Herald's personal battlemage. The entire incident was covered up, their names struck from every record. But the legend survived. Perhapse someone still knows the truth of this ancient tale.'' |
||
| ⚫ | |||
| − | *'''Objective:''' Investigate the |
+ | *'''Objective 10:''' Investigate the Gauldur legend |
| ⚫ | |||
| + | *'''Objective 21:''' Read Daynas Valen's notes |
||
|- |
|- |
||
| − | |''Long ago, the Archmage Gauldur was murdered, and his three |
+ | |align="center"|20||''Long ago, the Archmage Gauldur was murdered, and his three soms where hunted down by King Harald's personal battlemage. The mage Daynas Valen spent his life searching for the truth of this tale, and came to Folgunthur with the key needed to unlock its secret.'' |
| − | *'''Objective:''' |
+ | *'''Objective 20:''' Learn the truth from Daynas Valen |
| + | *'''Objective 21:''' Read Daynas Valen's notes |
||
|- |
|- |
||
| + | |align="center"|21|| |
||
| ⚫ | |||
| − | *'''Objective:''' |
+ | *'''Objective 21:''' Read Daynas Valen's notes |
| ⚫ | |||
|- |
|- |
||
| − | |''Long ago, the Archmage Gauldur was murdered by his three sons, who stole his amulet of power and divided it among themselves. The brothers were hunted down in secret and sealed in tombs across Skyrim. To reclaim the amulet, I will need to seek out their final resting places.'' |
+ | |align="center"|30||''Long ago, the Archmage Gauldur was murdered by his three sons, who stole his amulet of power and divided it among themselves. The brothers were hunted down in secret and sealed in tombs across Skyrim. To reclaim the amulet, I will need to seek out their final resting places.'' |
| ⚫ | |||
| ⚫ | |||
| + | *'''Objective 33:''' find the Gauldur Amulet Fragment in Saarthal |
||
| + | *'''Objective 100:''' Reforge the Gauldur Amulet |
||
|- |
|- |
||
| ⚫ | |||
| ⚫ | |||
| − | *'''Objective:''' |
+ | *'''Objective 100:''' Reforge the Gauldur Amulet |
| ⚫ | |||
| ⚫ | |||
|- |
|- |
||
| − | |''Long ago, the Archmage Gauldur was murdered by his three sons, who stole his amulet of power and divided it among themselves. I |
+ | |align="center"|105||''Long ago, the Archmage Gauldur was murdered by his three sons, who stole his amulet of power and divided it among themselves. I collected the fragments of the shattered amulet and brought them to Gauldur's tomb, where the ghosts of the three brothers ambushed me.'' |
| ⚫ | |||
|- |
|- |
||
| − | |''Long ago, the Archmage Gauldur was murdered by his three sons, who stole his amulet of power and divided it among themselves. I |
+ | |align="center"|150||''Long ago, the Archmage Gauldur was murdered by his three sons, who stole his amulet of power and divided it among themselves. I defeated the undead brothers, located the fragments of the shattered amulet, and forged it anew in gauldur's tomb.'' |
| + | *'''Objective 150:''' Take the Gauldur Amulet |
||
|- |
|- |
||
| + | |align="center"|255|| |
||
| ⚫ | |||
| ⚫ | |||
| ⚫ | |||
| ⚫ | |||
|} |
|} |
||
==Gallery== |
==Gallery== |
||
| + | <gallery> |
||
| − | <gallery spacing="small" widths="175" orientation="landscape"> |
||
| − | Folgunthur Daynas Valen.png|Daynas Valen |
+ | Folgunthur Daynas Valen.png|Daynas Valen. |
| − | Folgunthur Dragur Puzzle Room.png|Puzzle Room |
+ | Folgunthur Dragur Puzzle Room.png|Puzzle Room. |
</gallery> |
</gallery> |
||
==Trivia== |
==Trivia== |
||
*If the Dragonborn has a healthy supply of empty petty soul gems, a bow with soul trap and good sneak skill, the clones can be farmed to gather a good number of souls. |
*If the Dragonborn has a healthy supply of empty petty soul gems, a bow with soul trap and good sneak skill, the clones can be farmed to gather a good number of souls. |
||
| − | *Sigdis Gauldurson uses both |
+ | *Sigdis Gauldurson uses both [[Unrelenting Force (Skyrim)|Unrelenting Force]] and [[Disarm]], making him the most difficult to fight. |
*Falling down the hole again while exiting the dungeon will require going through the entire dungeon again to escape. |
*Falling down the hole again while exiting the dungeon will require going through the entire dungeon again to escape. |
||
*This quest can only be completed if the Dragonborn joins the [[College of Winterhold (Skyrim)|College of Winterhold]]. |
*This quest can only be completed if the Dragonborn joins the [[College of Winterhold (Skyrim)|College of Winterhold]]. |
||
| Line 146: | Line 163: | ||
*Folgunthur is the only tomb not to be directly mentioned by someone else. |
*Folgunthur is the only tomb not to be directly mentioned by someone else. |
||
*Geirmund's Hall and Reachwater Rock are the only tombs not to feature Word Walls. In addition, they both feature only one internal area. |
*Geirmund's Hall and Reachwater Rock are the only tombs not to feature Word Walls. In addition, they both feature only one internal area. |
||
| − | *Finding the Gauldur Amulet Fragment in Saarthal during the quest [[Under Saarthal]] for the College of Winterhold can also start the quest without needing to read Lost Legends or a Writ of Sealing. |
+ | *Finding the Gauldur Amulet Fragment in Saarthal during the quest "[[Under Saarthal]]" for the College of Winterhold can also start the quest without needing to read Lost Legends or a Writ of Sealing. |
==Bugs== |
==Bugs== |
||
| Line 154: | Line 171: | ||
|- |
|- |
||
| |
| |
||
| − | *Reading the note before the quest was obtained will make further progress impossible. Subsequently reading the Writ does nothing. The only known way to fix the quest (if it was obtained by killing Jyrik) is to obtain a copy of "Lost Legends" and read it. Then the quest will progress correctly. |
+ | *Reading the note before the quest was obtained will make further progress impossible. Subsequently, reading the Writ does nothing. The only known way to fix the quest (if it was obtained by killing Jyrik) is to obtain a copy of "Lost Legends" and read it. Then the quest will progress correctly. |
*During explorations, if [[Daynas Valen]] is located, he will be immediately hostile even if the quest has not yet begun. Once the quest has begun, despite killing him at his house, Daynas's body will be in the ruin where his journal and the claw can be found. |
*During explorations, if [[Daynas Valen]] is located, he will be immediately hostile even if the quest has not yet begun. Once the quest has begun, despite killing him at his house, Daynas's body will be in the ruin where his journal and the claw can be found. |
||
| − | *{{PS3}} In the attempt to access the shout within the Folgunthur Crypt, after killing [[Mikrul Gauldurson]] and the other Draugr thralls, the [[Word Wall]] march music may be heard without a shout being granted. Reloading does not fix this bug. |
+ | *{{PS3}} In the attempt to access the shout within the Folgunthur Crypt, after killing [[Mikrul Gauldurson]] and the other Draugr thralls, the [[Word Wall (Skyrim)|Word Wall]] march music may be heard without a shout being granted. Reloading does not fix this bug. |
*{{XBOX360}} Occasionally the pillar puzzle in [[Geirmund's Hall (Skyrim)|Geirmund's Hall]] will not work. There is no known method of fixing this. A reload is recommended. |
*{{XBOX360}} Occasionally the pillar puzzle in [[Geirmund's Hall (Skyrim)|Geirmund's Hall]] will not work. There is no known method of fixing this. A reload is recommended. |
||
**Update: Reload does not always work. If several attempts at reloading and retrying the pillars is not successful, restarting the quest may be required. |
**Update: Reload does not always work. If several attempts at reloading and retrying the pillars is not successful, restarting the quest may be required. |
||
| Line 165: | Line 182: | ||
*{{XBOX360}} A fix for the disappearing Sigdis Amulet is this: after completing the other steps as normal, upon return to Geirmund's Hall, the quest arrow will be pointing to the now present body of Sigdis. This may not always work. |
*{{XBOX360}} A fix for the disappearing Sigdis Amulet is this: after completing the other steps as normal, upon return to Geirmund's Hall, the quest arrow will be pointing to the now present body of Sigdis. This may not always work. |
||
*If the lair is entered with Mikrul Gauldurson already out of his tomb, there is a chance his corpse cannot be looted after killing him. The Dragonborn should reload the last save, go back to his room, and if he is out of his tomb again, simply back out of the zone and re-enter. He should be in his tomb, where he can quickly be killed and looted. |
*If the lair is entered with Mikrul Gauldurson already out of his tomb, there is a chance his corpse cannot be looted after killing him. The Dragonborn should reload the last save, go back to his room, and if he is out of his tomb again, simply back out of the zone and re-enter. He should be in his tomb, where he can quickly be killed and looted. |
||
| − | *{{XBOX360}} Sometimes Mikrul Gauldurson will be impossible to loot even when he comes out of his tomb. If this occurs, it may be resolved to killing him without sneaking, with a different weapon, such as a sword instead of a bow, or killing him last after killing the other [[Draugr (Skyrim)| |
+ | *{{XBOX360}} Sometimes Mikrul Gauldurson will be impossible to loot even when he comes out of his tomb. If this occurs, it may be resolved to killing him without sneaking, with a different weapon, such as a sword instead of a bow, or killing him last after killing the other [[Draugr (Skyrim)|draugr]]. This should make him lootable. |
*If the amulet in Saarthal is not picked up before the [[Eye of Magnus]] is moved, there is a chance it will disappear along with the corpse of Jyrik. |
*If the amulet in Saarthal is not picked up before the [[Eye of Magnus]] is moved, there is a chance it will disappear along with the corpse of Jyrik. |
||
*At a high enough level Sigdis can use the "Disarm" shout to remove the Dragonborn's equipped weapon. If the Dragonborn is standing in certain parts of the dungeon the weapon may be dropped outside the mapping making it impossible to retrieve. |
*At a high enough level Sigdis can use the "Disarm" shout to remove the Dragonborn's equipped weapon. If the Dragonborn is standing in certain parts of the dungeon the weapon may be dropped outside the mapping making it impossible to retrieve. |
||
| Line 171: | Line 188: | ||
*Killing the thralls while in the sarcophagus prevents them from spawning during the battle. |
*Killing the thralls while in the sarcophagus prevents them from spawning during the battle. |
||
*Killing or paralyzing Sigdis before he teleports for the first time, such as with a fatal sneak attack, the Paralyze spell or enchantment, or the [[Unrelenting Force (Skyrim)|Unrelenting Force]] shout, can cause him to fail to reappear or reappear paralyzed and unattackable. This makes it impossible to retrieve his Fragment. |
*Killing or paralyzing Sigdis before he teleports for the first time, such as with a fatal sneak attack, the Paralyze spell or enchantment, or the [[Unrelenting Force (Skyrim)|Unrelenting Force]] shout, can cause him to fail to reappear or reappear paralyzed and unattackable. This makes it impossible to retrieve his Fragment. |
||
| − | *Sigdis' [[Unrelenting Force (Skyrim)|Unrelenting Force]] attacks can push the Dragonborn up onto the platform where Gauldur's body sits. Once up there, the Dragonborn will not be able to come down again because they |
+ | *Sigdis' [[Unrelenting Force (Skyrim)|Unrelenting Force]] attacks can push the Dragonborn up onto the platform where Gauldur's body sits. Once up there, the Dragonborn will not be able to come down again because they will be stuck behind an invisible wall, and Sigdis will not be able to attack. Escape is possible on {{PC}} using the <code>tcl</code> console command, or by reloading a previous save. |
| − | **The Dragonborn cannot attack using arrows or melee attacks. However the quest completion can still be achieved using |
+ | **The Dragonborn cannot attack using arrows or melee attacks. However, the quest completion can still be achieved using dragon shouts to attack, such as Unrelenting Force. |
*Sigdis' Unrelenting Force can push the Dragonborn through the gate on the opposite side of the amulet pieces. This will cause the Dragonborn to be stuck there until the amulet is reforged. |
*Sigdis' Unrelenting Force can push the Dragonborn through the gate on the opposite side of the amulet pieces. This will cause the Dragonborn to be stuck there until the amulet is reforged. |
||
| − | *In case there are any problems in completing the quest, here is a list of the relevant items, for use with |
+ | *In case there are any problems in completing the quest, here is a list of the relevant items, for use with <code>player.additem</code>. |
**[[Lost Legends]]: {{ID|000ED608}} |
**[[Lost Legends]]: {{ID|000ED608}} |
||
**Sigdis's Gauldur Amulet Fragment: {{ID|0002D753}} |
**Sigdis's Gauldur Amulet Fragment: {{ID|0002D753}} |
||
| Line 185: | Line 202: | ||
*In the [[Reachwater Rock]] section (where the amulet fragments are combined), it is possible to get stuck on the platform where the defeated spirits are standing. This could prevent finishing the fight and/or collecting the completed amulet (and leaving the cave). It is best to avoid jumping up there; otherwise a reload will be needed. |
*In the [[Reachwater Rock]] section (where the amulet fragments are combined), it is possible to get stuck on the platform where the defeated spirits are standing. This could prevent finishing the fight and/or collecting the completed amulet (and leaving the cave). It is best to avoid jumping up there; otherwise a reload will be needed. |
||
*During the final battle, disintegrating any of the three brothers with a lightning spell (or killing one of them while under effect of Dawnbreaker) will cause the ash pile to reappear on the altar but the quest will not advance. This was tried by disintegrating one, two and all three. The only way to fix this is to reload a save before the disintegration. |
*During the final battle, disintegrating any of the three brothers with a lightning spell (or killing one of them while under effect of Dawnbreaker) will cause the ash pile to reappear on the altar but the quest will not advance. This was tried by disintegrating one, two and all three. The only way to fix this is to reload a save before the disintegration. |
||
| + | **Saving and reloading may fix this glitch. |
||
| − | *If the quest was received before going to the College of Winterhold, Saarthal cannot be entered until [[Tolfdir]] is listened to at the college (where he teaches a ward spell). |
+ | *If the quest was received before going to the College of Winterhold, Saarthal cannot be entered until [[Tolfdir (Skyrim)|Tolfdir]] is listened to at the college (where he teaches a ward spell). |
*If the Dragonborn chooses to travel to [[Folgunthur]] before Saarthal with Tolfdir, it is possible that the gate combination (closest on the left, farthest on the right) will be stuck and trigger the wrong gate, leaving the Dragonborn stuck. The only way to solve this is to use the lever that opens the last gate and closes the first one and then the Dragonborn must back through with the first gate closing and the rest opening. |
*If the Dragonborn chooses to travel to [[Folgunthur]] before Saarthal with Tolfdir, it is possible that the gate combination (closest on the left, farthest on the right) will be stuck and trigger the wrong gate, leaving the Dragonborn stuck. The only way to solve this is to use the lever that opens the last gate and closes the first one and then the Dragonborn must back through with the first gate closing and the rest opening. |
||
*The quest may completely disappear from the log without it being completed. No fix is known at this time, although reading "Lost Legends" may fix the quest. |
*The quest may completely disappear from the log without it being completed. No fix is known at this time, although reading "Lost Legends" may fix the quest. |
||
*If the Dragonborn is near the brothers' ghosts, the second brother fought in Reachwater cave might shout in such a way that the Dragonborn is pushed into the locked coffin. This will result in being stuck, and the only way out is to reload a saved game. |
*If the Dragonborn is near the brothers' ghosts, the second brother fought in Reachwater cave might shout in such a way that the Dragonborn is pushed into the locked coffin. This will result in being stuck, and the only way out is to reload a saved game. |
||
| ⚫ | |||
| − | *While the reforged amulet will grant an extra 30 points of Stamina, carrying capacity remains unchanged when it is equipped. |
||
| ⚫ | |||
*Occasionally, only two of the three brothers will appear as ghosts. The only way to fix is to reload before or during the battle. |
*Occasionally, only two of the three brothers will appear as ghosts. The only way to fix is to reload before or during the battle. |
||
*The Saarthal excavation site can occasionally be found with [[Jyrik Gauldurson|Jyrik]] already killed. He may be looted as normal. |
*The Saarthal excavation site can occasionally be found with [[Jyrik Gauldurson|Jyrik]] already killed. He may be looted as normal. |
||
| − | *If a bugged game does not fix itself when reading "Lost Legends" and is stuck on "Read Daynas Valen's notes |
+ | *If a bugged game does not fix itself when reading "Lost Legends" and is stuck on "Read Daynas Valen's notes," then a resolution is to just collect all other fragments from the three sons—Jyrik at Saarthal, Mikrul in Folgunthur and Sidgis in Geirmund's Hall—then go to Reachwater Rock after all of the sons and all three trials are defeated. At that point, the amulet that the Arch-mage Gauldur reforged can be taken, and the quest log will say that the notes were read, regardless if they were kept or not, and the quest is completed. |
*Sometimes when Sigdis uses Unrelenting Force it will push the Dragonborn into the water, from where it will be impossible to get out (console commands allow you to get out). He also may shout the Dragonborn into a place where it may be impossible to move at all (including console commands) |
*Sometimes when Sigdis uses Unrelenting Force it will push the Dragonborn into the water, from where it will be impossible to get out (console commands allow you to get out). He also may shout the Dragonborn into a place where it may be impossible to move at all (including console commands) |
||
*When trying to unlock the first rotary door in Reachwater Rock, using the correct combination, the door may not open. This can be fixed by entering the correct combination, then turning each ring once and using the claw again. One should repeat this until the correct combination is shown again. This may also happen with the second door. |
*When trying to unlock the first rotary door in Reachwater Rock, using the correct combination, the door may not open. This can be fixed by entering the correct combination, then turning each ring once and using the claw again. One should repeat this until the correct combination is shown again. This may also happen with the second door. |
||
Revision as of 18:42, 19 March 2020
This article contains video content produced by Fandom with some or no input from editors of The Elder Scrolls Wiki, and may not properly represent the scope of the written article below. Statements and footage within the video may be inaccurate, outdated, incomplete, or otherwise misleading to viewers.
|

|
- "Condemned by your crimes against realm and lord.
May your name and your deeds be forever forgotten.
And the charm which your bear be sealed by our ward." - ―Writ of Sealing[src]
Forbidden Legend is a quest available in The Elder Scrolls V: Skyrim in which the Dragonborn must recover the separated fragments of The Gauldur Amulet from various Ancient Nord ruins to be reforged and defeat the bound spirits of the sons of Arch-Mage Gauldur. The quest has the Dragonborn adventuring across Skyrim, exploring the Nordic Tombs of Folgunthur, Geirmund's Hall, Saarthal, and Reachwater Rock.
Background
Objectives
- Investigate the cryptic message
- Investigate the Gauldur legend
- Learn the truth from Daynas Valen
- Read Daynas Valen's notes
- Find the Gauldur Amulet fragment in Saarthal
- Find the Gauldur Amulet fragment in Folgunthur
- Find the Gauldur Amulet fragment in Geirmund's Hall
- Reforge the Gauldur Amulet
- Take the Gauldur Amulet
Walkthrough
This quest can be started by reading the book "Lost Legends" found throughout Skyrim. The article Lost Legends locations has more information on their locations. A copy can be found on a dead adventurer's body in Reachwater Rock where part of this quest takes place. The quest can also be activated by reading a Writ of Sealing in any of the burial locations.
The quest details the investigation of the Gauldur legend, and the finding and forging of the long lost, ancient Gauldur Amulet. When the three sons of Gauldur divided the amulet amongst themselves, they immediately began sacking various settlements around Skyrim. This attracted the attention of the High King Harald of Skyrim, which caused him to send his best warriors and his personal battlemage Lord Geirmund. After the defeat of the three sons, Harald ordered every record of their murders destroyed and Gauldur's name and deeds were struck from history, with only fragmented stories left behind.
Investigate the Gauldur Legend

Mikrul Gauldurson.
The quest begins in Folgunthur by reading the journal of Daynas Valen, which is located under a tent in the camp outside of the tomb. The journal tells of his travels with the Ivory Dragon Claw, and his time on a passenger ship from the city of Anvil in Cyrodiil to Skyrim. He traveled to Folgunthur with two adventurers that he met on the boat, looking for the fragments of the amulet.
Learn the Truth from Daynas Valen
Inside, past one claw keyhole is a room with puzzle pillars and another claw keyhole (all are already opened), then the corpses of draugr and Valen's compatriots. There are also spike and fire traps, and at least one live draugr. In the next large room, there are 5 draugr and draugr wight waiting to rise from their crypts. In the northeast corner of the room is a spiral staircase with a trap door in front of it. The trap door can be closed by activating the lever on the right wall of the staircase. Across the bridge at the top of the stairs, he will be lying on another claw keyhole. The Claw and his notes are on his corpse. Reading the notes activates the next three parts of the quest.
Find the Gauldur Amulet Fragment in Folgunthur
The bridge can be crossed by activating the keyhole. Once across and having avoided the traps and draugr, the Dragonborn will come to a gate with four levers. The path can be opened by activating the two on the right starting with the one nearest the gate, then the lever on the left furthest from the gate, the left lever closest to the gate, then finally the one on the right closest to the gate again. Past the gates, the path goes down stairs, then northeast across a set of stairs where there is a falling boulder trap.
The path continues to a room with two thrones. The lever to the left of the leftmost throne opens the door to the room with pillars to unlock the grille covering a staircase (from the left, Hawk-Whale-Snake) plus a soul gem trap. The chain pull in the previous room finishes the job. Down the stairs are two frostbite spiders. Ahead will be a dragon claw puzzle door, but there will be several draugr in crypts on either side. The combination to the puzzle, top to bottom, is Hawk-Hawk-Dragon. Inside is a door to Folgunthur Crypt.
Beyond that door is Mikrul Gauldurson, one of the easier Gauldur brothers as he has no special skills that separate him from a regular leveled draugr. However, he does have a small contingent of leveled draugr thralls who will attack the Dragonborn upon Mikrul's awakening. They all die, though, as soon as he is killed. A Gauldur Amulet Fragment and enchanted sword, Gauldur Blackblade, are on his corpse. Afterwards, the claw can be used to gain access to the two rooms on the back wall. The one to the right has a chest with leveled loot and a Word Wall for Frost Breath. A door to the right of the word wall provides an exit back to Folgunthur.
Find the Gauldur Amulet Fragment in Saarthal
Jyrik Gauldurson.
In order to gain access to the excavation site, the Dragonborn must first begin the quest "Under Saarthal." This quest is attained by joining the College of Winterhold. If the Dragonborn is not skilled with magic it may be best to not join until prompted by the quest "Elder Knowledge" as this will only require a demonstration of the Voice to join the college (after asking her if an exception may be made for being the Dragonborn). After completing the very short quest "First Lessons," Tolfdir will give the quest Under Saarthal.
At this point, the Under Saarthal quest should be followed. Tolfdir should be followed into the excavation site. He will be available for most of the dungeon. He will be missing for a short stretch where he leaves after defeating a room full of draugr, but will return right before the Dragonborn discovers the antechamber with Jyrik and The Eye of Magnus inside. Jyrik, who is in Saarthal by the orb, should be defeated and his Writ of Sealing and Gauldur Amulet Fragment taken. Do not forget to claim the Staff of Jyrik Gauldurson on the table in front of Jyrik's throne before it can be sent bouncing around the room by Tolfdir when he first tries to attack Jyrik.
A mage can defeat him by watching the elemental cloud around him as it changes randomly between storm, frost, and fire, and not using the element that is cloaking him as he will resist the attack. Warriors may treat him like a draugr scourge lord, or another draugr mage. Reading the writ will start the next quest point. The next clue about the origin of the Gauldur Amulet Fragment (if needed) can be found in The Arcanaeum by reading the book Lost Legends (on a small table on the right hand side of the room, behind the pillars not in the middle, as the room is entered).
Find the Gauldur Amulet Fragment in Geirmund's Hall
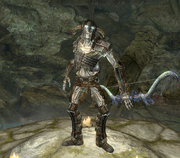
Sigdis Gauldurson.
Geirmund's Hall is a dungeon close to Ivarstead, grave of the hero Geirmund. There is a large hole in the ground against the eastern wall. At the bottom is an underwater alcove, with a chest and a Potion of Waterbreathing at the southern end. Up the wooden ramp is an iron door. Behind it are two frostbite spiders and an adept-locked door with leveled loot behind it. To the south and then west, check behind you for a chest. Before opening, disarm the trap or stand to the side of the chest to avoid the fire. Beware of the plate triggering a dart trap. Continuing, you will find a set of steps that lead down to a water-filled room with a pillar puzzle and some draugr. Halfway down the water room is a table with a soul gem – taking it releases a swinging mammoth skull trap. To unlock the puzzle, the order of the pillars starting from the first is hawk, whale, snake, whale. Once the pillars are in place, the lever by the gate opens the door.
The next room contains several more draugr. After climbing the wooden ramp, immediately to the right is an altar with the body of Geirmund holding a key. The door opposite Geirmund's resting place leads to an Arcane Enchanter plus a draugr and a frostbite spider. There are stairs up to the right, but they lead to a blocked path. The path to the left leads to a strong leveled draugr. After that is a dead end and a lever on the ground which will trigger a trap if activated. However, behind that lever on the right-hand side is another lever on the wall. Activating that one will cause the drawbridge to drop.
Across it is another lever that will drop another drawbridge with draugr on the other side. Next is a swinging pendulum trap with a draugr on the other side, who can be dispatched by shooting him with an arrow through the pendulums – he will attempt to come through the pendulums, and will be killed.

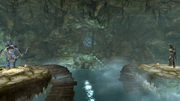
Sigdis and his clones.
The final room is water-filed, with wooden ramps leading to the crypt for Sigdis Gauldurson, arguably the hardest of the three sons to kill. There are four sigils on the ground in the cave. He will frequently teleport to whichever one is farthest from the Dragonborn and make two copies of himself. All three will attack the Dragonborn, including using Shouts like Unrelenting Force (which will knock the Dragonborn over whether or not any bonuses for the Unrelenting Force shout are active) and, at higher levels, Disarm. The easiest way to attack him is with stealth and ranged attacks.
If one of the clones is attacked, it will dissipate after one hit; after both clones have died, Sigdis will teleport away again. It is possible to tell Sigdis apart from his clones because he is the only one with the true health amount (the clones will have full health), and also by the fact that his clones will be surrounded by a bluish glow. In addition, the "real" Sigdis can be identified by being the only one wearing an Ancient Nord Helmet. His helm's decorative horns curl downwards; the horns on his clones' helmets will be curled upward. Sigdis also carries the Gauldur Blackbow. After he has been killed, the Gauldur Amulet Fragment can be looted from his corpse. Exit through the cave behind Sigdis's coffin.
Reforge the Gauldur Amulet
After all of the fragments have been collected, the quest continues in Reachwater Rock, near Karthspire. Inside, there is a dead Adventurer near the Emerald Dragon Claw, on a pedestal along with a note warning would-be explorers to stay away from the site. Further up the path is a claw door, which can be unlocked by rotating the rings to match the combination inscribed on the palm of the Emerald Claw: Bear, Whale, Snake (from the top down). Insert the claw in the keyhole and the door will open, along with three similar doors further ahead. Inside is yet another claw door, this time using the combination of the Ivory Dragon Claw: Hawk, Hawk, Dragon (again, from the top down).
Further inside will be a large room with a table with three amulet pedestals. Placing the three amulet fragments on each of the pedestals will make the ghosts of each son appear, each of whom the Dragonborn will have to fight in turn.
First will be Mikrul, who again can be faced as a leveled draugr with a small horde of draugr thralls. The draugr he commands will not stop attacking until Mikrul is defeated.
Sigdis will use the same tactics as before, disappearing and reappearing to shoot arrows at the Dragonborn, using four out of the six possible locations, and using shouts occasionally. Every time he teleports, the battle temporarily stops, which allows restoration of health and saving the game. The real Sigdis has a slightly different helmet model (Ancient Nord Helmet) than his clones (Helm of Yngol), and his clones will always have full health, and be surrounded by a slightly bluish glow.
After Sigdis, Jyrik will appear, occasionally teleporting around the room and using the same elemental cloaking tactic he used back in Saarthal while Tolfdir dealt with the Eye of Magnus. Defeat him using physical attacks or Destruction magic that does not match his elemental cloak.
Once all three sons have been defeated, they will reappear as ghosts above the pedestal. As they look to take the Dragonborn on three against one, their father appears and banishes them, with Sigdis commenting on realizing their father has awoken before Gauldur's sarcophagus bursts open and unleashes the spell to send them to Oblivion. Archmage Gauldur will then reforge the Gauldur Amulet Fragments into The Gauldur Amulet, a necklace that grants +30 to health, magicka, and stamina.
Gauldur's skeleton, in the crypt behind the table with the pedestals, holds a decent amount of money. Additionally, the Ghosts' use of Unrelenting Force may cause one to get stuck on the platform that the Ghosts who have not yet fought are on – this may cause them to not be able to get back down.
After the three sons have been banished, there is an area that opens behind the pathway that you last entered. This area contains a chest and some items surrounding the chest.
Rewards
- The Gauldur Amulet
- Staff of Jyrik Gauldurson
- Gauldur Blackblade
- Gauldur Blackbow
- A treasure chest at the bottom of the pool when you first enter the cavern located just below the dead Adventurer.
- Various chests and loot:
- At the entrance to Gauldur's grave, there is a false wall which leads to some leveled loot with the wall automatically unveiling itself upon clearing the dungeon
- An adept-locked chest containing leveled loot and potions in the chamber where the Emerald Dragon Claw was found with the chest atop a pillar (using Whirlwind Sprint may be necessary in order to reach the platform)
- A giant floating in Arriva's bog and an iron shield in the water, just under a floating skeleton
- An adept-locked chest in the water below the pillar in Reachwater Rock
- An orichalcum ore vein east of the dead adventurer, next to a torch by some mushrooms
- A chest in the water in Reachwater Rock
Journal
| Forbidden Legend – dunGauldursonQST | |
|---|---|
| ID | Journal Entry |
| 6 | In Reachwater Rock, I found a cryptic message that said the tomb here had been sealed, and should be forgotten forever. What is the story of this place?
|
| 7 | In Folgunthur, I found a cryptic message on the body of a powerful Draugr, condemning him for his ancient crimes. What was his story? Why was he entombed with a broken amulet?
|
| 8 | In Geirmund's Hall, I found a cryptic message on the body of a powerful Draugr, condemning him for his ancient crimes. What was his story? Why was he entombed with a broken amulet?
|
| 9 | In Saarthal, I found a cryptic message on the body of a powerful Draugr, condemning him for his ancient crimes. What was his story? Why was he entombed with a broken amulet?
|
| 10 | Long ago, the Archmage Gauldur was murdered, and his three sons were hunted down by King Herald's personal battlemage. The entire incident was covered up, their names struck from every record. But the legend survived. Perhapse someone still knows the truth of this ancient tale.
|
| 20 | Long ago, the Archmage Gauldur was murdered, and his three soms where hunted down by King Harald's personal battlemage. The mage Daynas Valen spent his life searching for the truth of this tale, and came to Folgunthur with the key needed to unlock its secret.
|
| 21 |
|
| 30 | Long ago, the Archmage Gauldur was murdered by his three sons, who stole his amulet of power and divided it among themselves. The brothers were hunted down in secret and sealed in tombs across Skyrim. To reclaim the amulet, I will need to seek out their final resting places.
|
| 100 | Long ago, the Archmage Gauldur was murdered by his three sons, who stole his amulet of power and divided it among themselves. I defeated the undead brothers, located the fragments of the shattered amulet, and forged it anew in Gauldur's tomb.
|
| 105 | Long ago, the Archmage Gauldur was murdered by his three sons, who stole his amulet of power and divided it among themselves. I collected the fragments of the shattered amulet and brought them to Gauldur's tomb, where the ghosts of the three brothers ambushed me. |
| 150 | Long ago, the Archmage Gauldur was murdered by his three sons, who stole his amulet of power and divided it among themselves. I defeated the undead brothers, located the fragments of the shattered amulet, and forged it anew in gauldur's tomb.
|
| 255 |
|
Gallery
")
")
Trivia
- If the Dragonborn has a healthy supply of empty petty soul gems, a bow with soul trap and good sneak skill, the clones can be farmed to gather a good number of souls.
- Sigdis Gauldurson uses both Unrelenting Force and Disarm, making him the most difficult to fight.
- Falling down the hole again while exiting the dungeon will require going through the entire dungeon again to escape.
- This quest can only be completed if the Dragonborn joins the College of Winterhold.
- At the end of the quest, when Gauldur's coffin opens, Sigdis will turn around and face the coffin and whisper "Gauldur!" before being banished along with his brothers.
- Nothing respawns in any of the dungeons, except Folgunthur, meaning items can be safely stored inside containers and will remain there if the Dragonborn wishes to return and retrieve them later.
- Geirmund's Hall is the only tomb to appear in The Elder Scrolls Online, but it appears as a town instead.
- Saarthal is the only tomb that is actually a Dungeon Lock-Out before "Under Saarthal" is started.
- Folgunthur is the only tomb not to be directly mentioned by someone else.
- Geirmund's Hall and Reachwater Rock are the only tombs not to feature Word Walls. In addition, they both feature only one internal area.
- Finding the Gauldur Amulet Fragment in Saarthal during the quest "Under Saarthal" for the College of Winterhold can also start the quest without needing to read Lost Legends or a Writ of Sealing.
Bugs
|
This section contains bugs related to Forbidden Legend. Before adding a bug to this list, consider the following:
|
| Click to show |
|---|
|