mNo edit summary |
Shockstorm (talk | contribs) mNo edit summary |
||
| (29 intermediate revisions by 11 users not shown) | |||
| Line 1: | Line 1: | ||
{{For|2=Unmarked Locations}} |
{{For|2=Unmarked Locations}} |
||
| − | '''Unmarked |
+ | '''Unmarked locations''' are places that are not marked as icons on the [[world map]] upon discovery. There are many places on the world map that are unmarked but contain treasure chests, [[Items (Skyrim)|items]], or interesting characteristics that can be easily missed by the wandering adventurer. [[Locations (Skyrim)|Locations]] like these are often [[Camps (Skyrim)|camps]], fields, [[Shacks (Skyrim)|shacks]], [[Shrines (Skyrim)|shrines]], or [[ruins]]. The following is a list of these locations for each of the [[Holds]]. |
==[[Eastmarch (Skyrim)|Eastmarch]]== |
==[[Eastmarch (Skyrim)|Eastmarch]]== |
||
| − | *[[Bonestrewn Flats|Dragon Mound: Bonestrewn |
+ | *[[Bonestrewn Flats|Dragon Mound: Bonestrewn Flats]] – Opens during "[[Dragon Rising]]." (Official guide map marker 7.L) |
*[[Kynesgrove Resurrection|Dragon Mound: Kynesgrove Resurrection]] – [[Alduin (Skyrim)|Alduin]] will resurrect the dragon [[Sahloknir]] during "[[A Blade in the Dark]]." (Official guide map marker 7.H). |
*[[Kynesgrove Resurrection|Dragon Mound: Kynesgrove Resurrection]] – [[Alduin (Skyrim)|Alduin]] will resurrect the dragon [[Sahloknir]] during "[[A Blade in the Dark]]." (Official guide map marker 7.H). |
||
*[[Dragon Mound Witchmist Grove]] – Opens during "[[The Way of the Voice]]." (Official guide map marker 7.N) |
*[[Dragon Mound Witchmist Grove]] – Opens during "[[The Way of the Voice]]." (Official guide map marker 7.N) |
||
| Line 12: | Line 12: | ||
[[File:Lucky Lorenz's Shack.png|thumb|200px|right|Lucky Lorenz's Shack]] |
[[File:Lucky Lorenz's Shack.png|thumb|200px|right|Lucky Lorenz's Shack]] |
||
*[[Lucky Lorenz's Shack]] – A shack and its owner have been crushed by a fallen tree across the river from the Abandoned Prison. Loot includes ''[[Treasure Map IX]]'' and the Light Armor skill book ''[[Rislav the Righteous]]''. (Official guide map marker 7.A). |
*[[Lucky Lorenz's Shack]] – A shack and its owner have been crushed by a fallen tree across the river from the Abandoned Prison. Loot includes ''[[Treasure Map IX]]'' and the Light Armor skill book ''[[Rislav the Righteous]]''. (Official guide map marker 7.A). |
||
| − | *[[Hunter's Camp: Dunmeth Pass]] – North of [[Narzulbur]] is a small camp with two hunters, a tanning rack and the Light Armor skill book ''[[Ice and Chitin]]''. A flag raised on a pole is perched on a rocky ridge above the camp. (Official guide map marker 7.I). |
+ | *[[Hunter's Camp: Dunmeth Pass]] – North of [[Narzulbur]] is a small camp with two [[Hunter (Skyrim)|hunters]], a tanning rack and the Light Armor skill book ''[[Ice and Chitin]]''. A flag raised on a pole is perched on a rocky ridge above the camp. (Official guide map marker 7.I). |
| − | *[[Hunters' Camp: Slopes of Kagrenzel]] – Halfway between [[Ansilvund]] and [[Kagrenzel]] to the south of the path is a small hunter camp with two hunters and an |
+ | *[[Hunters' Camp: Slopes of Kagrenzel]] – Halfway between [[Ansilvund]] and [[Kagrenzel]] to the south of the path is a small hunter camp with two hunters and an [[Archery (Skyrim)|Archery]] skill book ''[[Father of the Niben]]''. [[Corundum ore vein]] nearby. (Official guide map marker 7.U). |
*[[Hunter's Camp: Steamcrag Slopes]] – A large hunter's camp with horses, a wagon, and several hunters. There is a dead [[Mammoth (Skyrim)|mammoth]], a corundum ore vein, and the Two-Handed skill book ''[[The Legendary Sancre Tor]]''. (Official guide map marker 7.P). |
*[[Hunter's Camp: Steamcrag Slopes]] – A large hunter's camp with horses, a wagon, and several hunters. There is a dead [[Mammoth (Skyrim)|mammoth]], a corundum ore vein, and the Two-Handed skill book ''[[The Legendary Sancre Tor]]''. (Official guide map marker 7.P). |
||
*[[Hunter's Camp: Windhelm Plateau]] – Several hunters are attacked by a [[Troll (Skyrim)|troll]] when the [[Last Dragonborn|Dragonborn]] approaches. (Official guide map marker 7.F & 7.G) During the Civil War attack on Windhelm, this will be replaced by the Imperial Army. |
*[[Hunter's Camp: Windhelm Plateau]] – Several hunters are attacked by a [[Troll (Skyrim)|troll]] when the [[Last Dragonborn|Dragonborn]] approaches. (Official guide map marker 7.F & 7.G) During the Civil War attack on Windhelm, this will be replaced by the Imperial Army. |
||
[[File:Hunter Jacuzzi Camp.png|thumb|200px|right|Hunter Jacuzzi Camp]] |
[[File:Hunter Jacuzzi Camp.png|thumb|200px|right|Hunter Jacuzzi Camp]] |
||
*[[Hunter Jacuzzi Camp]] – West of the [[Eldergleam Sanctuary]] is a small hunter camp with three scantily-clothed hunters and a copy of the Smithing skill book ''[[Cherim's Heart of Anequina]]''. (Official game guide marker 7.K). |
*[[Hunter Jacuzzi Camp]] – West of the [[Eldergleam Sanctuary]] is a small hunter camp with three scantily-clothed hunters and a copy of the Smithing skill book ''[[Cherim's Heart of Anequina]]''. (Official game guide marker 7.K). |
||
| − | *[[Mara's Eye Stones]] – Just South of [[Mara's Eye Pond]], a [[Spriggan Matron]] stands in the archway of a ruin. (Official guide map marker 7.C). |
+ | *[[Mara's Eye Stones]] – Just South of [[Mara's Eye Pond]], a [[Spriggan Matron (Skyrim)|Spriggan Matron]] stands in the archway of a ruin. (Official guide map marker 7.C). |
*[[Sulfur Ruins]] – Just north of [[Mistwatch (Skyrim)|Mistwatch]] in the middle of a sulfurous lake, these old ruins are protected by three skeletons that will rise when approached. (Official guide map marker 7.Q). |
*[[Sulfur Ruins]] – Just north of [[Mistwatch (Skyrim)|Mistwatch]] in the middle of a sulfurous lake, these old ruins are protected by three skeletons that will rise when approached. (Official guide map marker 7.Q). |
||
*[[Mournful Giant]] – A [[Giant (Skyrim)|giant]] is found mourning over the loss of his mammoth, that lays dead in a small hot-spring pool. (Official guide map marker 7.S). |
*[[Mournful Giant]] – A [[Giant (Skyrim)|giant]] is found mourning over the loss of his mammoth, that lays dead in a small hot-spring pool. (Official guide map marker 7.S). |
||
| Line 36: | Line 36: | ||
*[[Bandit Bridge: Pinewatch]] – Southwest along the main road of [[Pinewatch]] is a couple of [[Bandits (Skyrim)|bandits]] holding up at a wooden bridge waiting to ambush any who pass below. (Official guide map marker 8.AA) |
*[[Bandit Bridge: Pinewatch]] – Southwest along the main road of [[Pinewatch]] is a couple of [[Bandits (Skyrim)|bandits]] holding up at a wooden bridge waiting to ambush any who pass below. (Official guide map marker 8.AA) |
||
*[[Bandit Camp: Pinewatch Heights]] – Three bandits have taken over an alchemist's camp by a waterfall just down the path southeast of Pinewatch. They've killed a female [[Dunmer (Skyrim)|Dunmer]], who had an [[Containers (Skyrim)|Apothecary's Satchel]] and take the Alteration skill book titled ''[[The Lunar Lorkhan]]'' on her at the time of death. (Official guide map marker 8.AB) |
*[[Bandit Camp: Pinewatch Heights]] – Three bandits have taken over an alchemist's camp by a waterfall just down the path southeast of Pinewatch. They've killed a female [[Dunmer (Skyrim)|Dunmer]], who had an [[Containers (Skyrim)|Apothecary's Satchel]] and take the Alteration skill book titled ''[[The Lunar Lorkhan]]'' on her at the time of death. (Official guide map marker 8.AB) |
||
| − | *[[Bandit Camp: Skybound Overhang]] – Along the snowy foothills towards [[Riverwood (Skyrim)|Riverwood]] is a switchback where some bandits have hidden in a camp waiting to ambush any lost travelers. South of Riverwood, along the small path that climbs up towards [[Helgen]] is a small bandits camp with a cooking pot, |
+ | *[[Bandit Camp: Skybound Overhang]] – Along the snowy foothills towards [[Riverwood (Skyrim)|Riverwood]] is a switchback where some bandits have hidden in a camp waiting to ambush any lost travelers. South of Riverwood, along the small path that climbs up towards [[Helgen]] is a small bandits camp with a roasting skeever and cooking pot, a locked chest and the [[Block (Skyrim)|block]] skill book ''[[Warrior (Book)|Warrior]]''. (Official guide map marker 8.Z) |
| ⚫ | |||
*[[Bear Hunter's Camp]] – A small unoccupied hunter's camp west of [[Falkreath (Skyrim)|Falkreath]] and north of [[Halldir's Cairn]], with a ''[[Hunter's Journal]]'', a [[Knapsack|knapsack]] and the [[Sneak (Skyrim)|Sneak]] skill book ''[[Legend of Krately House]]''. |
*[[Bear Hunter's Camp]] – A small unoccupied hunter's camp west of [[Falkreath (Skyrim)|Falkreath]] and north of [[Halldir's Cairn]], with a ''[[Hunter's Journal]]'', a [[Knapsack|knapsack]] and the [[Sneak (Skyrim)|Sneak]] skill book ''[[Legend of Krately House]]''. |
||
| ⚫ | |||
*[[Border Crossings (Skyrim)|Border Crossings]] |
*[[Border Crossings (Skyrim)|Border Crossings]] |
||
*[[Bugling Elk]] – The elk is found in a meadow southeast of [[Evergreen Grove]] at the ruins of a [[Dwemer]] statue. There is usually a bear nearby. |
*[[Bugling Elk]] – The elk is found in a meadow southeast of [[Evergreen Grove]] at the ruins of a [[Dwemer]] statue. There is usually a bear nearby. |
||
| − | *[[Burning Caravan]] – West of Evergreen Grove is a burning [[Horse (Skyrim)|Horse-Drawn]] cart along with two burnt bodies. There's a leveled chest on top of the carriage. The destruction looks as if it was caused by a [[Dragons (Skyrim)|dragon]] attack. (Official guide map marker 8.F) |
+ | *[[Burning Caravan: Evergreen Grove]] – West of Evergreen Grove is a burning [[Horse (Skyrim)|Horse-Drawn]] cart along with two burnt bodies. There's a leveled chest on top of the carriage. The destruction looks as if it was caused by a [[Dragons (Skyrim)|dragon]] attack. (Official guide map marker 8.F) |
*[[Dark Elf's Grave]] – A mourner seems to have joined his relative in the afterlife after being backstabbed and left to die at this Nordic burial site. (Official guide map marker 8.J) |
*[[Dark Elf's Grave]] – A mourner seems to have joined his relative in the afterlife after being backstabbed and left to die at this Nordic burial site. (Official guide map marker 8.J) |
||
*[[Dragon Mound: Bilegulch Ridge]] – Opens during "[[Alduin's Wall (Quest)|Alduin's Wall]]." (Official guide map marker 8.A) |
*[[Dragon Mound: Bilegulch Ridge]] – Opens during "[[Alduin's Wall (Quest)|Alduin's Wall]]." (Official guide map marker 8.A) |
||
| Line 47: | Line 47: | ||
*[[Dragon Mound: Evergreen Woods]] – Opens during "Alduin's Wall." (Official guide map marker 8.L) |
*[[Dragon Mound: Evergreen Woods]] – Opens during "Alduin's Wall." (Official guide map marker 8.L) |
||
*[[Fisherman's Island (Skyrim)|Fisherman's Island]] – A [[Fisherman (Skyrim)|Fisherman]] on a small island in [[Lake Ilinalta]]. The island has a [[beehive]] and a large number of [[bee]]s. (Official guide map marker 8.Q) |
*[[Fisherman's Island (Skyrim)|Fisherman's Island]] – A [[Fisherman (Skyrim)|Fisherman]] on a small island in [[Lake Ilinalta]]. The island has a [[beehive]] and a large number of [[bee]]s. (Official guide map marker 8.Q) |
||
| − | *[[Hunter's Camp: The Guardian Stones]] – Southwest from the [[Guardian Stones]] next to the river. A [[hunter]] is usually nearby. The camp contains a leveled [[Containers (Skyrim)|chest]]. (Official guide map marker 8.W) |
+ | *[[Hunter's Camp: The Guardian Stones]] – Southwest from the [[Guardian Stones]] next to the river. A [[Hunter (Skyrim)|hunter]] is usually nearby. The camp contains a leveled [[Containers (Skyrim)|chest]]. (Official guide map marker 8.W) |
*[[Hunter's Camp: Sunderstone Gorge]] – Opposite [[Sunderstone Gorge]] and East of [[Bilegulch Mine]] is a small camp occupied by one hunter. He has an Elk you can loot, but the chest will be stealing. (Official guide map marker 8.C) |
*[[Hunter's Camp: Sunderstone Gorge]] – Opposite [[Sunderstone Gorge]] and East of [[Bilegulch Mine]] is a small camp occupied by one hunter. He has an Elk you can loot, but the chest will be stealing. (Official guide map marker 8.C) |
||
*[[Hunter's Camp: Upper Pinewatch Ridge]] – Past the dead [[Dunmer (Skyrim)|Dark Elf]]'s Camp, up a windy path lies a cliff ledge where a hunter has set camp, provided with the camp is a view of the most of [[Falkreath Hold (Skyrim)|Falkreath Hold]]. (Official guide map marker 8.AC) |
*[[Hunter's Camp: Upper Pinewatch Ridge]] – Past the dead [[Dunmer (Skyrim)|Dark Elf]]'s Camp, up a windy path lies a cliff ledge where a hunter has set camp, provided with the camp is a view of the most of [[Falkreath Hold (Skyrim)|Falkreath Hold]]. (Official guide map marker 8.AC) |
||
*[[Ilinalta Fisherman]] – A Fisherman camp at the West end of Lake Ilinalta. The tent contains a [[One-Handed (Skyrim)|One-Handed]] skill book ''[[Fire and Darkness]]''. (Official guide map marker 8.H) |
*[[Ilinalta Fisherman]] – A Fisherman camp at the West end of Lake Ilinalta. The tent contains a [[One-Handed (Skyrim)|One-Handed]] skill book ''[[Fire and Darkness]]''. (Official guide map marker 8.H) |
||
*[[The Indigestible Emerald]] – Just by the waterfall at the northeastern part of [[Lake Ilinalta]] and East of [[Anise's Cabin]] is an animal skeleton which holds a [[Flawless Emerald|flawless emerald]] inside its ribcage. (Official guide map marker 8.S) |
*[[The Indigestible Emerald]] – Just by the waterfall at the northeastern part of [[Lake Ilinalta]] and East of [[Anise's Cabin]] is an animal skeleton which holds a [[Flawless Emerald|flawless emerald]] inside its ribcage. (Official guide map marker 8.S) |
||
| − | *[[The Mauled Refugees]] – West of Helgen is a small camp with two slain [[Refugee]] |
+ | *[[The Mauled Refugees]] – West of Helgen is a small camp with two slain [[Refugee (Skyrim)|refugees]]. There is a [[Wolf (Skyrim)|wolf]] prowling the area. (Official guide map marker 8.AF) |
*[[Money Tree]] – A hollow tree just a bit north of [[North Brittleshin Pass]] has a Strong Box, (apprentice lock). An easy way to find it is to travel along the road from [[Whiterun (Skyrim)|Whiterun]] and when near the cave head down the dirt road. |
*[[Money Tree]] – A hollow tree just a bit north of [[North Brittleshin Pass]] has a Strong Box, (apprentice lock). An easy way to find it is to travel along the road from [[Whiterun (Skyrim)|Whiterun]] and when near the cave head down the dirt road. |
||
*[[Nordic Burial Grove]] – Six graves and a large structure are set just west of [[North Shriekwind Bastion]] there isn't much except a few offerings of flowers. The graves are guarded by two [[Skeleton (Skyrim)|skeletons]]. (Official guide map marker 8.P) |
*[[Nordic Burial Grove]] – Six graves and a large structure are set just west of [[North Shriekwind Bastion]] there isn't much except a few offerings of flowers. The graves are guarded by two [[Skeleton (Skyrim)|skeletons]]. (Official guide map marker 8.P) |
||
| − | *[[ |
+ | *[[Peddler's Misfortune]] – An overturned cart marks the death of an unlucky [[Khajiit]] merchant who lies dead at the scene. There are two bear traps in the road and his horse lays dead nearby. Amongst the clutter, there's a [[Speech]] skill book, ''[[A Dance in Fire, Book VII|A Dance in Fire, v.7]]''. (Official guide map marker 8.D) |
*[[Prospector's Shack]] – A shack south of [[Bonechill Passage]] has been attacked by a dragon, incinerating it and its inhabitants. Found there is a ''[[Note to the Authorities]]'', the [[Pickpocket]] skill book called ''[[Purloined Shadows]]'', and a chest inside the smoldering ruins. (Official guide map marker 8.AD) |
*[[Prospector's Shack]] – A shack south of [[Bonechill Passage]] has been attacked by a dragon, incinerating it and its inhabitants. Found there is a ''[[Note to the Authorities]]'', the [[Pickpocket]] skill book called ''[[Purloined Shadows]]'', and a chest inside the smoldering ruins. (Official guide map marker 8.AD) |
||
*[[Riverwood Folly]] – Below and east of [[Bleak Falls Barrow (Location)|Bleak Falls Barrow]] is the remains of an Ancient Nordic Tower, home to a small group of [[Bandits (Skyrim)|bandits]] guarding their loot. (Official guide map marker 8.T) |
*[[Riverwood Folly]] – Below and east of [[Bleak Falls Barrow (Location)|Bleak Falls Barrow]] is the remains of an Ancient Nordic Tower, home to a small group of [[Bandits (Skyrim)|bandits]] guarding their loot. (Official guide map marker 8.T) |
||
| Line 81: | Line 81: | ||
[[File:Clam Digger's Camp.png|thumb|200px|right|Clam Digger's Camp.]] |
[[File:Clam Digger's Camp.png|thumb|200px|right|Clam Digger's Camp.]] |
||
*[[Clam Digger's Camp]] – West of [[Northwatch Keep]], a small camp with a clam farm and a cooking spit. (Official guide map marker 1.A) |
*[[Clam Digger's Camp]] – West of [[Northwatch Keep]], a small camp with a clam farm and a cooking spit. (Official guide map marker 1.A) |
||
| − | *[[Couldn't Be Bothered Cave]] – At the very end of the western road in the Haafingar mountains, very, very far to the west of [[Pinefrost Tower]] and [[Rimerock Burrow]], north of [[Mor Khazgur]]. It looks like a normal cave entrance, except for the fact that it is blocked off. It is unknown whether it is a cancelled cave, or simply intentional. |
+ | *[[Couldn't Be Bothered Cave]] – At the very end of the western road in the Haafingar mountains, very, very far to the west of [[Pinefrost Tower]] and [[Rimerock Burrow]], north of [[Mor Khazgur (Skyrim)|Mor Khazgur]]. It looks like a normal cave entrance, except for the fact that it is blocked off. It is unknown whether it is a cancelled cave, or simply intentional. |
*[[Fool's Gold Island]] – A [[Mudcrab (Skyrim)|mudcrab]]-inhabited island west of [[Broken Oar Grotto]], with a lone flag planted at its top and a skeleton embracing it. Two gold ore veins lie at the base of the small hill, on opposite sides. |
*[[Fool's Gold Island]] – A [[Mudcrab (Skyrim)|mudcrab]]-inhabited island west of [[Broken Oar Grotto]], with a lone flag planted at its top and a skeleton embracing it. Two gold ore veins lie at the base of the small hill, on opposite sides. |
||
*[[Forsworn Ambush Camp]] – Two Forsworn have set up three Bear Traps in the gully just south of [[Volskygge]], and have already lured a [[Nord (Skyrim)|Nord]] to his death. They attack the Dragonborn on sight. In their tent, at the eastern end of the gully, a chest can be found. (Official guide map marker 1.B) |
*[[Forsworn Ambush Camp]] – Two Forsworn have set up three Bear Traps in the gully just south of [[Volskygge]], and have already lured a [[Nord (Skyrim)|Nord]] to his death. They attack the Dragonborn on sight. In their tent, at the eastern end of the gully, a chest can be found. (Official guide map marker 1.B) |
||
| Line 140: | Line 140: | ||
*[[A Bandit's Book]] – (Official guide map marker 5.E) |
*[[A Bandit's Book]] – (Official guide map marker 5.E) |
||
*[[An Abandoned Rowboat]] – A broken boat on the shores of the river Southwest of [[Sky Haven Temple]]. It contains a strongbox, an apothecary's satchel, and scattered flawless gems, including, a flawless ruby used for the quest, "[[The Only Cure]]." In the water next to it are a few mead barrels and a chest. |
*[[An Abandoned Rowboat]] – A broken boat on the shores of the river Southwest of [[Sky Haven Temple]]. It contains a strongbox, an apothecary's satchel, and scattered flawless gems, including, a flawless ruby used for the quest, "[[The Only Cure]]." In the water next to it are a few mead barrels and a chest. |
||
| − | *[[Brush Strongbox: Riverside]] – A strongbox can be found in dead branches on the south-east shore of the [[Karth River]], halfway between Four Skull Lookout and Sundered Towers. See [[Karthwasten]] Trivia and Bugs sections for more details. (Official guide map marker 5.Q) |
+ | *[[Brush Strongbox: Riverside]] – A strongbox can be found in dead branches on the south-east shore of the [[Karth River]], halfway between Four Skull Lookout and Sundered Towers. See [[Karthwasten (Skyrim)|Karthwasten]] Trivia and Bugs sections for more details. (Official guide map marker 5.Q) |
| − | *[[Dead Lovers Camp]] – Between [[Old Hroldan]] and [[Soljund's Sinkhole (Location)|Soljund's Sinkhole]] is a small camp with |
+ | *[[Dead Lovers Camp]] – Between [[Old Hroldan]] and [[Soljund's Sinkhole (Location)|Soljund's Sinkhole]] is a small camp with [[Talvur]] and [[Karan]] slain by an animal. Karan's journal tells the tale of their plan to elope. (Official guide map marker 5.V) |
*[[Dragon Mound: Karthspire Bluffs]] – Opens during "Alduin's Wall" (Official guide map marker 5.T) |
*[[Dragon Mound: Karthspire Bluffs]] – Opens during "Alduin's Wall" (Official guide map marker 5.T) |
||
*[[Dragon Mound: Reachwater Pass]] – Opens during "[[Elder Knowledge]]." (Official guide map marker 5.B) |
*[[Dragon Mound: Reachwater Pass]] – Opens during "[[Elder Knowledge]]." (Official guide map marker 5.B) |
||
| Line 147: | Line 147: | ||
*[[Dwarven Rubble: Salvius Farm Trail]] (Official guide map marker 5.O) |
*[[Dwarven Rubble: Salvius Farm Trail]] (Official guide map marker 5.O) |
||
[[File:DwemerPavillion.jpg|thumb|Lair of the Wispmother]] |
[[File:DwemerPavillion.jpg|thumb|Lair of the Wispmother]] |
||
| − | *[[Druadach Dwemer Pavilion |
+ | *[[Druadach Dwemer Pavilion]] – West of the [[Shrine to Peryite]], near the mountain summit, is a Dwemer four-sided arch guarded by a [[Wispmother (Skyrim)|wispmother]]. (Official guide map marker 5.J) |
*[[Dwemer Ruins: Druadach]] – East of [[Deep Folk Crossing]] is a small [[Dwemer Ruins (Skyrim)|Dwemer Ruin]] with a lone standing pillar, an altar with two dwarven arrows and a [[Dwemer Convector]]. (Official guide map marker 5.A) |
*[[Dwemer Ruins: Druadach]] – East of [[Deep Folk Crossing]] is a small [[Dwemer Ruins (Skyrim)|Dwemer Ruin]] with a lone standing pillar, an altar with two dwarven arrows and a [[Dwemer Convector]]. (Official guide map marker 5.A) |
||
*[[Dwemer Ruins: Karth River Confluence]] – (Official guide map marker 5.F) |
*[[Dwemer Ruins: Karth River Confluence]] – (Official guide map marker 5.F) |
||
| Line 154: | Line 154: | ||
*[[Forsworn Camp: Reachwater River]] – West of [[Reachcliff Cave]] is a forsworn camp under attack by two soldiers, with a treasure chest, satchel, and [[Block (Skyrim)|Blocking]] skill book. (Official guide map marker 5.S) |
*[[Forsworn Camp: Reachwater River]] – West of [[Reachcliff Cave]] is a forsworn camp under attack by two soldiers, with a treasure chest, satchel, and [[Block (Skyrim)|Blocking]] skill book. (Official guide map marker 5.S) |
||
*[[Hagraven Nest]] – West of [[Ragnvald]], a small path leads to a [[Hagraven (Skyrim)|Hagraven]] camp. (Official guide map marker 5.N) |
*[[Hagraven Nest]] – West of [[Ragnvald]], a small path leads to a [[Hagraven (Skyrim)|Hagraven]] camp. (Official guide map marker 5.N) |
||
| − | *[[The Incautious Bather]] – A female swimmer, oddly named "[[Captive (Skyrim)| |
+ | *[[The Incautious Bather]] – A female swimmer, oddly named "[[Captive (Skyrim)|Captive]]," has been killed by the Forsworn. Her clothes and a high value necklace is nearby. Her journal explains the scene. Northwest of [[Shrine to Peryite]]. (Official guide map marker 5.D) |
[[File:JuniperShrine.jpg|thumb|200px|right|Juniper Shrine]] |
[[File:JuniperShrine.jpg|thumb|200px|right|Juniper Shrine]] |
||
*[[Juniper Shrine]] – Northwest of [[Valthume]], further up the path from the small [[Forsworn]] camp above, is a small Dwemer ruin with a planted Juniper tree. Behind the tree is an unlocked Dwemer chest and the skill book ''[[Enchanter's Primer]]''. (Official guide map marker 5.AA) |
*[[Juniper Shrine]] – Northwest of [[Valthume]], further up the path from the small [[Forsworn]] camp above, is a small Dwemer ruin with a planted Juniper tree. Behind the tree is an unlocked Dwemer chest and the skill book ''[[Enchanter's Primer]]''. (Official guide map marker 5.AA) |
||
| Line 167: | Line 167: | ||
*[[The Bloodied Bandit]] – (Official guide map marker 5.H) |
*[[The Bloodied Bandit]] – (Official guide map marker 5.H) |
||
*[[The Exposed Miner]] – (Official guide map marker 5.M) |
*[[The Exposed Miner]] – (Official guide map marker 5.M) |
||
| − | *[[Totem to Peryite]] – Between the [[Shrine to Peryite]] and [[Karthwasten]] is an alcove at the base of the cliff with a chest, two corpses and some poisons. This is a smaller shrine to Peryite. The chest contains the [[Illusion (Skyrim)|Illusion]] skill book ''[[Incident in Necrom]]''. (Official guide map marker 5.L) |
+ | *[[Totem to Peryite]] – Between the [[Shrine to Peryite]] and [[Karthwasten (Skyrim)|Karthwasten]] is an alcove at the base of the cliff with a chest, two corpses and some poisons. This is a smaller shrine to Peryite. The chest contains the [[Illusion (Skyrim)|Illusion]] skill book ''[[Incident in Necrom]]''. (Official guide map marker 5.L) |
| − | *[[Trollsbane Demise |
+ | *[[Trollsbane's Demise]] – Between [[Valthume]] and [[Cradle Stone Tower]] is a troll den where the body of [[Frofnir Trollsbane]] is found. The den is home to two trolls fighting one another. Frofnir carries the unique warhammer [[Trollsbane]]. (Official guide map marker 5.AB) |
==[[The Rift (Skyrim)|The Rift]]== |
==[[The Rift (Skyrim)|The Rift]]== |
||
| Line 211: | Line 211: | ||
*[[Dragon Mound: Lone Mountain]] – Opens during "Alduin's Wall." (Official guide map marker 6.O) |
*[[Dragon Mound: Lone Mountain]] – Opens during "Alduin's Wall." (Official guide map marker 6.O) |
||
*[[Fallen Tree Bridge]] – South of [[Hillgrund's Tomb]] is a massive fallen tree crossing the gorge with the river rapids below. Beyond the rapids is a body washed up on shore. On the northwest side is a chest and the Illusion skill book ''The Black Arts on Trial''. (Official guide map marker 6.V) |
*[[Fallen Tree Bridge]] – South of [[Hillgrund's Tomb]] is a massive fallen tree crossing the gorge with the river rapids below. Beyond the rapids is a body washed up on shore. On the northwest side is a chest and the Illusion skill book ''The Black Arts on Trial''. (Official guide map marker 6.V) |
||
| − | *[[Fetid Pond]] – Southwest of [[Swindler's Den]] is a pond in a depression with a dead bandit. He has the skill book ''Beggar'' on him. (Official guide map marker 6.F) |
+ | *[[Fetid Pond]] – Southwest of [[Swindler's Den (Cave)|Swindler's Den]] is a pond in a depression with a dead bandit. He has the skill book ''Beggar'' on him. (Official guide map marker 6.F) |
| − | *[[Fossilized Giant |
+ | *[[Fossilized Giant Mudcrab]] – West of [[Broken Fang Cave]]. The carcass of a giant fossilized mudcrab can be found here. (Official guide map marker 6.H) |
| − | *[[Hunters Camp: White River Hills]] – ( |
+ | *[[Hunters Camp: White River Hills]] – (official guide map marker 6.U) |
*[[Hunter Hunted]] – In the mountains close to [[Drelas' Cottage]], find a dead hunter and the beast that bested him. (Official guide map marker 6.D) |
*[[Hunter Hunted]] – In the mountains close to [[Drelas' Cottage]], find a dead hunter and the beast that bested him. (Official guide map marker 6.D) |
||
*[[Lady of the Lake]] – West of [[Whiterun (Skyrim)|Whiterun]] northwest of [[Bleakwind Basin]] is a small spring with a hand sticking out, holding a leveled sword. (Official guide map marker 6.Q) |
*[[Lady of the Lake]] – West of [[Whiterun (Skyrim)|Whiterun]] northwest of [[Bleakwind Basin]] is a small spring with a hand sticking out, holding a leveled sword. (Official guide map marker 6.Q) |
||
| Line 231: | Line 231: | ||
*[[The Skeleton's Strong Box: Greymoor]] – Northwest of [[Fort Greymoor]] is a skeleton still clutching his strong box. (Official guide map marker 6.P) |
*[[The Skeleton's Strong Box: Greymoor]] – Northwest of [[Fort Greymoor]] is a skeleton still clutching his strong box. (Official guide map marker 6.P) |
||
*[[The Two Pillars]] – Southeast of Swindler's Den is a shrine with the Enchanting skill book ''Twin Secrets'' and a strong box. (Official guide map marker 6.I) |
*[[The Two Pillars]] – Southeast of Swindler's Den is a shrine with the Enchanting skill book ''Twin Secrets'' and a strong box. (Official guide map marker 6.I) |
||
| − | *[[Whiterun Military |
+ | *[[Whiterun Military Camp]] – (Official guide map marker 6.S) |
*[[Whiterun Dead Guard]] – Outside Whiterun at the base of Dragonsreach, a dead Whiterun or Stormcloak guard will be found with blood on him. It will only be there if "[[The Fallen]]" is completed. |
*[[Whiterun Dead Guard]] – Outside Whiterun at the base of Dragonsreach, a dead Whiterun or Stormcloak guard will be found with blood on him. It will only be there if "[[The Fallen]]" is completed. |
||
| Line 248: | Line 248: | ||
*[[Ill-Gotten Gains]]: Sea Shore of Ghosts – East of Snow Veil Sanctum in a glacier crevasse is a small smuggler's stash with a chest and a hostile animal. (Official guide map marker 4.T) |
*[[Ill-Gotten Gains]]: Sea Shore of Ghosts – East of Snow Veil Sanctum in a glacier crevasse is a small smuggler's stash with a chest and a hostile animal. (Official guide map marker 4.T) |
||
[[File:Mountanthorsummit.png|thumb|200px|right|Mount Anthor Summit.]] |
[[File:Mountanthorsummit.png|thumb|200px|right|Mount Anthor Summit.]] |
||
| − | *[[Mount Anthor Summit]] – Located west of Mount Anthor. Access via the exit from Ironbind Hallows. Two chests and a Quicksilver ore vein are next to a mysterious Dwemer monument. Beware the ice wraiths. (Official guide map marker 4.I) |
+ | *[[Mount Anthor Summit]] – Located west of Mount Anthor. Access via the exit from Ironbind Hallows. Two chests and a Quicksilver ore vein are next to a mysterious Dwemer monument. On top of the tallest pillar is an assortment of potions. These can be accessed by using [[Whirlwind Sprint]] from the nearby hillside. Beware the ice wraiths. (Official guide map marker 4.I) |
*[[Rundi's Altar]] – Southeast of the College of Winterhold, and continuing up the pass from The Friends, one will find Rundi one of the missing College of Winterhold students. He has a named dagger on the altar and the alchemy skill book ''Mannimarco, King of Worms''. Frost Rune traps are present (Official guide map marker 4.O) |
*[[Rundi's Altar]] – Southeast of the College of Winterhold, and continuing up the pass from The Friends, one will find Rundi one of the missing College of Winterhold students. He has a named dagger on the altar and the alchemy skill book ''Mannimarco, King of Worms''. Frost Rune traps are present (Official guide map marker 4.O) |
||
*[[Shrine of Arkay: Windhelm Hills]] – Directly south of Snow Veil Sanctum is an altar with a Shrine of Arkay and some offerings, but beware the Wispmother. (Official guide map marker 4.W) |
*[[Shrine of Arkay: Windhelm Hills]] – Directly south of Snow Veil Sanctum is an altar with a Shrine of Arkay and some offerings, but beware the Wispmother. (Official guide map marker 4.W) |
||
| Line 265: | Line 265: | ||
==[[Solstheim (Dragonborn)|Solstheim]] {{DR}}== |
==[[Solstheim (Dragonborn)|Solstheim]] {{DR}}== |
||
The following are unmarked locations found only in the {{Dragonborn}} expansion: |
The following are unmarked locations found only in the {{Dragonborn}} expansion: |
||
| + | |||
===Solstheim: Northern Mountains=== |
===Solstheim: Northern Mountains=== |
||
*Spiky Grass Island – South of the [[Earth Stone (Dragonborn)|Earth Stone]] lies an island with crumbling ruins. Atop are dead [[Reaver (Dragonborn)|Reavers]], [[Grass Pod|spiky grass plants]], [[Ash Hopper (Dragonborn)|Ash Hopper]]s, and one [[Heart Stone]] deposit. (Official guide map marker S.NA) |
*Spiky Grass Island – South of the [[Earth Stone (Dragonborn)|Earth Stone]] lies an island with crumbling ruins. Atop are dead [[Reaver (Dragonborn)|Reavers]], [[Grass Pod|spiky grass plants]], [[Ash Hopper (Dragonborn)|Ash Hopper]]s, and one [[Heart Stone]] deposit. (Official guide map marker S.NA) |
||
| Line 284: | Line 285: | ||
*Temple of Miraak: Secret Exit – (Official guide map marker S.NQ) |
*Temple of Miraak: Secret Exit – (Official guide map marker S.NQ) |
||
*Fahlbtharz Grand Hall – It is an location only seen on the Local Map and is the exit lift out of [[Fahlbtharz]]. It is south of Fahlbtharz and north of the [[Abandoned Lodge]]. It is directly west of the [[Altar of Thrond (Dragonborn)|Altar of Thrond]]. |
*Fahlbtharz Grand Hall – It is an location only seen on the Local Map and is the exit lift out of [[Fahlbtharz]]. It is south of Fahlbtharz and north of the [[Abandoned Lodge]]. It is directly west of the [[Altar of Thrond (Dragonborn)|Altar of Thrond]]. |
||
| + | |||
===Solstheim: Southern Ash Lands=== |
===Solstheim: Southern Ash Lands=== |
||
| + | *Ash Hopper Ambush – South-East of [[Old Attius Farm]], and west of [[Hrodulf's House]]. A chest and two skeletons, approaching them causes two [[Ash Hopper (Dragonborn)|ash hoppers]] to appear from the ash. |
||
*Driftwood Isle – (Official guide map marker S.SA) |
*Driftwood Isle – (Official guide map marker S.SA) |
||
*Isle of Basalt – (Official guide map marker S.SB) |
*Isle of Basalt – (Official guide map marker S.SB) |
||
Revision as of 03:59, 8 February 2020
- For other uses, see Unmarked Locations.
Unmarked locations are places that are not marked as icons on the world map upon discovery. There are many places on the world map that are unmarked but contain treasure chests, items, or interesting characteristics that can be easily missed by the wandering adventurer. Locations like these are often camps, fields, shacks, shrines, or ruins. The following is a list of these locations for each of the Holds.
Eastmarch
- Dragon Mound: Bonestrewn Flats – Opens during "Dragon Rising." (Official guide map marker 7.L)
- Dragon Mound: Kynesgrove Resurrection – Alduin will resurrect the dragon Sahloknir during "A Blade in the Dark." (Official guide map marker 7.H).
- Dragon Mound Witchmist Grove – Opens during "The Way of the Voice." (Official guide map marker 7.N)
- Dunmeth Pass – The road that leads to Morrowind, east from Refugees' Rest. The game will not let players continue on very far from the graveyard at Refugees' Rest.
- Eastmarch Necromancer Altar – Northwest of Bonestrewn Crest are two necromancers, a treasure chest, a leveled soul gem and the skeletal remains of a novice conjurer. Called "Cronvangr Summoning Altar" in the official game guide (map marker 7.M).
- Eldergleam Sanctuary Treasure Crate – Northwest of the Atronach Stone and set above the entrance to the Eldergleam Sanctuary lies a crate with four leveled soul gems, a dagger, plus the Enchanting skill book, A Tragedy in Black.
- Golden Outcrop – Further up from the Hunter's Camp above is a rocky outcropping home to several level-dependent creatures. Next to the cave are two gold ore veins. Called "Wild Animal Den: Dunmeth Pass" in the official game guide (map marker 7.J).
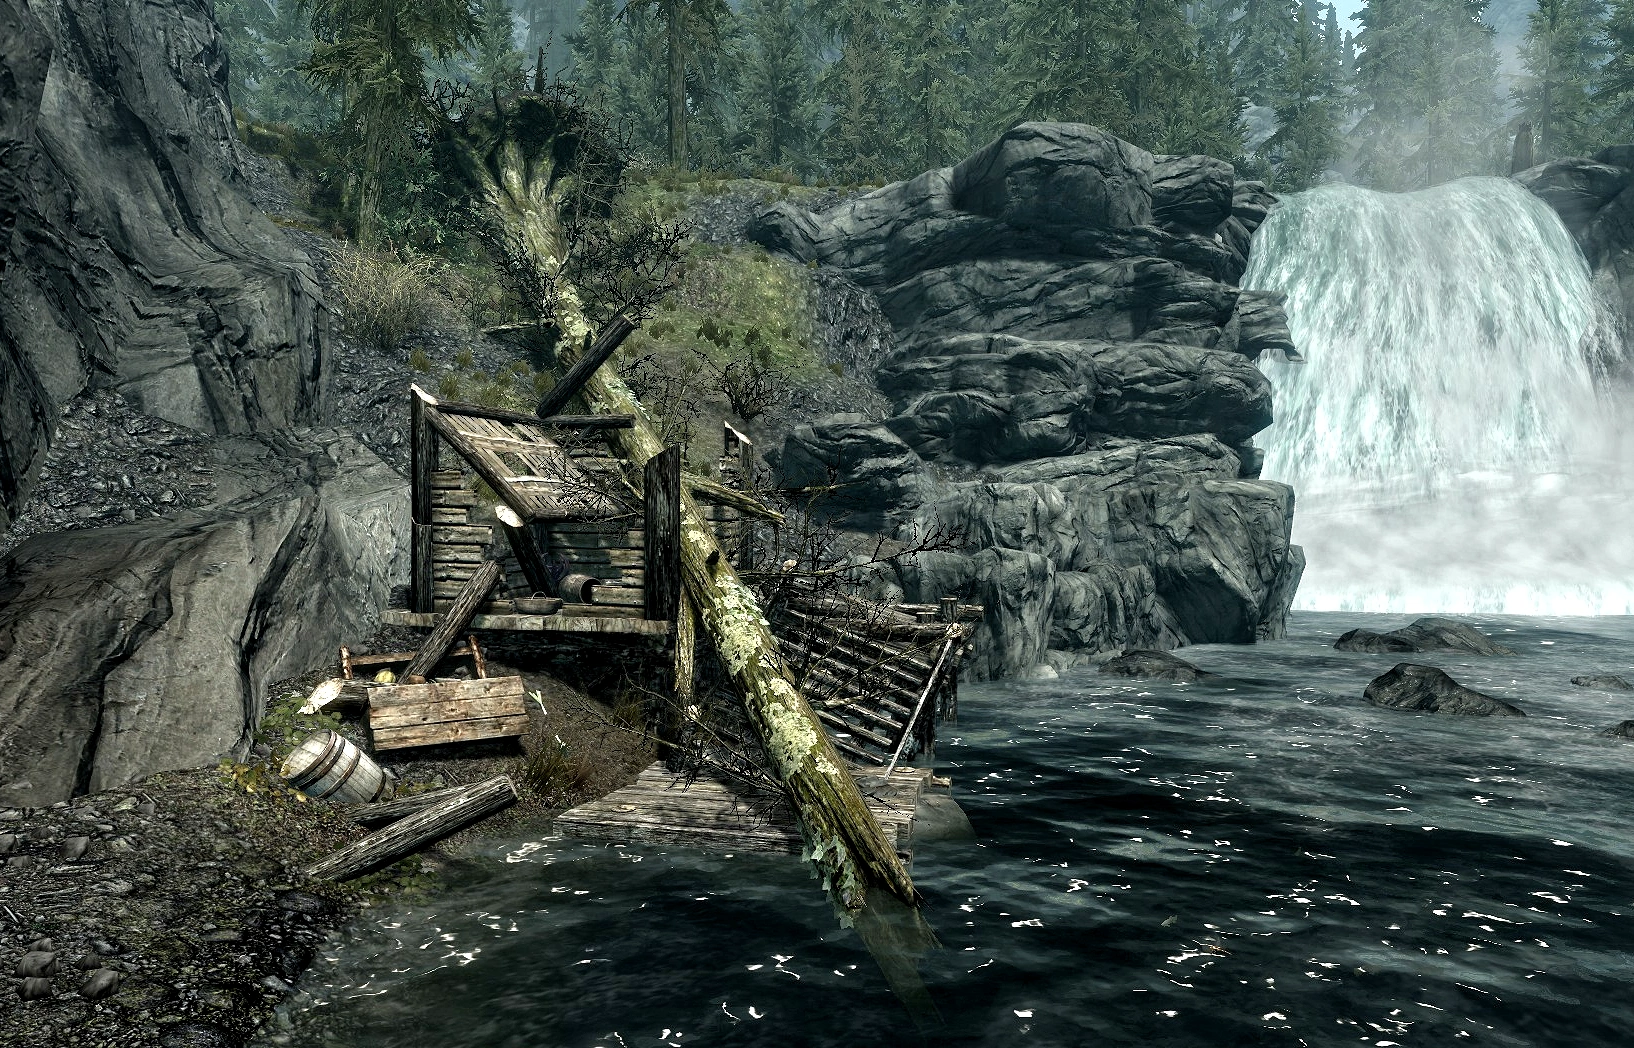
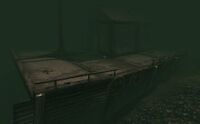
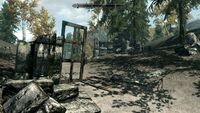
Lucky Lorenz's Shack
- Lucky Lorenz's Shack – A shack and its owner have been crushed by a fallen tree across the river from the Abandoned Prison. Loot includes Treasure Map IX and the Light Armor skill book Rislav the Righteous. (Official guide map marker 7.A).
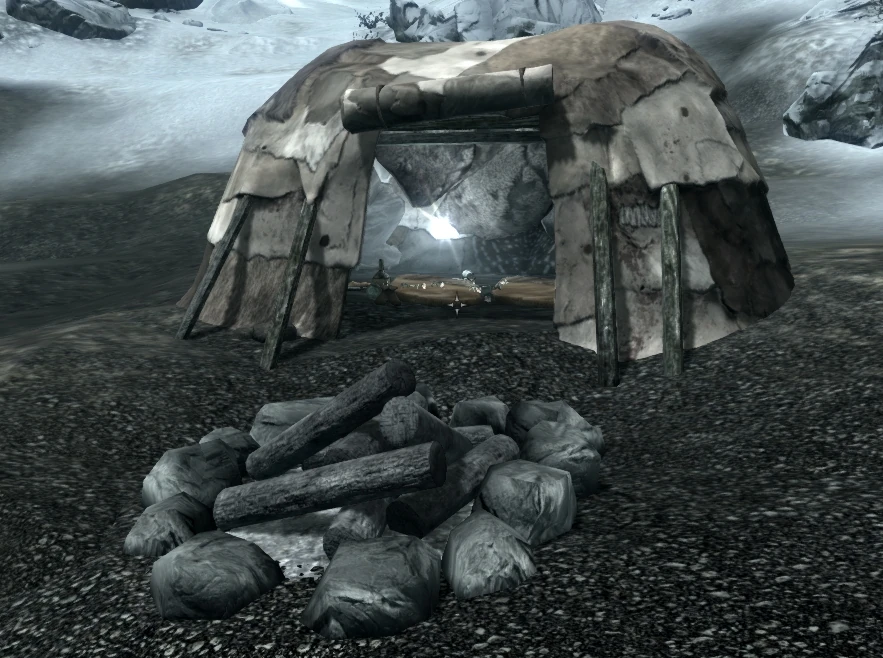
- Hunter's Camp: Dunmeth Pass – North of Narzulbur is a small camp with two hunters, a tanning rack and the Light Armor skill book Ice and Chitin. A flag raised on a pole is perched on a rocky ridge above the camp. (Official guide map marker 7.I).
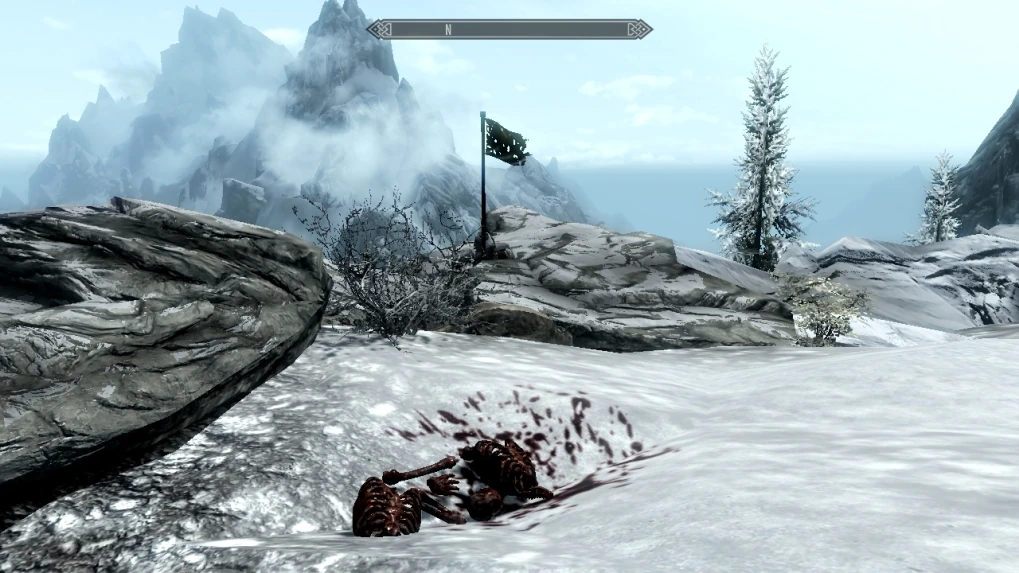
- Hunters' Camp: Slopes of Kagrenzel – Halfway between Ansilvund and Kagrenzel to the south of the path is a small hunter camp with two hunters and an Archery skill book Father of the Niben. Corundum ore vein nearby. (Official guide map marker 7.U).
- Hunter's Camp: Steamcrag Slopes – A large hunter's camp with horses, a wagon, and several hunters. There is a dead mammoth, a corundum ore vein, and the Two-Handed skill book The Legendary Sancre Tor. (Official guide map marker 7.P).
- Hunter's Camp: Windhelm Plateau – Several hunters are attacked by a troll when the Dragonborn approaches. (Official guide map marker 7.F & 7.G) During the Civil War attack on Windhelm, this will be replaced by the Imperial Army.
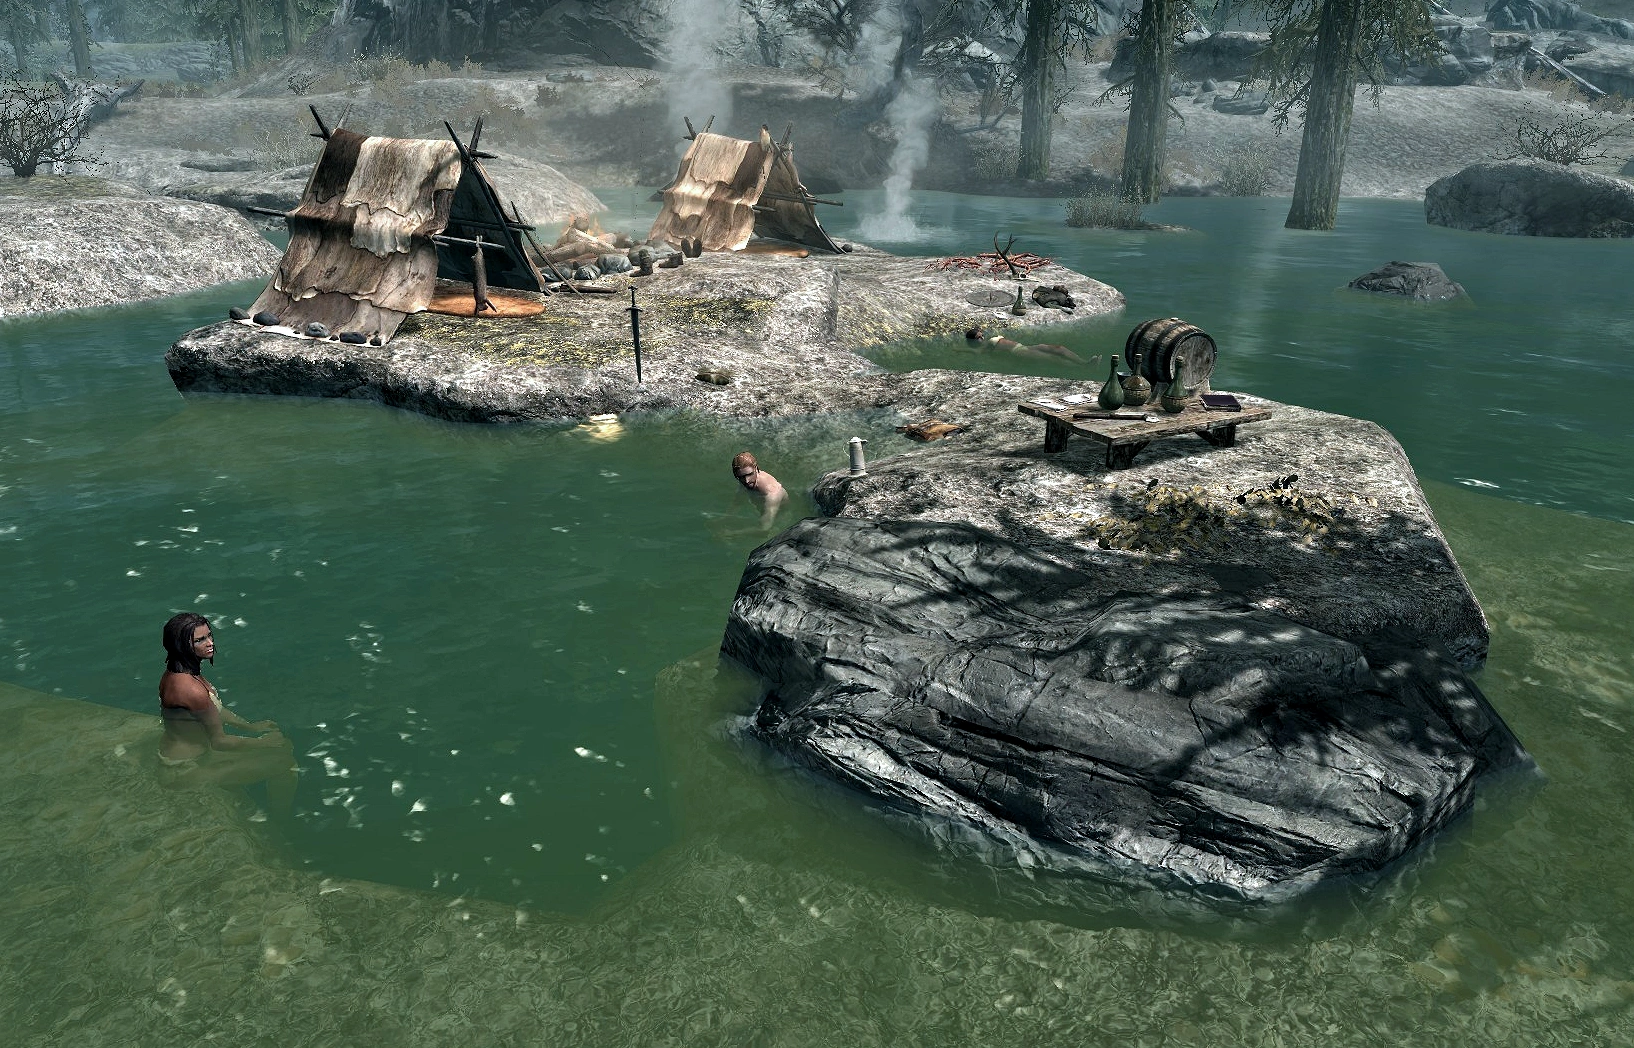
Hunter Jacuzzi Camp
- Hunter Jacuzzi Camp – West of the Eldergleam Sanctuary is a small hunter camp with three scantily-clothed hunters and a copy of the Smithing skill book Cherim's Heart of Anequina. (Official game guide marker 7.K).
- Mara's Eye Stones – Just South of Mara's Eye Pond, a Spriggan Matron stands in the archway of a ruin. (Official guide map marker 7.C).
- Sulfur Ruins – Just north of Mistwatch in the middle of a sulfurous lake, these old ruins are protected by three skeletons that will rise when approached. (Official guide map marker 7.Q).
- Mournful Giant – A giant is found mourning over the loss of his mammoth, that lays dead in a small hot-spring pool. (Official guide map marker 7.S).
- Dragon Mound: Mzulft Foothills – Opens during "Dragon Rising." (Official guide map marker 7.T).
- Stormcloak Crag – East of Uttering Hills Cave, a flag marks its location. Corundum and Gold ore veins nearby along with a dead Stormcloak. (Official guide map marker 7.D).
- Shrine of Akatosh Steamcrag Hillock – Northeast of Mistwatch, and south of Steamcrag Camp at the top of a small rocky hill, is a Shrine of Akatosh protected by three skeletons. An alteration skill book, Breathing Water, and a leveled weapon lie on the altar. (Official guide map marker 7.R).
- Shrine of Talos Overlooking Windhelm – Across the river and overlooking Windhelm. Loose gear and a copy of The Talos Mistake. (Official guide map marker 7.E).
- Stormcloak Shipment Camp – North and down the road from Shor's Watchtower. Only present if the Dragonborn sided with the Empire during the Civil War quests. See "Compelling Tribute (Imperials)."
- Talos by the Lake – East of Cradlecrush Rock. A Shrine of Talos on a lovely little pond. (Official guide map marker 7.B).
- Witchmist Sulphur Pool – A herding area for giants and their mammoths. (Official guide map marker 7.O)
Falkreath Hold
- Alchemist's Camp: Evergreen Woods – The camp of the Alchemist found dead at Evergreen Grove. (Official guide map marker 8.K)
- Ambushed Khajiit Caravan – East of Helgen, a caravan of eight Khajiit lay dead with their horses while four bandits still linger at the scene. The skill book The Buying Game (Speech) is on one of the carts. This location is known as the "Khajiit Caravan Massacre" (Official guide map marker 8. AG)
- Bandit Camp: Helgen Cliffs – On the main road west of Helgen, is a small camp that appears to be abandoned. (Official guide map marker 8.AE)
- Bandit Camp: Ilinalta Foothills – Directly south of the Guardian Stones near the road. There is a tanning rack here and the One-handed skill book Night Falls on Sentinel. One of the Bandits carries Treasure Map I. To the South of the camp are several corundum ore veins. (Official guide map marker 8.X)
- Bandit Bridge: Pinewatch – Southwest along the main road of Pinewatch is a couple of bandits holding up at a wooden bridge waiting to ambush any who pass below. (Official guide map marker 8.AA)
- Bandit Camp: Pinewatch Heights – Three bandits have taken over an alchemist's camp by a waterfall just down the path southeast of Pinewatch. They've killed a female Dunmer, who had an Apothecary's Satchel and take the Alteration skill book titled The Lunar Lorkhan on her at the time of death. (Official guide map marker 8.AB)
- Bandit Camp: Skybound Overhang – Along the snowy foothills towards Riverwood is a switchback where some bandits have hidden in a camp waiting to ambush any lost travelers. South of Riverwood, along the small path that climbs up towards Helgen is a small bandits camp with a roasting skeever and cooking pot, a locked chest and the block skill book Warrior. (Official guide map marker 8.Z)
- Bear Cave: Halldir's Cairn – A bear den south and uphill from the Bear Hunter's Camp. The defeated hunters can be found there along with two bears. (Official guide map marker 8.N)
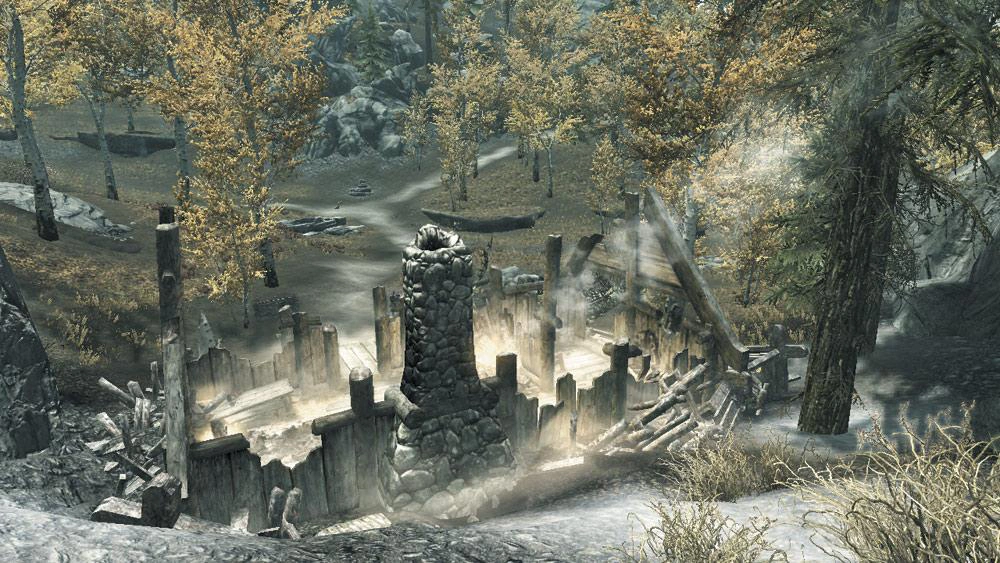
- Bear Hunter's Camp – A small unoccupied hunter's camp west of Falkreath and north of Halldir's Cairn, with a Hunter's Journal, a knapsack and the Sneak skill book Legend of Krately House.
- Border Crossings
- Bugling Elk – The elk is found in a meadow southeast of Evergreen Grove at the ruins of a Dwemer statue. There is usually a bear nearby.
- Burning Caravan: Evergreen Grove – West of Evergreen Grove is a burning Horse-Drawn cart along with two burnt bodies. There's a leveled chest on top of the carriage. The destruction looks as if it was caused by a dragon attack. (Official guide map marker 8.F)
- Dark Elf's Grave – A mourner seems to have joined his relative in the afterlife after being backstabbed and left to die at this Nordic burial site. (Official guide map marker 8.J)
- Dragon Mound: Bilegulch Ridge – Opens during "Alduin's Wall." (Official guide map marker 8.A)
- Dragon Mound: Bloodlet Peaks – Opens during "Alduin's Wall." (Official guide map marker 8.AI)
- Dragon Mound: Evergreen Woods – Opens during "Alduin's Wall." (Official guide map marker 8.L)
- Fisherman's Island – A Fisherman on a small island in Lake Ilinalta. The island has a beehive and a large number of bees. (Official guide map marker 8.Q)
- Hunter's Camp: The Guardian Stones – Southwest from the Guardian Stones next to the river. A hunter is usually nearby. The camp contains a leveled chest. (Official guide map marker 8.W)
- Hunter's Camp: Sunderstone Gorge – Opposite Sunderstone Gorge and East of Bilegulch Mine is a small camp occupied by one hunter. He has an Elk you can loot, but the chest will be stealing. (Official guide map marker 8.C)
- Hunter's Camp: Upper Pinewatch Ridge – Past the dead Dark Elf's Camp, up a windy path lies a cliff ledge where a hunter has set camp, provided with the camp is a view of the most of Falkreath Hold. (Official guide map marker 8.AC)
- Ilinalta Fisherman – A Fisherman camp at the West end of Lake Ilinalta. The tent contains a One-Handed skill book Fire and Darkness. (Official guide map marker 8.H)
- The Indigestible Emerald – Just by the waterfall at the northeastern part of Lake Ilinalta and East of Anise's Cabin is an animal skeleton which holds a flawless emerald inside its ribcage. (Official guide map marker 8.S)
- The Mauled Refugees – West of Helgen is a small camp with two slain refugees. There is a wolf prowling the area. (Official guide map marker 8.AF)
- Money Tree – A hollow tree just a bit north of North Brittleshin Pass has a Strong Box, (apprentice lock). An easy way to find it is to travel along the road from Whiterun and when near the cave head down the dirt road.
- Nordic Burial Grove – Six graves and a large structure are set just west of North Shriekwind Bastion there isn't much except a few offerings of flowers. The graves are guarded by two skeletons. (Official guide map marker 8.P)
- Peddler's Misfortune – An overturned cart marks the death of an unlucky Khajiit merchant who lies dead at the scene. There are two bear traps in the road and his horse lays dead nearby. Amongst the clutter, there's a Speech skill book, A Dance in Fire, v.7. (Official guide map marker 8.D)
- Prospector's Shack – A shack south of Bonechill Passage has been attacked by a dragon, incinerating it and its inhabitants. Found there is a Note to the Authorities, the Pickpocket skill book called Purloined Shadows, and a chest inside the smoldering ruins. (Official guide map marker 8.AD)
- Riverwood Folly – Below and east of Bleak Falls Barrow is the remains of an Ancient Nordic Tower, home to a small group of bandits guarding their loot. (Official guide map marker 8.T)
- Sacrificial Altar: Evergreen Woods – West of Roadside Ruins, is an altar where a Necromancer makes plans to work with a dead Imperial woman. Included in the loot is the Conjuration skill book 2920, Frostfall, v.10. (Official guide map marker 8.M)
- Shrine of Akatosh (Falkreath): Twilight Valley – Past the White Cap Circle is an old Nordic architectural overhang that overlooks Twilight Sepulcher. There are some offerings, including the Enchanting skill book A Tragedy in Black. (Official guide map marker 8.G)
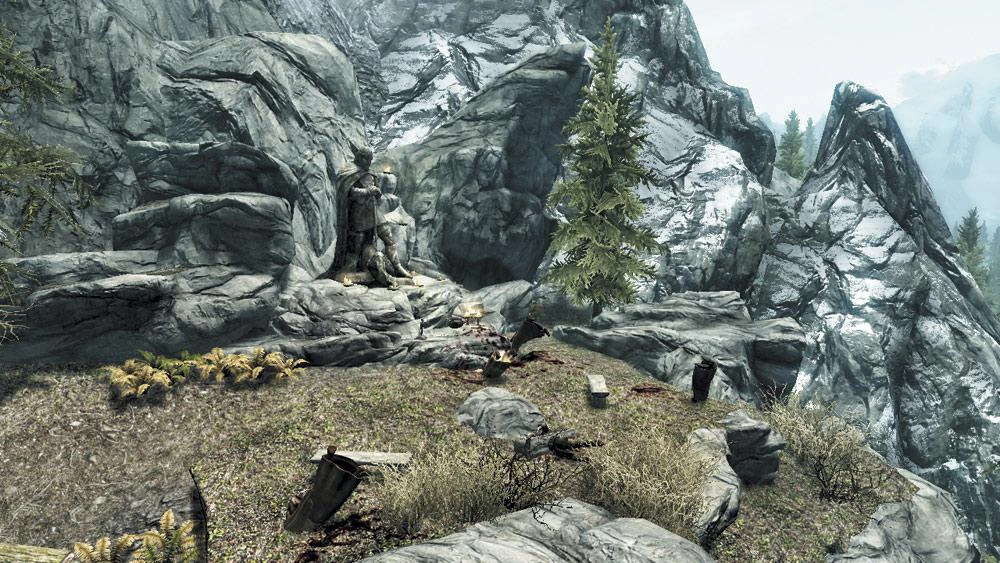
Shrine of Talos Massacre.
- Shrine of Talos Massacre – Northeast of Pinewatch is a shrine with four dead worshipers and a dead Thalmor Agent named Sanyon. There are the Thalmor Orders on the agent's body. Known as "Shrine of Talos: Ilinalta Foothills" in the official game guide (map marker 8.Y).
- Sunken Barrow – A small ancient ruin in Lake Ilinalta with a treasure chest and two leveled soul gems at the bottom. It is located West of the Guardian Stones, along the coastline near rocks raised from the water and is home to two slaughterfish. (Official guide map marker 8.R)
- Sunken Fishing Boat – North of Half-Moon Mill, beneath the lake is a clump of rocks that hide a large treasure chest. (Official guide map marker 8.I)
- Toadstool Ring: Bilegulch Ridge – A strangely grown circle of fungi, a few steps South-West of Bilegulch Ridge Dragon Mound. (Official game guide marker 8.B)
- The Conjurer's Altar: Lake Ilinalta – North of Pinewatch, just off the lakeside road, is a small altar with skeletal remains, a leveled sword, a burial urn, and the Conjuration skill book 2920, Hearth Fire, v.9. It is behind Lakeview Manor. The leveled Conjurer will eventually respawn. (Official guide map marker 8.V)
- The Headless Skeleton – North from Southfringe Sanctum, a decapitated Skeleton sits against a tree with the axe still stuck in its trunk. A chest and the Conjuration skill book called The Warrior's Charge are next to him. (Official guide map marker 8.AJ)
- The Lost Conjurer – Up the snowy slope west from Bloodlet Throne is a small Conjuration circle with some void salts and the Conjuration skill book titled 2920, vol 09 - Hearth Fire. Nearby are two orichalcum ore veins.
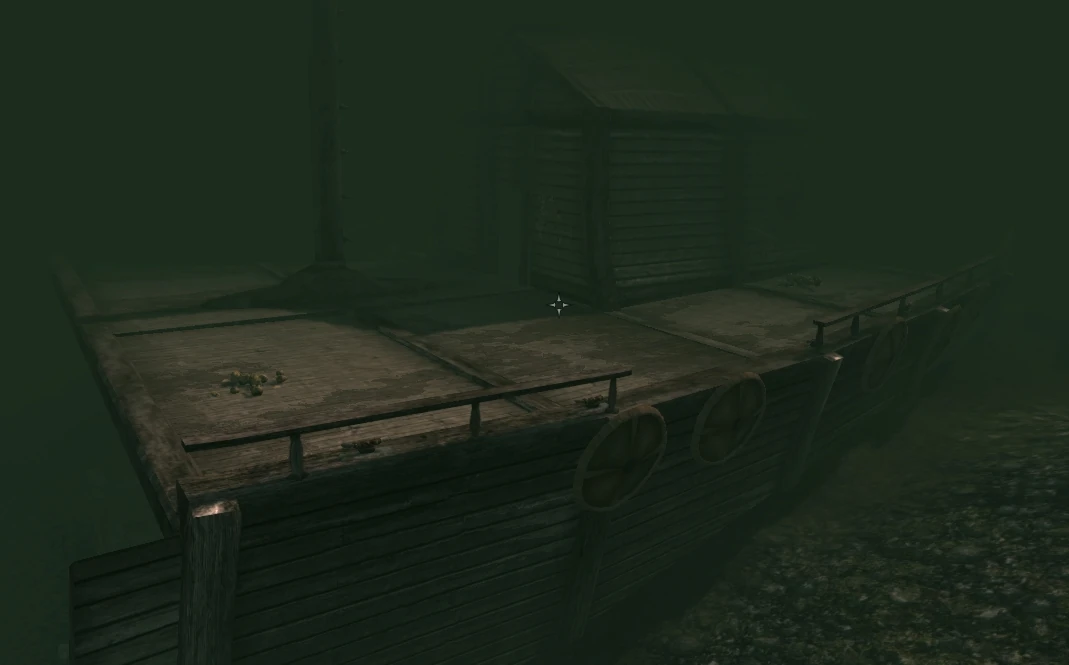
Ilinalta Shipwreck.
- The Silvermoon – An underwater shipwreck in Lake Ilinalta with a leveled weapon, and a chest containing a random amount of gold. Just south of The Lady Stone, the top of a broken ship's mast sticks out of the lake. (Official guide map marker 8.O)

Toppled Towers.
- Toppled Towers: Knifepoint Woods – North of Knifepoint Ridge, two toppled towers are home to a couple of wolves. Inside is an Elk, two blisterwort, and two chests to loot. (Official guide map marker 8.E)
- Two Lost Crates – Above Angi's Camp and to the southeast, two crates with the Sneak skill book Three Thieves. Further south is a gold ore vein.
- White Cap Circle – Just North of Twilight Sepulcher is an unusual circle of white cap mushrooms, just before the Shrine of Akatosh, with a staff and the Archery skill book Father of the Niben inside. One of Kyne's Sacred Trials is located here.
- Wild Animal Den: Orphan's Tear – Not far from the Falkreath Stormcloak Camp is an overhang, acting the home to some wild animals. (Official guide map marker 8.AH)
- Wild Animal Den: Pinewatch Outcropping – Northwest of Pinewatch is a wolf den, a broken cart, and a chest. (Official guide map marker 8.U)
- Dead Woodcutter – Immediately west of Lakeview Manor,HF just below the rocky outcrop, is a dead Woodcutter and his unique axe The Woodsman's Friend.
Haafingar

Clam Digger's Camp.
- Clam Digger's Camp – West of Northwatch Keep, a small camp with a clam farm and a cooking spit. (Official guide map marker 1.A)
- Couldn't Be Bothered Cave – At the very end of the western road in the Haafingar mountains, very, very far to the west of Pinefrost Tower and Rimerock Burrow, north of Mor Khazgur. It looks like a normal cave entrance, except for the fact that it is blocked off. It is unknown whether it is a cancelled cave, or simply intentional.
- Fool's Gold Island – A mudcrab-inhabited island west of Broken Oar Grotto, with a lone flag planted at its top and a skeleton embracing it. Two gold ore veins lie at the base of the small hill, on opposite sides.
- Forsworn Ambush Camp – Two Forsworn have set up three Bear Traps in the gully just south of Volskygge, and have already lured a Nord to his death. They attack the Dragonborn on sight. In their tent, at the eastern end of the gully, a chest can be found. (Official guide map marker 1.B)
- Haafingar Nordic Burial Ruins – On the road that climbs up to the Thalmor Embassy, a small trail to the right leads to a Nordic ruin with burial urns and a leveled weapon. (Official guide map marker 1.G)
- Haafingar Sabre Cat Lair – East of the Thalmor Embassy, a rocky outcropping with two Sabre Cats and a dead Argonian carrying the pickpocket skill book Guide To Better Thieving. (Official guide map marker 1.E)
- Howling Wolf's Folly – On the road from Lost Echo Cave toward Steepfall Burrow. A leveled animal resides here and leaps down from the small promontory to attack. One of its kills (a soldier) has a lockpicking skill book Proper Lock Design on its corpse. (Official guide map marker 1.C)
- Pincushion Peter – A skeleton east of the Thalmor Embassy with a light armor skill book and a Staff of Fireballs. There is a knapsack as well. (Official guide map marker 1.F)
- Pinemoon Bear Lair – South of Pinemoon Cave, a large rocky outcropping is home to a bear along with some dead prey. (Official guide map marker 1.D)
- Reeking Cave – Northwest of the Thalmor Embassy (to which it is connected by a trapdoor), this small cave is inhabited by a frost troll. It contains an illusion skill book.
- Solitude Military Camp – This camp is used for the final assault on Solitude. (Official guide map marker 1.H)
Hjaalmarch
- Adventurer's Campsite – Near Chillwind Depths is an abandoned campsite with minor loot. The Adventurer's Journal records their intentions. (Official map marker 2.E)
- Ambushed Caravan – Next to a merchant's wagon are the bodies of a man, a woman, and their horse, all slain by Falmer. A skill book can be found in their knapsack. A Merchant's Journal is on the deceased woman. (Official guide map marker 2.D)

Black Arts Burial Ground
- Black Arts Burial Ground – A burial mound southeast of Morthal with the Illusion skill book The Black Arts On Trial. (Official guide map marker 2.O)
- Collapsed Burial Ground (Pinned Draugr) – Southeast of the Abandoned Shack and west of Ustengrav are the crumbled remains of a Nordic tomb. A burial urn and a locked chest can be found among the stones as well as the body of a Draugr who carries the Sneak skill book Sacred Witness. (Official guide map marker 2.N)
- Dead Mammoth – Southwest of Morthal and near Dead Men's Respite, by the side of a dirt path by the river, a Bear has just brought down a Mammoth. (Official guide map marker 2.L)
- Dragon Mound: Karth River Forest- Opens during "Diplomatic Immunity." (Official guide map marker 2.C)
- Dragon Mound: Labyrinthian Peaks – Opens during "Elder Knowledge," moonstone ore deposit nearby. (Official guide map marker 2.P)
- Dragon Mound: Robber's Gorge Bluffs – Opens during "Diplomatic Immunity." (Official guide map marker 2.G)
- Draugr Burial Mound – Northwest of Morthal, near the Apprentice Stone, is a half-flooded Nordic barrow with a locked chest (Novice), a potion, and a Lockpicking skill book The Locked Room. There are no Draugr to be found but the barrow is inhabited by a large number of Mudcrabs. (Official guide map marker 2.J)
- Ghost Barrow – A ancient Nord mausoleum with an adept locked trapdoor guarding a grave with a few weapons. Northeast of Kjenstag Ruins. To access the grave, the Kjenstag Ruins mini-quest must be completed. (Official guide map marker 2.Q)
- Hamvir's Summit Hunter's Camp – (Official guide map marker 2.S)
- Karth River Henge – A random Mage has set up his lab on the other side of the river east of Dragon Bridge, with an Alchemy skill book Mannimarco, King of Worms and a dead woman. (Official guide map marker 2.A)
- Riverside Bandit Camp – A small bandits camp east of Dragon Bridge, a short way from the Karth River Henge. Next to a locked chest lies the Block skill book Warrior. (Official guide map marker 2.B)
- Sabre Cat Rock – An ambush site for two sabre cats, contains minor loot. (Official guide map marker 2.F)
- Shrine of Kynareth: Robber's Gorge Bluffs – (Official guide map marker 2.M)
- Single Hunter Camp – Up the path towards North Cold Rock Pass is a small hunter camp with the Archery skill book The Gold Ribbon of Merit.
- Smuggler's Alcove – East of East Empire Company Warehouse and north of the Apprentice Stone is an abandoned campsite with the Pickpocket skill book Purloined Shadows. (Official guide map marker 2.I)
- Summoning Stones – A mysterious ruin frequented by Falion of Morthal. It can be used to cure Vampirism. (Official guide map marker 2.K)
- Swamp Pond Massacre – A camp north of the Apprentice Stone, within sight of Solitude. The Exodus, Restoration skill book, can be found in one of the lean-tos. The mauled remains of the two campers are near the fire pit. (Official guide map marker 2.H)
- The Conjurer's Caravan – Two bandits have ambushed a caravan and slaughtered the magician, and are dividing the spoils. They are immediately hostile towards the Dragonborn. The caravan contains the following: Skill Book (Speech) A Dance in Fire, Book VI, two Apothecary's Satchels, and minor loot. (Official guide map marker 2.R)
The Pale
- A Bloody Trail – North from Volunruud a blood trail can be found; at one end is a dead male Bosmer, at the other is a dead female Bosmer with Treasure Map VI on her. (Official guide map marker 3.I)
- Bandit Camp (Dawnstar) – A small camp home to three bandits lies to the west of Dawnstar and to the north of Mzinchaleft. The camp contains an unlocked chest and the Destruction skill book A Hypothetical Treachery. (Official guide map marker 3.F)
- Bandit's Hovel – A destroyed hunting shack now occupied by bandits and a chest. (Official guide map marker 3.C)
- Barnacle Boat – On the beach west of Dawnstar lies a small overturned boat containing a Scimitar, a knapsack and the Alteration skill book, Daughter of the Niben. (Official guide map marker 3E)
- Dawnstar Frost Troll Den – West of Dawnstar, a rocky outcropping is home to a frost troll. At the back of the cave is the Block skill book Death Blow of Abernanit and an unlocked chest. (Official guide map marker 3.G)
- Dragon Mound: Sea Shore Foothills – Opens during "Elder Knowledge." (Official guide map marker 3.D)
- Dragon Mound Yorgrim Resurrection – Alduin will resurrect the blood dragon Viinturuth, during "Elder Knowledge." There's also a chest here. (Official guide map marker 3Q)
- Horker Standing Stones – Just north of High Gate Ruins on a small tidal island is the remains of a Nordic ruin now home to horkers. (Official guide map marker 3.A)
- Ice Shard Wild Animal Den – South of Fort Dunstad, some wolves have killed a mammoth. (Official guide map marker 3.L)
- Julianos' Fallen – North of Shearpoint overlooking the Lake Yorgrim basin below is a half buried skeleton with a Shrine of Julianos in its arms. (Official guide map marker 3.N)
Lover's Tent
- Lover's Tent – East of Dawnstar Sanctuary is a tent with many wild flowers and an Amulet of Mara inside. (Official guide map marker 3H)
- Mammoth Graveyard- West of Loreius Farm is a pit with mammoth skeletons, a fresh dead mammoth, and the only two known poachers in the game. One of "Kyne's Sacred Trials" takes place here. (Official guide map marker 3.K)
- Dragon Mound: Shimmermist Hills – Opens during "Elder Knowledge." (Official guide map marker 3.M)
- Shrine of Mara: Pale Border – Marking the border between Hjaalmarch, The Pale, and Whiterun holds is a Shrine of Mara. To find it head northwest from Volunruud. (Official guide map marker 3.J)
- Sunken Treasures – North west of the Wreck of the Brinehammer in the Sea of Ghosts lies a sunken chest with leveled loot. (Official guide map marker 3.B)
- Tower of Mzark Camp – A camp outside of the elevator exit from Tower of Mzark. Tower of Mzark only appears on the map after it is exited.
- Waterfall Campsite – Just west of Anga's Mill is a lone tent and campfire near a pond and waterfall. A skeleton, a barrel and a locked strongbox are hidden behind the waterfall.
- Wayward Peak Summit – Above Forsaken Cave high on a mountain summit is a flag, some minor loot, and an excellent view of the Yorgrim Basin. (Official guide map marker 3.P)
- Yorgrim Forest Spider Trap – Northeast of Tumble Arch Pass find a small pile of Dwemer masonry with a chest. When the Dragonborn approaches the chest, frostbite spiders will ambush them from up high in the trees. (Official guide map marker 3.O)
The Reach
- A Bandit's Book – (Official guide map marker 5.E)
- An Abandoned Rowboat – A broken boat on the shores of the river Southwest of Sky Haven Temple. It contains a strongbox, an apothecary's satchel, and scattered flawless gems, including, a flawless ruby used for the quest, "The Only Cure." In the water next to it are a few mead barrels and a chest.
- Brush Strongbox: Riverside – A strongbox can be found in dead branches on the south-east shore of the Karth River, halfway between Four Skull Lookout and Sundered Towers. See Karthwasten Trivia and Bugs sections for more details. (Official guide map marker 5.Q)
- Dead Lovers Camp – Between Old Hroldan and Soljund's Sinkhole is a small camp with Talvur and Karan slain by an animal. Karan's journal tells the tale of their plan to elope. (Official guide map marker 5.V)
- Dragon Mound: Karthspire Bluffs – Opens during "Alduin's Wall" (Official guide map marker 5.T)
- Dragon Mound: Reachwater Pass – Opens during "Elder Knowledge." (Official guide map marker 5.B)
- Dwarven Arch: Harmugstal Falls – By a waterfall just north of Harmugstahl is a small dwarven arch with the Restoration skill book Withershins. (Official guide map marker 5.C)
- Dwarven Rubble: Salvius Farm Trail (Official guide map marker 5.O)
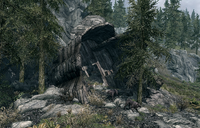
Lair of the Wispmother
- Druadach Dwemer Pavilion – West of the Shrine to Peryite, near the mountain summit, is a Dwemer four-sided arch guarded by a wispmother. (Official guide map marker 5.J)
- Dwemer Ruins: Druadach – East of Deep Folk Crossing is a small Dwemer Ruin with a lone standing pillar, an altar with two dwarven arrows and a Dwemer Convector. (Official guide map marker 5.A)
- Dwemer Ruins: Karth River Confluence – (Official guide map marker 5.F)
- Forsworn Camp: Bthardamz Outskirts – Southwest of Bthardzam is a small forsworn camp with two dead Forsworns apparently killed by a nearby frost troll. Notable items include the Destruction skill book The Art of War Magic and a number of pelts and a chest. There is a silver ore vein nearby and a quicksilver vein further up the mountain. (Official guide map marker 5.G)
- Forsworn Camp: Gloomreach – Exactly east of Dushnikh Yal and Southwest of Rorikstead, on a small path that climbs up towards Valthume is a small Forsworn camp with two forsworn. An Apothecary's Satchel lies on one of the hay beds. (Official guide map marker 5.Y)
- Forsworn Camp: Reachwater River – West of Reachcliff Cave is a forsworn camp under attack by two soldiers, with a treasure chest, satchel, and Blocking skill book. (Official guide map marker 5.S)
- Hagraven Nest – West of Ragnvald, a small path leads to a Hagraven camp. (Official guide map marker 5.N)
- The Incautious Bather – A female swimmer, oddly named "Captive," has been killed by the Forsworn. Her clothes and a high value necklace is nearby. Her journal explains the scene. Northwest of Shrine to Peryite. (Official guide map marker 5.D)
Juniper Shrine
- Juniper Shrine – Northwest of Valthume, further up the path from the small Forsworn camp above, is a small Dwemer ruin with a planted Juniper tree. Behind the tree is an unlocked Dwemer chest and the skill book Enchanter's Primer. (Official guide map marker 5.AA)
- Lost Treasure: Purewater Run – (Official guide map marker 5.R)
- Dragon Mound: Ragnvald Vale – Opens during Elder Knowledge (Official guide map marker 5.I)
- Reachman's Altar: Red Eagle Redoubt – (Official guide map marker 5.U)
- Reachwind Burial Mound – (Official guide map marker 5.X)
- River Rapids Treasure Chest – West of Old Hroldan lies a chest on a small island with the Illusion Skill Book: 2920, vol 02 - Sun's Dawn. (Official guide map marker 5.W)
- Sabre Cat Ravine – A dead sabre cat with a skeleton. Also an enchanted hunting bow, a leveled battleaxe, some steel arrows and a knapsack containing random items are found here. South of Shrine to Peryite, in a cliff. (Official guide map marker 5.K)
- Shrine of Dibella: Old Hroldan – (Official guide map marker 5.Z)
- Shrine of Zenithar: Four Skull Lookout – (Official guide map marker 5.P)
- The Bloodied Bandit – (Official guide map marker 5.H)
- The Exposed Miner – (Official guide map marker 5.M)
- Totem to Peryite – Between the Shrine to Peryite and Karthwasten is an alcove at the base of the cliff with a chest, two corpses and some poisons. This is a smaller shrine to Peryite. The chest contains the Illusion skill book Incident in Necrom. (Official guide map marker 5.L)
- Trollsbane's Demise – Between Valthume and Cradle Stone Tower is a troll den where the body of Frofnir Trollsbane is found. The den is home to two trolls fighting one another. Frofnir carries the unique warhammer Trollsbane. (Official guide map marker 5.AB)
The Rift
- Altar in the Woods – Directly north of Autumnshade Clearing is a small Dwemer Ruin that a mage is using as an alter. Also find the Restoration skill book Racial Phylogeny. (Official guide map marker 9.L)
- Bandit's Shack: Autumnshade – North of Heartwood Mill is an abandoned wooden house taken over by two bandits and their dog. The Block skill book Battle of Red Mountain is on the table. (Official guide map marker 9.J) With the Dawnguard add-on installed, this location becomes marked as Redwater Den.
- Border Crossings
- Darkwater Stash – To the southwest of Darkwater Pass, to the left when climbing up the path towards Ivarstead and near a corundum ore vein, are some barrels and an empty sack next to the Pickpocket skill book Aevar Stone-Singer. This is located just north of the water slide chest described above.
- Dead Khajiit Merchant – Down the road from Tumbledown Tower is a bridge over a stream. Under the waterfall feeding the stream is a dead Khajiit merchant, a coin purse and some coins. Above the waterfall is Broken Helm Hollow. It's likely he was killed by the bandits there and thrown down or fell trying to escape.
- Dead Redguard – Northeast of Angarvunde, a dead Redguard man lies over a tree stump, with the Lockpicking skill book Advances in Lockpicking underneath him.
- Dragon Mound: Autumnshade Woods – Opens during "Bleak Falls Barrow." (Official guide map marker 9.M)
- Dragon Mound: Autumnwatch Woods – Opens during "Diplomatic Immunity." (Official guide map marker 9.F)
- Dragon Mound: Lost Tongue Pass – Opens during "Diplomatic Immunity." (Official guide map marker 9.Q)

Flagged Troll Lair.
- Frost Troll Den: Jerall Mountain Ridge – East of Stendarr's Beacon in the most southeastern part of Skyrim, a blood trail leads to a frost troll lair. A lone flag raised on the rocky ledge marks the location of a leveled helmet, a locked strongbox and a Block skill book A Dance in Fire, Book II (book may be under the dead wolf). (Official guide map marker 9.Y)
- Forest Stash – Below and directly southwest of the Last Vigil,DR a set of armor and the Heavy Armor skill book Hallgerd's Tale lie behind a fallen tree.
- Hunter's Camp: Autumnshade Hills – Directly south of Autumnshade Clearing is a small camp with two trading hunters. The Archery skill book The Gold Ribbon of Merit is in one of the tents. This is probably the camp of the two slain hunters at Autumnshade Clearing. (Official guide map marker 9.N)
- Medresi's Camp: Angarvunde – Mercenary camp belonging to Medresi Dran, you can find her in the nearby dungeon Angarvunde. Read Medresi's Notes and pick up the Speech skill book A Dance in Fire, Book VI. (Official guide map marker 9.H)
- Miner's Camp: Velothi Mountains – East of Fort Greenwall up in the mountains, a frost troll guards the skeletons of two miners. Slightly down the slope, some other skeletal remains are found next to a pair of monk boots and the Destruction skill book The Art of War Magic. After the Dragonborn DLC, this is the location of the Last Vigil (now marked on the map). (Official guide map marker 9.T)
- Northwind Chest – South of Northwind Summit, on a ledge on the way down the mountain, there are two skeletons and a novice locked chest with some loot. (Official guide map marker 9.K)
- Shrine of Zenithar (Riften) – Just a short distance northeast from the Three Sentinels is the ruins of a small tower with a shrine, a skeleton, minor loot, and a leveled hostile animal. (Official guide map marker 9.V)
- Shrine of Talos: Froki's Peak – South of Froki's Shack is a shrine with minor loot, including the Two-Handed skill book King. (Official guide map marker 9.G)

The Burning Farmhouse.
- The Burning Farmhouse – Found east of Lost Tongue Overlook and directly south of Broken Helm Hollow surrounded by mountains. Inside the house is an unlocked chest as well as a Scroll of Conjure Flame Atronach, which is likely why the house is burning. The Destruction skill book Horror of Castle Xyr is hidden under a hollow fallen tree. (Official guide map marker 9.X)
- The Poultry Reanimator: Lake Geir – South of Lake Geir, a novice necromancer practices his art on dead chickens. (Official guide map marker 9.C)
- The Three Sentinels – Three guard towers on the road north of Riften. Each tower has a chest with "confiscated goods," but it is not counted as stealing to take the loot or anything else from these towers. (Official guide map marker 9.U)
- Trapper's Dilemma – In the forest east of Fort Greenwall is a rusty cage containing a wolf. If one frees the wolf, two trappers will appear from behind a rock and will attack. If the wolf survives, he'll remain around the cage. (Official guide map marker 9.S)
- Treasure Hunter's Camp – East of Lake Geir, small camp with a smoking camp fire. There's a note with directions to the treasure at Treasure Hunter's Island. (Official guide map marker 9.D)
- Treasure Hunter's Island – South of Nilheim on Lake Geir is a treasure chest on an island along with two treasure hunters. (Official guide map marker 9.E)
- Troll Den Rkund – West of the Ruins of Rkund is a Nordic barrow built into the mountain. There's no way to enter the barrow, but there is a chest and a troll to loot. (Official guide map marker 9.O) A short walk to the east of the Troll Den find the Lockpicking skill book Proper Lock Design next to a fallen birch tree.
- Trolled Stormcloaks: Darkwater Overhang – Heading north down the path from Ivarstead is a rocky outcrop inhabited by a troll. The cave contains the bodies of two Stormcloaks as well as an Orichalcum ore vein. One body carries a note as well as the Heavy Armor skill book Chimarvamidium. (Official guide map marker 9.A)
- Tumbledown Tower: Riften Outskirts – Southeast of Riften, along the main road, a single ruined tower hides two bandits waiting for an ambush. One of the bandits has the two handed skill book King. There's also a chest. (Official guide map marker 9.W)
- Two Pine Ridge – Exactly east of Stendarr's Beacon, just downhill from Flagged Troll Lair, (see above), is a single bed roll under a tree, next to a pickaxe and 2 books, including the Sneak skill book 2920, vol 08 - Last Seed. (Official guide map marker 9.Z)
- Water Slide Chest – North of Nilheim, down a very long water chute, is a lone chest in a narrow canyon before another large waterfall.
- Wild Animal Den: Crystaldrift Cave – Just around the corner from Crystaldrift Cave's entrance is an animal den. There's no treasure chest here. (Official guide map marker 9.P)
- Wild Animal Den: Mistwatch – South of Mistwatch and northeast of Clearspring Tarn is a simple animal den with little to loot. (Official guide map marker 9.I)
- Wild Animal Den: Shor's Stone – Southeast of Shor's Watchtower is a den with a dead bandit. (Official guide map marker 9.R)
- Wood Cutter's Camp: Lake Geir – South of Lake Geir close to the road to Ivarstead, woodcutter slain in his camp. (Official guide map marker 9.B)
Whiterun Hold
- Bloodied Box: East of Sleeping Tree Camp look for blood on the ground and a strong box. (Official guide map marker 6.N)
- Dragon Mound: Great Henge Resurrection – During "Diplomatic Immunity," Alduin will resurrect the dragon Vuljotnaak. (Official guide map marker 6.K)
- Dragon Mound: Lone Mountain – Opens during "Alduin's Wall." (Official guide map marker 6.O)
- Fallen Tree Bridge – South of Hillgrund's Tomb is a massive fallen tree crossing the gorge with the river rapids below. Beyond the rapids is a body washed up on shore. On the northwest side is a chest and the Illusion skill book The Black Arts on Trial. (Official guide map marker 6.V)
- Fetid Pond – Southwest of Swindler's Den is a pond in a depression with a dead bandit. He has the skill book Beggar on him. (Official guide map marker 6.F)
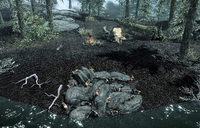
- Fossilized Giant Mudcrab – West of Broken Fang Cave. The carcass of a giant fossilized mudcrab can be found here. (Official guide map marker 6.H)
- Hunters Camp: White River Hills – (official guide map marker 6.U)
- Hunter Hunted – In the mountains close to Drelas' Cottage, find a dead hunter and the beast that bested him. (Official guide map marker 6.D)
- Lady of the Lake – West of Whiterun northwest of Bleakwind Basin is a small spring with a hand sticking out, holding a leveled sword. (Official guide map marker 6.Q)
- Necromancer's Bluff – Just west of Fort Greymoor and north east of the Puzzling Pillar Ruins is an altar with a dead necromancer killed by the three skeletons he raised. On the altar next to the corpse lie several alchemy ingredients and the conjuration skill book Liminal Bridges. A mammoth and several mudcrabs may be found just to the west and three graves can be found Northeast. (Official guide map marker 6.M)
- Rorikstead Resurrection – During "Alduin's Wall," Alduin will resurrect the dragon Nahagliiv. (Official guide map marker 6.B)

Wispmother Pass
- Ruined Toll and Wispmother's Well – Southwest of Fort Amol at a pass on the path that travels southwards towards Ivarstead find the remains of an old Imperial toll building, but watch out for the wispmother in the well. The skill book The Warrior's Charge sits on top of a basket and a hidden locked strongbox. (Official guide map marker 6.W)
- Puzzling Pillar Ruins – a caved in ruin southeast of Sleeping Tree Camp. A Nordic animal puzzle must be solved in order to remove the grate covering a chest. (Official guide map marker 6.L)
- Shrine of Akatosh Rorikstead – North of Rorikstead overlooking the town. (Official guide map marker 6.A)
- Shrine of Zenithar Crumbling Bastion – North of Broken Fang Cave is a ruined fort with a shrine, a chest, the speech skill book 2920, vol 05 – Second Seed and other minor loot. (Official guide map marker 6.G)
- Shrine of Zenithar Ring of Boulders – West of Swindler's Den in a ring of boulders. (Official guide map marker 6.E)
- Shrine of Talos: White River Valley – On a bluff north of the White River is an overhang with a shrine. Jarl Elisif will ask the Dragonborn to do her a favor here, but look out for Thalmor. (Official guide map marker 6.T)
- Smuggler's Den – Several bandits have setup camp northwest of Dragonsreach, just outside the city walls under a small cliff. On a table is the pickpocket skill book Aevar Stone-Singer. (Official guide map marker 6.R)
- Swallowed Skeleton – North of Sleeping Tree Camp lies a mammoth skeleton with a human skeleton inside its belly. (Official guide map marker 6.J)
- The Expired Alchemist – The body of a dead alchemist is on the rocks in the center of a pond with a waterfall, down stream from Talking Stone Camp. (Official guide map marker 6.C)
- The Seven Thousand Steps – The path to High Hrothgar from Ivarstead; read all ten wayshrines to receive the blessing Voice of the Sky. (Official guide map marker 6.X)
- The Skeleton's Strong Box: Greymoor – Northwest of Fort Greymoor is a skeleton still clutching his strong box. (Official guide map marker 6.P)
- The Two Pillars – Southeast of Swindler's Den is a shrine with the Enchanting skill book Twin Secrets and a strong box. (Official guide map marker 6.I)
- Whiterun Military Camp – (Official guide map marker 6.S)
- Whiterun Dead Guard – Outside Whiterun at the base of Dragonsreach, a dead Whiterun or Stormcloak guard will be found with blood on him. It will only be there if "The Fallen" is completed.
Winterhold Hold
- Altar of Xrib – Located southwest of Winterhold. It's an ancient sacrificial altar, surrounded by piles of bones. Among the bones is the Conjuration skill book The Doors of Oblivion, and some offerings. (Official guide map marker 4.L)
- Deadman's Camp – Find a Strong Box and an unfortunate camper northwest of Journeyman's Nook. (Official guide map marker 4.P)
- Dead Man's Treasure – On the very large island northeast of the wreck of the Winter War is a raised flag with a skeleton, a pile of gold ingots, and a pickpocket skill book.
- Fisherman's Camp: Slaughterfish Bay – Located north-west of wreck of the Winter War, this is a small abandoned camp where two fishermen, Skeggr and Advard, came to a tragic end. Read the Fisherman's Journal to get the story. (Official guide map marker 4.U)
- Friends Forever – Southeast of the shore under the bridge of The College of Winterhold and east of the town, in a crevice pass are two skeletons. One is caught in a bear trap and the other is crouched over giving aid. There is an Apothecary Satchel nearby. (Official guide map marker 4.N)
- Frozen Mammoth – An ancient mammoth partially encased in a glacier. (Official guide map marker 4.G)
- Haul of the Horkers – Just northeast of Journeyman's Nook, on the way down to the waterfront, in the crevice of the rock/ice, two horkers guard a locked chest with random loot. A restoration skill book lies beside it. 2920, vol 04 – Rain's Hand. There is a silver ore vein at the exact spot. (Official guide map marker 4.Q)
- Horker Hunter's Camp – The camp of two horker hunters ripe for looting. You may also take their horse and the Light-armor skill book Rislav the Righteous. (Official guide map marker 4.R)
- Horker Hunter's Last Stand – The horker hunters from the camp fail to take on too many horkers at once, but you can loot Treasure Map VIII off one of them. (Official guide map marker 4.S)
- Hunter's Overlook: Fellhammer Wastes – Northwest of Fort Fellhammer are two hunters on an exposed overlook above the Shrine of Dibella. (Official guide map marker 4.B)
- The Iceberg Explorer – On the island north of The Tower Stone, a raised flag marks the location of an unlocked chest. A skeleton lies next to the Heavy Armor skill book The Knights of the Nine. (Official guide map marker 4.E)
- Ill-Gotten Gains: Sea Shore of Ghosts – East of Snow Veil Sanctum in a glacier crevasse is a small smuggler's stash with a chest and a hostile animal. (Official guide map marker 4.T)
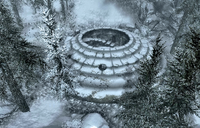
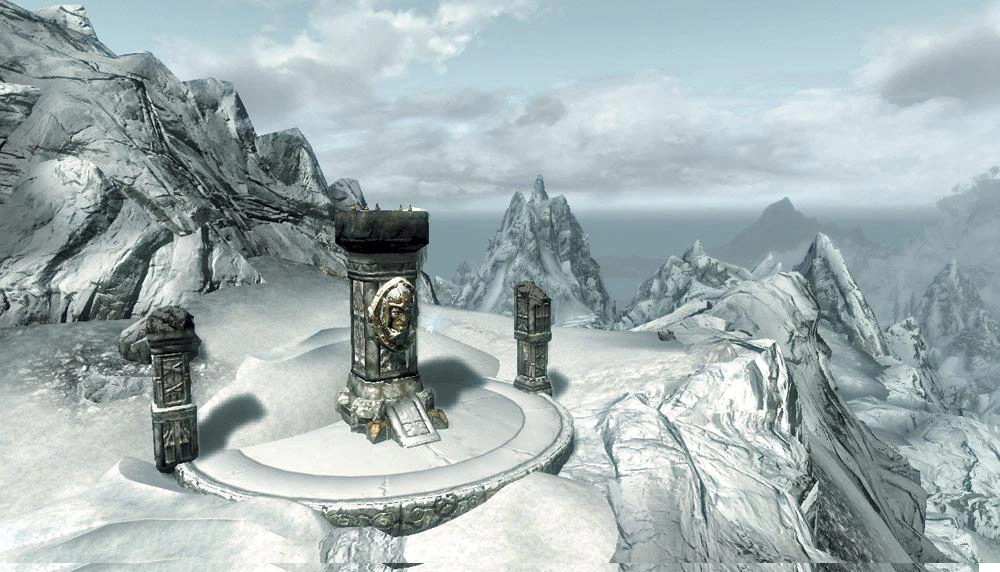
Mount Anthor Summit.
- Mount Anthor Summit – Located west of Mount Anthor. Access via the exit from Ironbind Hallows. Two chests and a Quicksilver ore vein are next to a mysterious Dwemer monument. On top of the tallest pillar is an assortment of potions. These can be accessed by using Whirlwind Sprint from the nearby hillside. Beware the ice wraiths. (Official guide map marker 4.I)
- Rundi's Altar – Southeast of the College of Winterhold, and continuing up the pass from The Friends, one will find Rundi one of the missing College of Winterhold students. He has a named dagger on the altar and the alchemy skill book Mannimarco, King of Worms. Frost Rune traps are present (Official guide map marker 4.O)
- Shrine of Arkay: Windhelm Hills – Directly south of Snow Veil Sanctum is an altar with a Shrine of Arkay and some offerings, but beware the Wispmother. (Official guide map marker 4.W)
- Shrine of Dibella: Watching Dawnstar – This shrine is on a large raised platform that marks the border of the hold with The Pale. On the altar is the Illusion skill book Incident at Necrom. Official guide map marker 4.A)
- Shrine of Talos: Ilas-Tei's Last Stand – North of Ysgramor's Tomb, Ilas-Tei – one of the missing College of Winterhold students – had a disaster involving his calm spell and some skeevers. Next to the skeever cage is an Apothecary's Satchel, a Scroll of Calm and the alteration skill book Breathing Water. He has a named necklace and a good amount of ingredients on his body. (Official guide map marker 4.K)
- Shrine of Talos: Sea of Ghosts – East of the Pilgrim's Trench and next to Trius' Camp. Follow the path to the shrine from the back of Talos. There's a One-handed skill book The Importance of Where, and other leveled loot. (Official guide map marker 4.J)
- Shrine of Talos Winterhold Glaciers – East from Hob's Fall Cave along the shore, Two-handed skill book Words and Philosophy and minor loot. (Official guide map marker 4.F)
- The Dead Refugees – Avalanche Pass – West of Whistling Mine along the road towards Mount Anthor, three refugees lie dead next to their snowed-in cart. The cart contains an Apothecary's Satchel and the enchanting skill book Enchanter's Primer. (Official guide map marker 4.V)
- Trius' Camp – A small camp next to Pilgrim's Trench, there is a skeleton (assumed to be Trius) and a note.
- Velehk Sain's Treasure – A peninsula is just southwest of Ysgramor's Tomb. (Official guide map marker 4.J)
- Wispmother's Crevasse – In an iceberg crevasse north of Journeyman's Nook is the lair of a wispmother and her wisps.
- Wet Bones – On top of a glacier west of Saarthal is a half buried skeleton next to a Dwemer chest. (Official guide map marker 4.H)
- Wolf Den: Fellhammer Wastes – Northwest of Fort Fellhammer is a wolf den in a rocky alcove with a dead bandit. (Official guide map marker 4.C)
- Yisra's Beachside Combustion – Yisra's failed Flame Cloak spell experiment on the beach across from Yngvild. She is one of the missing College of Winterhold students. Find the spell tome beside her and a named necklace on her burned body north east of Winterhold Imperial Camp. (Official guide map marker 4.D)
Solstheim DR
The following are unmarked locations found only in the The Elder Scrolls V: Dragonborn expansion:
Solstheim: Northern Mountains
- Spiky Grass Island – South of the Earth Stone lies an island with crumbling ruins. Atop are dead Reavers, spiky grass plants, Ash Hoppers, and one Heart Stone deposit. (Official guide map marker S.NA)
- The Ever-Abandoned Ship – (Official guide map marker S.NB)
- Waterfall and Grazing Netch – (Official guide map marker S.NC)
- Mudcrab Tidal Pools – (Official guide map marker S.ND)
- Riekling Chest – (Official guide map marker S.NE)
- The Fisherman's Haul – North of Bloodskal Barrow, inhabited by a Bristleback. (Official guide map marker S.NF)
- Riekling Barrel Hoard – North of Damphall Mine lies a wooden platform with many barrels, crates, and a chest. When approached, Rieklings will pop out of the barrels in an ambush. (Official guide map marker S.NG)
- Horker Iceberg – Northeast of Northshore Landing is an iceberg island with several horkers and stalhrim deposits. (Official guide map marker S.NH)
- White Ridge Barrow Hut – (Official guide map marker S.NI)
- Forgotten Spoils – (Official guide map marker S.NJ)
- Desolate Hunter's Camp – (Official guide map marker S.NK)
- Shrine of Zenithar – Near Moesring Pass. A Shrine of Zenithar accompanied by various geodes. (Official guide map marker S.NL)
- Dragon Mound: Frozen Shoals – North of Frossel and Haknir's Shoal is a triangle of islands, and northwest of them is a dragon mound. (Official guide map marker S.NM)
- Giant Nirnroot Island – A small rocky isle with six giant Nirnroot plants. (Official guide map marker S.NN)
- Riekling Outpost Island – A small rocky isle containing a medium-sized Riekling camp and several Rieklings. (Official guide map marker S.NO)
- Lurker Ambush (Tidal Pool) – Due west and north-west of Haknir's Shoal is a tiny bay that a Lurker will appear in when approached. (Official guide map marker S.NP)
- Temple of Miraak: Secret Exit – (Official guide map marker S.NQ)
- Fahlbtharz Grand Hall – It is an location only seen on the Local Map and is the exit lift out of Fahlbtharz. It is south of Fahlbtharz and north of the Abandoned Lodge. It is directly west of the Altar of Thrond.
Solstheim: Southern Ash Lands
- Ash Hopper Ambush – South-East of Old Attius Farm, and west of Hrodulf's House. A chest and two skeletons, approaching them causes two ash hoppers to appear from the ash.
- Driftwood Isle – (Official guide map marker S.SA)
- Isle of Basalt – (Official guide map marker S.SB)
- Reavers' Folly – (Official guide map marker S.SC)
- Bloodskal Copse – (Official guide map marker S.SD)
- Wilderness Shrine of Kynareth – A Shrine of Kynareth north of the Earth Stone and near Bloodskal Barrow. (Official guide map marker S.SE)
- Coldcinder Cave (Exit) – (Official guide map marker S.SF)
- The Miner's Lament – (Official guide map marker S.SG)
- Spider Nest (Logs) – (Official guide map marker S.SH)
- Hrodulf's Last Stand – (Official guide map marker S.SI)
- Spider Nest (Kagrumez) – (Official guide map marker S.SJ)
- Dragon Mound: Temple Foothills – A dragon mound located directly west of Vahlok's Tomb, atop some rocks. (Official guide map marker S.SK)
- Gold Miners' Floodgate – The hidden camp of a dead Argonian called Usha. (Official guide map marker S.SL)
- Dunmeri Camp – Directly east of Vahlok's Tomb in the forests. (Official guide map marker S.SM)
- Spriggan Grove – (Official guide map marker S.SN)
- Ashfallow Reaver Camp – Southeast of Ramshackle Trading Post. (Official guide map marker S.SO)
- Lurker Ambush (Ashfallow Dunes) – (Official guide map marker S.SP)
- Impact Crater (Burnt Spriggan) – (Official guide map marker S.SQ)
- Bloodied Grove – (Official guide map marker S.SR)
- Varona's Remains – (Official guide map marker S.SS)
- Dusty the Silt Strider – (Official guide map marker S.ST)
- Impact Crater (Tel Mithryn) – (Official guide map marker S.SU)
- Lurker Ambush (Tel Mithryn Peninsula) – (Official guide map marker S.SV)
- Basalt Causeway – (Official guide map marker S.SW)
- Miner Immolation – A scene of a tragic mining accident, southeast of Tel Mithryn. (Official guide map marker S.SX)